Tutorial to install the Littlest JupyterHub using Nginx as a reverse proxy. This allows us to run different services and serve multiple websites on the same server as the one used by The Littlest JupyterHub.
-
Using a terminal program, SSH into your server. This should give you a prompt where you can type commands.
-
Make sure you have python3, python3-dev, curl and git installed.
sudo apt install python3 python3-dev git curl
-
Copy the text below, and paste it into the terminal. Replace with the name of the first admin user for this JupyterHub. Choose any name you like (don’t forget to remove the brackets!). This admin user can log in after the JupyterHub is set up, and can configure it to their needs. Remember to add your username!
curl -L https://tljh.jupyter.org/bootstrap.py | sudo -E python3 - --admin <admin-user-name>
Example:
curl -L https://tljh.jupyter.org/bootstrap.py | sudo -E python3 - --admin johan -
Press Enter to start the installation process. This will take 5-10 minutes, and will say ‘Done!’ when the installation process is complete.
-
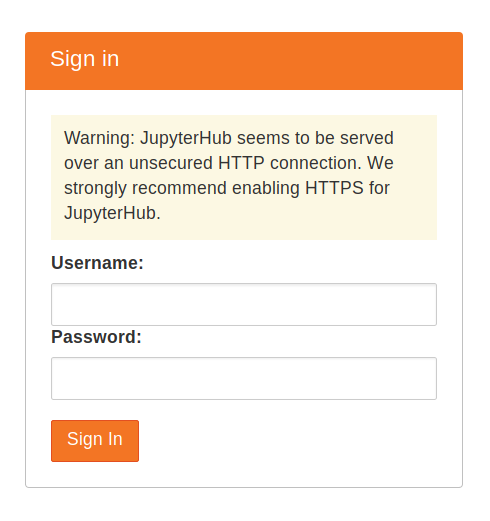
Copy the Public IP of your server, and try accessing http://public-ip from your browser. If everything went well, this should give you a JupyterHub login page.
-
In order to use Nginx as reverse Proxy on ports 80 and 443 (ssl), use another port as Traefix's proxy listening port. Replace <TRAEFIK_LISTENING_PORT> by the port you want to use:
tljh-config set http.port <TRAEFIK_LISTENING_PORT>
Example:
tljh-config set http.port 8000 -
You can now restart Traefik and the hub in order to apply changes:
tljh-config reload proxy
tljh-config reload hub
-
If everything works correctly, you should be able to access the JupyterHub login page there: http://public-ip:<TRAEFIK_LISTENING_PORT>.
In our case:
http://public-ip:8000
- Add a "A record" pointing to the public-ip address of your server.
JUPYTER-DOMAIN. 0 IN A <PUBLIC-IP>
- Wait a few minutes. Try accessing http://JUPYTER-DOMAIN:<TRAEFIK_LISTENING_PORT>. If there is no problem, you should see the JupyterHub login page again.
- Install Nginx.
apt-get install nginx- Make sure the Nginx Service is not running by stopping it.
sudo systemctl stop nginx-
Generate a Let's encrypt SSL certificates for your domain:
-
Download the Let’s Encrypt Client, which is called certbot and the Nginx Certbot plugin.
apt-get update apt-get install certbot apt-get install python-certbot-nginx -
Certbot can automatically configure Nginx for SSL/TLS. It looks for and modifies the server block in your NGINX configuration that contains a server_name directive with the domain name you’re requesting a certificate for. In our example, the domain is JUPYTER-DOMAIN. Therefore, we'll have to modify the Nginx configuration. Go the the "sites-enabled" folder and open the Nginx configuration file.
cd /etc/nginx/sites-enabled nano default -
Remove everything and use the following simple configuration (replace <JUPYTER-DOMAIN> by your domain):
server { listen 80; server_name <JUPYTER-DOMAIN>; return 302 https://$host$request_uri; } -
Run the following command to generate certificates with the Nginx plug‑in:
sudo certbot --nginx -d <JUPYTER-DOMAIN> -
If everything works correctly, certbot should display the following message:
Congratulations! You have successfully enabled https://<JUPYTER-DOMAIN>
-------------------------------------------------------------------------------------
IMPORTANT NOTES:

Congratulations! Your certificate and chain have been saved at:
/etc/letsencrypt/live/<JUPYTER-DOMAIN>/fullchain.pem
Your key file has been saved at:
/etc/letsencrypt/live/<JUPYTER-DOMAIN>//privkey.pem
Your cert will expire on XXX.
-
-
Once the Let's encrypt certificates are generated, it is possible to completely configure Nginx. Make Nginx listen on port 80 and redirect traffic to SSL/HTTPS. The Nginx server that handles SSL communication acts as a reverse proxy and redirect traffic (Web sockets included) to Traefik proxy that listens on port 127.0.0.1:<TRAEFIK_LISTENING_PORT>. Go to /etc/nginx/sites-enabled, open "default" file and replace the old configuration by this one (replace <JUPYTER-DOMAIN>,<TRAEFIK_LISTENING_PORT> and certificate paths by the correct values):
# top-level http config for websocket headers # If Upgrade is defined, Connection = upgrade # If Upgrade is empty, Connection = close map $http_upgrade $connection_upgrade { default upgrade; '' close; } # HTTP server to redirect all 80 traffic to SSL/HTTPS server { listen 80; server_name <JUPYTER-DOMAIN>; # Tell all requests to port 80 to be 302 redirected to HTTPS return 302 https://$host$request_uri; } # HTTPS server to handle JupyterHub server { listen 443 ssl; server_name <JUPYTER-DOMAIN>; ssl_certificate /etc/letsencrypt/live/<JUPYTER-DOMAIN>/fullchain.pem; ssl_certificate_key /etc/letsencrypt/live/<JUPYTER-DOMAIN>/privkey.pem; ssl_protocols TLSv1 TLSv1.1 TLSv1.2; ssl_prefer_server_ciphers on; ssl_ciphers 'ECDHE-RSA-AES128-GCM-SHA256:ECDHE-ECDSA-AES128-GCM-SHA256:ECDHE-RSA-AES256-GCM-SHA384:ECDHE-ECDSA-AES256-GCM-SHA384:DHE-RSA-AES128-GCM- SHA256:DHE-DSS-AES128-GCM-SHA256:kEDH+AESGCM:ECDHE-RSA-AES128-SHA256:ECDHE-ECDSA-AES128-SHA256:ECDHE-RSA-AES128-SHA:ECDHE-ECDSA-AES128-SHA:ECDHE-RSA-AES256-SHA384:ECDHE-ECDSA-AES256-SHA384:ECDHE-RSA-AES256-SHA:ECDHE-ECDSA-AES256-SHA:DHE-RSA-AES128-SHA256:DHE-RSA-AES128-SHA:DHE-DSS-AES128-SHA256:DHE-RSA-AES256-SHA256:DHE-DSS-AES256-SHA:DHE-RSA-AES256-SHA:AES128-GCM-SHA256:AES256-GCM-SHA384:AES128-SHA256:AES256-SHA256:AES128-SHA:AES256-SHA:AES:CAMELLIA:DES-CBC3-SHA:!aNULL:!eNULL:!EXPORT:!DES:!RC4:!MD5:!PSK:!aECDH:!EDH-DSS-DES-CBC3-SHA:!EDH-RSA-DES-CBC3-SHA:!KRB5-DES-CBC3-SHA'; ssl_session_timeout 1d; ssl_session_cache shared:SSL:50m; ssl_stapling on; ssl_stapling_verify on; add_header Strict-Transport-Security max-age=15768000; # Managing literal requests to the JupyterHub front end location / { proxy_pass http://127.0.0.1:<TRAEFIK_LISTENING_PORT>; proxy_set_header X-Real-IP $remote_addr; proxy_set_header Host $host; proxy_set_header X-Forwarded-For $proxy_add_x_forwarded_for; # websocket headers proxy_http_version 1.1; proxy_set_header Upgrade $http_upgrade; proxy_set_header Connection $connection_upgrade; proxy_set_header X-Scheme $scheme; proxy_buffering off; } # Managing requests to verify letsencrypt host location ~ /.well-known { allow all; } } -
Simply restart Nginx with the new configuration.
sudo systemctl start nginx
-
You can now access https://<JUPYTER-DOMAIN> and the communication is secured with SSL.
-
You can now also change the Nginx configuration file by adding new directives to serve other websites on the same server.
Thank you for reading. If you find the tutorial useful, buy me a coffee :)
