The following README will guide you on how to use MicroK8s to run a Kubernetes cluster locally and connect it as an Azure Arc enabled Kubernetes cluster resource.
-
Clone this repo
git clone https://github.com/microsoft/azure_arc.git -
Install or update Azure CLI. Azure CLI should be running version 2.7 or later. Use
az --versionto check your current installed version. -
Create Azure Service Principal (SP)
To connect a Kubernetes cluster to Azure Arc, Azure Service Principal assigned with the "Contributor" role is required. To create it, login to your Azure account run the below command (this can also be done in Azure Cloud Shell).
az login
az ad sp create-for-rbac -n "<Unique SP Name>" --role contributor
For example:
az ad sp create-for-rbac -n "http://AzureArcK8s" --role contributorOutput should look like this:
{ "appId": "XXXXXXXXXXXXXXXXXXXXXXXXXXXX", "displayName": "AzureArcK8s", "name": "http://AzureArcK8s", "password": "XXXXXXXXXXXXXXXXXXXXXXXXXXXX", "tenant": "XXXXXXXXXXXXXXXXXXXXXXXXXXXX" }Note: It is optional but highly recommended to scope the SP to a specific Azure subscription and Resource Group
-
Enable subscription for two providers for Azure Arc enabled Kubernetes
Registration is an asynchronous process, and registration may take approximately 10 minutes.az provider register --namespace Microsoft.Kubernetes Registering is still on-going. You can monitor using 'az provider show -n Microsoft.Kubernetes' az provider register --namespace Microsoft.KubernetesConfiguration Registering is still on-going. You can monitor using 'az provider show -n Microsoft.KubernetesConfiguration'
You can monitor the registration process with the following commands:
az provider show -n Microsoft.Kubernetes -o table

az provider show -n Microsoft.KubernetesConfiguration -o table
-
Install the Azure Arc for Kubernetes CLI extensions connectedk8s and k8sconfiguration:
az extension add --name connectedk8s
az extension add --name k8sconfiguration
Note: If you already used this guide before and/or have the extensions installed, use the az extension update --name connectedk8s and the az extension update --name k8sconfiguration commands.
-
Install MicroK8s following the specific install guide for your operating system. For convenience, we've added some commands below:
-
Windows:
Download the MicroK8s installer for Windows and follow the instructions.
Once installed, enable MicroK8s with:
microk8s status --wait-ready microk8s enable dns -
Linux:
sudo snap install microk8s --classic microk8s status --wait-ready microk8s enable dns -
MacOS:
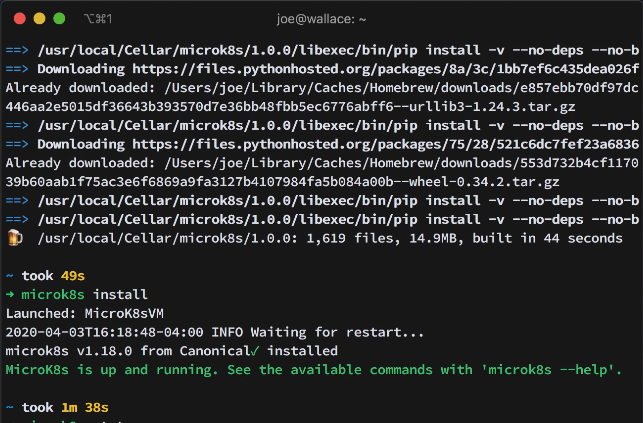
brew install ubuntu/microk8s/microk8s microk8s install microk8s status --wait-ready microk8s enable dns -
WSL2
This blog post walks through an installation of MicroK8s in WSL 2.
-
-
Export MicroK8s cluster kubeconfig file path
MicroK8s will not update your .kube/config file, and accessing the cluster is done using the microk8s cli, eg: microk8s kubectl get nodes. To be able to use this config with the Azure Arc CLI, we need to export it into a file.
Windows:
microk8s config view > %HOMEPATH%\.kube\microk8s
Linux and MacOS:
microk8s config view > ~/.kube/microk8s
-
Authenticate Azure CLI
We'll start by authenticating our CLI with Azure, replacing the values below with the output from the command we issued to create service principal earlier (
az ad sp create-for-rbac) in the prerequisite section of this guide.az login --service-principal -u appId -p password --tenant tenant -
Create a Resource Group
az group create -n Arc-MicroK8s-Demo -l EastUS -
Connect the cluster to Azure Arc
Windows:
az connectedk8s connect --name Arc-MicroK8s-Demo --resource-group Arc-MicroK8s-Demo --kube-config %HOMEPATH%\.kube\microk8s --kube-context microk8s --tags 'Project=jumpstart_azure_arc_k8s'Linux and MacOS:
az connectedk8s connect --name Arc-MicroK8s-Demo --resource-group Arc-MicroK8s-Demo --kube-config ~/.kube/microk8s --kube-context microk8s --tags 'Project=jumpstart_azure_arc_k8s' -
Upon completion, you will have your MicroK8s cluster connected as a new Azure Arc Kubernetes cluster resource in a new Resource Group.
Now that your Kubernetes cluster is connected to Azure Arc, you might want to explore the following Day 2 scenarios:
-
In Azure, the most straightforward way is to delete the cluster or the Resource Group via the Azure Portal or through the CLI.
az group delete --name Arc-MicroK8s-Demo
-
To stop the MicroK8s cluster locally, use the following command:
microk8s stop
-
The uninstall process of MicroK8s depends on your operating system.
-
Windows
Stop the MicroK8s VM in Multipass:
multipass stop microk8s-vmLaunch
Add or Remove Programsand uninstall MicroK8s.multipass delete microk8s-vm multipass purgeIf you want to completely uninstall Multipass, launch
Add or Remove Programsand uninstall Multipass. -
Linux
sudo snap remove microk8s -
MacOS
brew uninstall ubuntu/microk8s/microk8s
-


