- DeepCell Label interface
- Example: tissue image
- Example: nuclear image
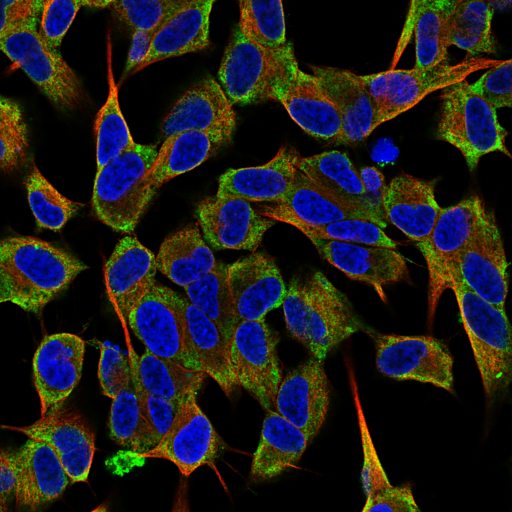
- Example: Human Protein Atlas image
- Example: timelapse and 3D files
- Export labels
To learn the DeepCell Label interface, open the first example file in the dropdown menu on the homepage, named 3D organoid annotation.
You should now see an interface that looks like this:

On the left, we see an infopane with data about what we are viewing.
On the right, we see an interactive canvas with labels overlaid on a raw image.

The infopane tells us what we are viewing in the canvas. See the Info Table tab of the dropdown instructions in Label to learn more about each row:


We use the canvas to:
- browse the image
- adjust the image for better viewing
- select labels
- edit selected labels
See the Canvas tab of the dropdown instructions to learn how to browse and adjust the images.
See the Select tab to learn how to select labels.
See the Tools and Actions tabs to learn how to edit the selected labels.

Made a mistake? Undo or redo your modifications with Undo and Redo buttons above the canvas. We can also use the shortcuts Ctrl + Z to undo and Ctrl + Shift + Z to redo.
Files can contain information about multiple frames, channels, and features. The Info Table tab of the dropdown instructions explains these different aspects of a file, and the Canvas tab explains how to update the view of these different components.
Zoom and pan functionality can be used to get a closer look at the current view. There is no limit to how far you can zoom in on a file; although there are diminishing returns for viewing details within the image, working at high levels of zoom can help make mouse movements more accurate.
Before we can edit a label, we must select it. When we select a label as the foreground label, we can add more to that label, while selecting the label as the background lets us overwrite or remove that label. The foreground is outlined in white, while the background label is outlined in red.
When highlighting is on, the foreground label also becomes bright red, making it easy to focus on. By selecting all the labels in order, we can methodically review the labels in a file.
See the Select Labels tab of the dropdown instructions for how to change the labels being highlighted.
In RGB viewing mode, we can see all the labels outlined in white on top of a color image, where each raw channel becomes a different color. In this view, the selected labels are highlighted in translucent white instead of bright red.
- Download the tissue imaging .npz file from our S3 bucket. This file is prepopulated with labels.
- Drag and drop the file onto the dropzone on the DeepCell Label homepage.
- The file will be displayed in the single-channel viewing mode at first. Press Ctrl + B to change to RGB mode.

Press B to use the Brush tool.
The Brush will paint the foreground label over the background label. See the Selecting Labels tab for details on selecting labels.
Click and drag with the Brush to paint the foreground label over the background label. Other labels in the file won't be affected by the brush.
The Brush lets us correct label borders, or even draw labels from scratch. The Brush is the most flexible tool to make pixel-level changes, but also requires more work to get high-quality results.
-
- Select the label you want to paint with as the foreground and "no label" as the background.
- Paint over unlabeled areas to expand the selected label.
-
- Select "no label" as the foreground and the label you want to shrink as the background.
- Paint over the label to remove it.
-
- Select one label as the foreground and the other as the background, and paint to expand the foreground into the background.
- Press X to switch the foreground and background and paint in the other direction.
-
- Press N to select a new, unused label as the foreground, and select "no label" as the background.
- Paint over unlabeled areas to add the new label to the canvas.
-
- Select the label to remove as the background, and select "no label" as the foreground.
- Completely paint over the label to remove it.
-
- Press the ↑ to make the brush larger.
- Paint with a large brushes to make quick and broad changes.
-
- Press the ↓ to make the brush smaller.
- Paint with a small brushes for precise detail work.
-
- Select one label as the foreground and the other as the background.
- Paint over the entire background label to combine the two labels into one.
-
- Select a label you want to split as the background, and press N to select a new, unused label as the foreground.
- Paint over the existing label to replace it with the new label.
Unlike the brush tool that we click to use, replace is an an action that we use through a keybind.
Select the label you want to keep, then select the label you want to replace, then press R to replace the second label with the first. A prompt will appear in confirm action where we can:
- press Enter to replace the label in the current frame
- press Space to replace the label across all frames, or
- press Esc to cancel
-
- Select "no label" as the foreground and the label you want to replace as the background.
- Replace to remove the label entirely, including unconnected pieces.
- Use this to delete labels of debris or other image artifacts.
-
- Select the labels you want to combine as the foreground and the background.
- Replace to give both regions the foreground label.
- Download the nuclear imaging .npz file from our S3 bucket. This file is prepopulated with labels.
- Drag and drop the file onto the dropzone on the DeepCell Label homepage.
Press M to use the Autofit tool. The Autofit tool adjusts the foreground label boundary to hug the nearest edges in the raw image.
Click a label once to select it as the foreground label, then click on it again to Autofit the label.
Use cases
-
- After filling in the rough shape of a label with the Brush, click on the label with Autofit to snap the brush stroke to the cell border.
-
- Click on a label with Autofit after thresholding to smooth the borders.
- Thresholding often results in rough borders with stray pixels.
Press Q to use the Grow/Shrink tool.
The Grow/Shrink tool expands the foreground label by one pixel or contracts the background label by one pixel.
Click on the foreground label to grow its border by one pixel.
Click on the background label to shrink its border by one pixel.
While you using the Grow/Shrink tool, you can click on an unselected label to make it the foreground or Shift + click on a to make it the background.
Press W to use the Watershed tool. Watershed can split a single label that contains two cells into two separate labels.
The Watershed tool works best when the two cells have bright centers and a dim borders around them. You may need to undo and try other tools like the Brush or Thresholding if Watershed does not split the cells well.
Use cases
-
- Click on the center of two cells that have the same label. Each spot that you click will become two separate labels.
- Download the Human Protein Atlas .png image from our S3 bucket. This image is not paired with any labels.
- Drag and drop the file onto the dropzone on the DeepCell Label homepage.
Press T to use the Threshold tool. Thresholding adds the foreground label to the brightest pixels within a box. Click and drag to draw a bounding box.
The Threshold tool will not overwrite any labels, and instead only adds labels in areas with no label.
Thresholding works best when cells have a clear bright signal. Make sure to include some background in your bounding box.
-
- Press N to pick a new label as the foreground.
- Click and drag to create a bounding box around the area to threshold. The new label will be on the brightest areas inside the bounding box.
-
- Select the label you want to adjust as the foreground.
- Draw a bounding box around the label. The brightest pixels inside the box will get the same label.
Press K to use the Trim tool.
Click on a label once to select it as the background. Click on it again to remove the disconnected pixels. Make sure to click on the part of the label you want to keep.
-
- Thresholding often adds labels to stray bright pixels.
- Clear the stray pixels by clicking on the main center of the thresholded area with the Trim tool.
-
- Stray regions can arise from labeling mistakes made by other people or from artifacts of computational labeling.
- Click on the main region with the Trim tool to quickly remove detached areas while keeping the main region.
Press G to use the Flood tool. Select the foreground label that you want to flood with and select the background label you want to flood over.
While using the Flood tool, you can simply click on an unselected label to make it the background label.
-
- Flooding a region allows us to fix our work after accidentally reusing a label value.
- Press N to select a new label as the foreground and click to flood one of the regions with a new value.
- Use this approach as long as the two regions are separate.
-
- Some tools like threshold can leave a hole in the label.
- Select the label you want to fill the hole with as the foreground, then click on the hole to select it as the background or fill the hole.
-
- You can intentionally leave holes when drawing to quickly create a large label.
- Paint an outline of a large object with the Brush tool, then fill in the center with the Flood tool.
We will not be covering timelapse annotations in this workshop. Here are some tools and use cases specific to working with timelapse files.
- replace
- swap
- flood
-
- Select the label you want to use for a cell across all frames.
- Move through frames with A and D, or ← and → and select inconsistent labelings of the cell as the background.
- Replace the background label with the desired foreground label.
-
- Rather than replacing two labels in succession, you can swap the two to.
- Select two labels, then press s key to swap the selected labels.
- A prompt will appear in the "confirm action" row to confirm the swap where we can:
- press Enter to swap the labels,
- press Esc to abort the action.
-
- Select "no label" as the foreground and click on an unwanted region with the Flood tool to remove that region.
- Use this as an alternative to Trim if you want to remove only some of the unconnected regions, like for a branching structure in 3D.

Download your labels with the download button above the infopane. Your raw images and labels are stored together in the .npz file as training data for model training. The raw images are stored in an array named X with shape (frames, width, height, channels) and the labels are stored in an array named y with shape (frames, width, height, channels).
Ready to put your training data to use? Quickly train your own model with DeepCell.