This chatbot innovation project is using Amazon Lex as the AI Chatbot engine, information store will use either postgresql through Amazon RDS or DynamoDB and the deployment plan is to use Microsoft Teams (longer term use REACT JS for the user interface). You can embed the chatbot onto a website using html.
dynamodb uses boto3 library to connect to AWS
You need to use IAM AWS service to setup user permissions and for Key/password etc
Currently Alex has been built using the web interface for Amazon Lex for a few sample intents, but we will use the modeling building API long term as per diagram below.


We have a alex-lex S3 bucket for the project here (Created using boto rather than web interface):

Connecting to a PostgreSQL Database
Used these instructions to create the below guide - https://aws.amazon.com/getting-started/hands-on/create-connect-postgresql-db/
-
The RDS instance has already been created (details can be found here https://us-east-1.console.aws.amazon.com/rds/home?region=us-east-1#database:id=database-1;is-cluster=false;tab=connectivity)
-
We can use any SQL client to connect to the database however in this instance we are using SQL Workbench. SQL workbench can be downloaded here - https://www.sql-workbench.eu/downloads.html. Once downloaded, extract everything from the compressed folder.

- Download the latest JDBC driver from the PostgreSQL website - https://jdbc.postgresql.org/. Save the file in a place where you can easily find it later. This file is needed in the next step.

-
Connect to the PostgreSQL database
a. From the SQL Workbench extracted file, open the application file.
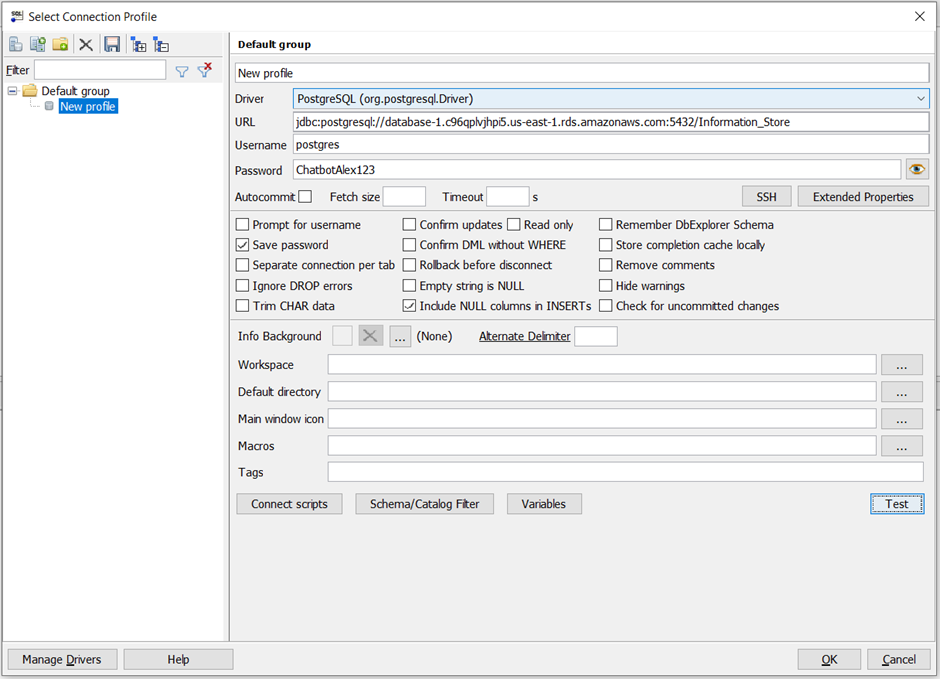
b. A dialogue box will appear which you will need to populate as below:
i.	Driver: PostgreSQL (org.postgresql.Driver)

ii.	URL: jdbc:postgresql://database-1.c96qplvjhpi5.us-east-1.rds.amazonaws.com:5432/Information_Store

iii.	Username: postgres Password: ChatbotAlex123
Once this has been updated, click ‘OK’.
c. You are now connected to the database. You can return to the Amazon RDS Console, select the instance from the Databases list and you should see that there is an additional connection to the database listed under the Current activity heading.
At this point your database is ready to use. You can start creating tables, insert data, and run queries from SQL Workbench client.