-
Notifications
You must be signed in to change notification settings - Fork 2
01 building tcamt from sources
This post explains how to compile and install TCAMT from the source code on macOS Catalina
Apple’s XCode includes command-line tools that are required by brew, and is available for free on the App Store. Make sure you are running the latest version.
$ xcode-select --install
OSX does not include the Homebrew package by default.
$ /bin/bash -c "$(curl -fsSL https://raw.githubusercontent.com/Homebrew/install/master/install.sh)"
Install MySQL with package manager. It is used as database for the user account of both TCAMT and old-IGAMT.
$ brew install [email protected]
Start MySQL-Server. Note that it is persistent after rebooting.
$ brew services start [email protected]
Make sure the MySQL-Server is started.
$ pf -ef | grep mysql
  501   415     1   0  5:15PM ??         0:00.03 /bin/sh /usr/local/opt/[email protected]/bin/mysqld_safe --datadir=/usr/local/var/mysql
  501   593   415   0  5:15PM ??         0:03.23 /usr/local/opt/[email protected]/bin/mysqld --basedir=/usr/local/opt/[email protected] --datadir=/usr/local/var/mysql --plugin-dir=/usr/local/opt/[email protected]/lib/plugin --log-error=Sukchanui-MacBookPro.local.err --pid-file=Sukchanui-MacBookPro.local.pid
Create the igl schema in MySQL.
$ export PATH="/usr/local/opt/[email protected]/bin:$PATH"
$ mysql -u root
mysql> create database igl;
mysql> quit
Go the original DB server, and export MySQL using mysqldump command.
$ mysqldump -u root -p igl > Dump20200404.sql
In your local machine, import a default data using MySQL-Client program mysql.
$ mysql -u root igl < Dump20200404.sql
Verify that the data has been moved correctly.
$ mysql -u root igl
mysql> select count(*) from Account;
+----------+
| count(*) |
+----------+
|        3 |
+----------+
1 row in set (0.01 sec)

mysql> quit
Install MongoDB with package manager. It is the main database for IGAMT, old-IGAMT and TCAMT.
$ brew tap mongodb/brew
$ brew install [email protected]
Start MongoDB-Server. Note that it is persistent after rebooting.
$ brew services start [email protected]
Make sure the MongoDB-Server is started.
$ pf -ef | grep mongod
  501   399     1   0  5:15PM ??         0:43.48 /usr/local/opt/mongodb-community/bin/mongod --config /usr/local/etc/mongod.conf
Go the original DB server, and export MongoDB using mongodump command.
$ mongodump --out=/tmp/dump/
In your local machine, import a default data using MongoDB-Client program mongorestore.
$ mongorestore --db igamt-user /tmp/dump/igamt-user
$ mongorestore --db igamt /tmp/dump/igamt
$ mongorestore --db igamt-hl7 /tmp/dump/igamt-hl7
$ mongorestore --db tcl /tmp/dump/tcl
Verify that the data has been moved correctly.
$ mongo
> use igamt-user
> db.account.count();
1
Git clone.
$ git clone https://github.com/usnistgov/tcamt-2.git
$ cd tcamt-2
The part of a website that user interacts with directly is termed as front end. It is also referred to as the client side of the application.
Node.js is a JavaScript-based environment which you can use to create web-servers and networked applications. You can also use it to perform helpful tasks on your computer such as concatenating and minifying JavaScript files and compiling Sass files into CSS.
NPM is a package manager that makes installing Node packages fast and easy. A package, also called a module, is just a code library that extends Node by adding useful features. For example, the request module simplifies the process of making HTTP requests so you can easily get web resources from other sites.
NPM is installed when you install Node.js. Installing Node.js and NPM is pretty straightforward using Homebrew.
$ brew install node
Make sure you have Node and NPM installed by running simple command to see what version of each is installed:
$ node -v
v13.12.0
$ npm -v
6.14.4
Bower is a package manager for the web. To install bower open terminal and type the following command.
$ npm install -g bower
To check which version of bower is installed type the following command in the terminal.
$ bower -v
1.8.8
Compass is an open source CSS Authoring Framework and it is used by both old-IGAMT and TCAMT.
To use Compass, we need to install Ruby like the following:
$ brew install ruby
This should install the latest Ruby version.
Grunt is the JavaScript Task Runner. Use the following command in the terminal to install Grunt globally.
$ npm install -g grunt-cli
To build with Grunt:
$ cd tcamt-lite-client
$ bower install
$ npm install
$ gem install compass
$ grunt build
Backend is server side of the website. It stores and arranges data, and also makes sure everything on the client-side of the website works fine.
Oracle’s recent changes to Java licensing have meant that many enterprises are re-evaluating their requirements for a stable Java distribution with reliable support at a reasonable cost.
Therefore, we install AdoptOpenJDK provided by an open community.
$ brew tap adoptopenjdk/openjdk
$ brew cask install adoptopenjdk8
Make sure java is installed.
$ java -version
openjdk version "1.8.0_242"
OpenJDK Runtime Environment (AdoptOpenJDK)(build 1.8.0_242-b08)
OpenJDK 64-Bit Server VM (AdoptOpenJDK)(build 25.242-b08, mixed mode)
Apache Maven is a software project management and comprehension tool. Based on the concept of a project object model (POM), Maven can manage a project's build, reporting and documentation from a central piece of information.
Run the follwing command on Terminal
$ brew install maven
Check the version using mvn.
$ mvn -v
Apache Maven 3.6.3 (cecedd343002696d0abb50b32b541b8a6ba2883f)
Maven home: /usr/local/Cellar/maven/3.6.3_1/libexec
Java version: 13.0.2, vendor: N/A, runtime: /usr/local/Cellar/openjdk/13.0.2+8_2/libexec/openjdk.jdk/Contents/Home
Default locale: en_US, platform encoding: UTF-8
OS name: "mac os x", version: "10.15.4", arch: "x86_64", family: "mac"
The Apache Tomcat software is an open source implementation of the Java Servlet, JavaServer Pages, Java Expression Language and Java WebSocket technologies. The Java Servlet, JavaServer Pages, Java Expression Language and Java WebSocket specifications are developed under the Java Community Process.
Install tomcat using package manager:
$ brew install tomcat
Configure the resource for the Tomcat to access MySQL. Add the JDBC resource configuration to the file located in /usr/local/Cellar/tomcat/9.0.33/libexec/conf/context.xml.
$ diff -u context_old.xml context_new.xml
--- context_old.xml	2020-04-07 11:38:56.668013873 -0400
+++ context_new.xml	2020-04-06 19:59:14.992543186 -0400
@@ -28,4 +28,9 @@
     <!--
     <Manager pathname="" />
     -->
+    <Resource name="jdbc/igl_jndi" auth="Container"
+        type="javax.sql.DataSource" maxActive="100"
+        maxIdle="30" maxWait="10000" username="root" password=""
+        driverClassName="com.mysql.jdbc.Driver"
+        url="jdbc:mysql://localhost:3306/igl"/>
 </Context>
Eclipse is an integrated development environment (IDE) used in computer programming, and is the most widely used Java IDE. It contains a base workspace and an extensible plug-in system for customising the environment. Eclipse is written mostly in Java and its primary use is for developing Java applications, but it may also be used to develop applications in other programming languages via plug-ins.
The following is the single command required to install Eclipse IDE on macOS using Homebrew.
$ brew cask install eclipse-jee
First, click on the icon to run eclpise-jee
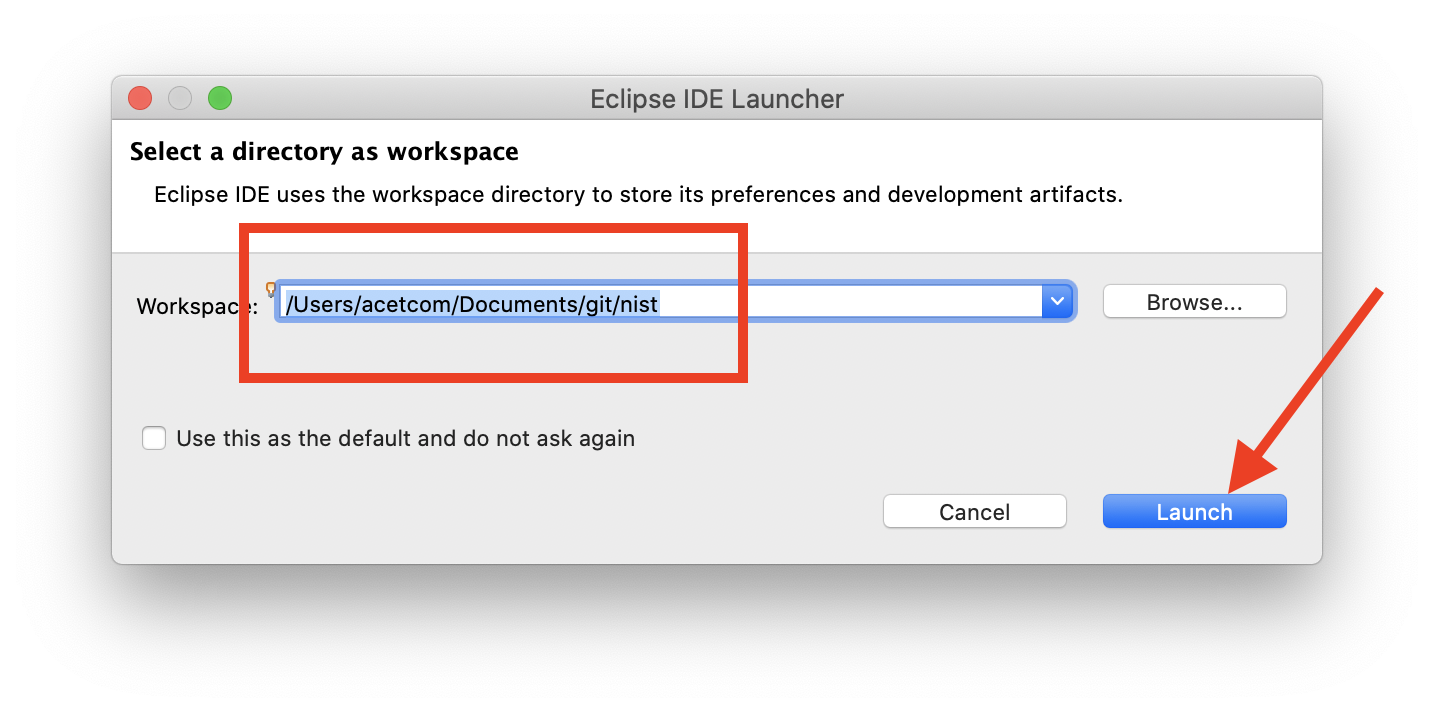
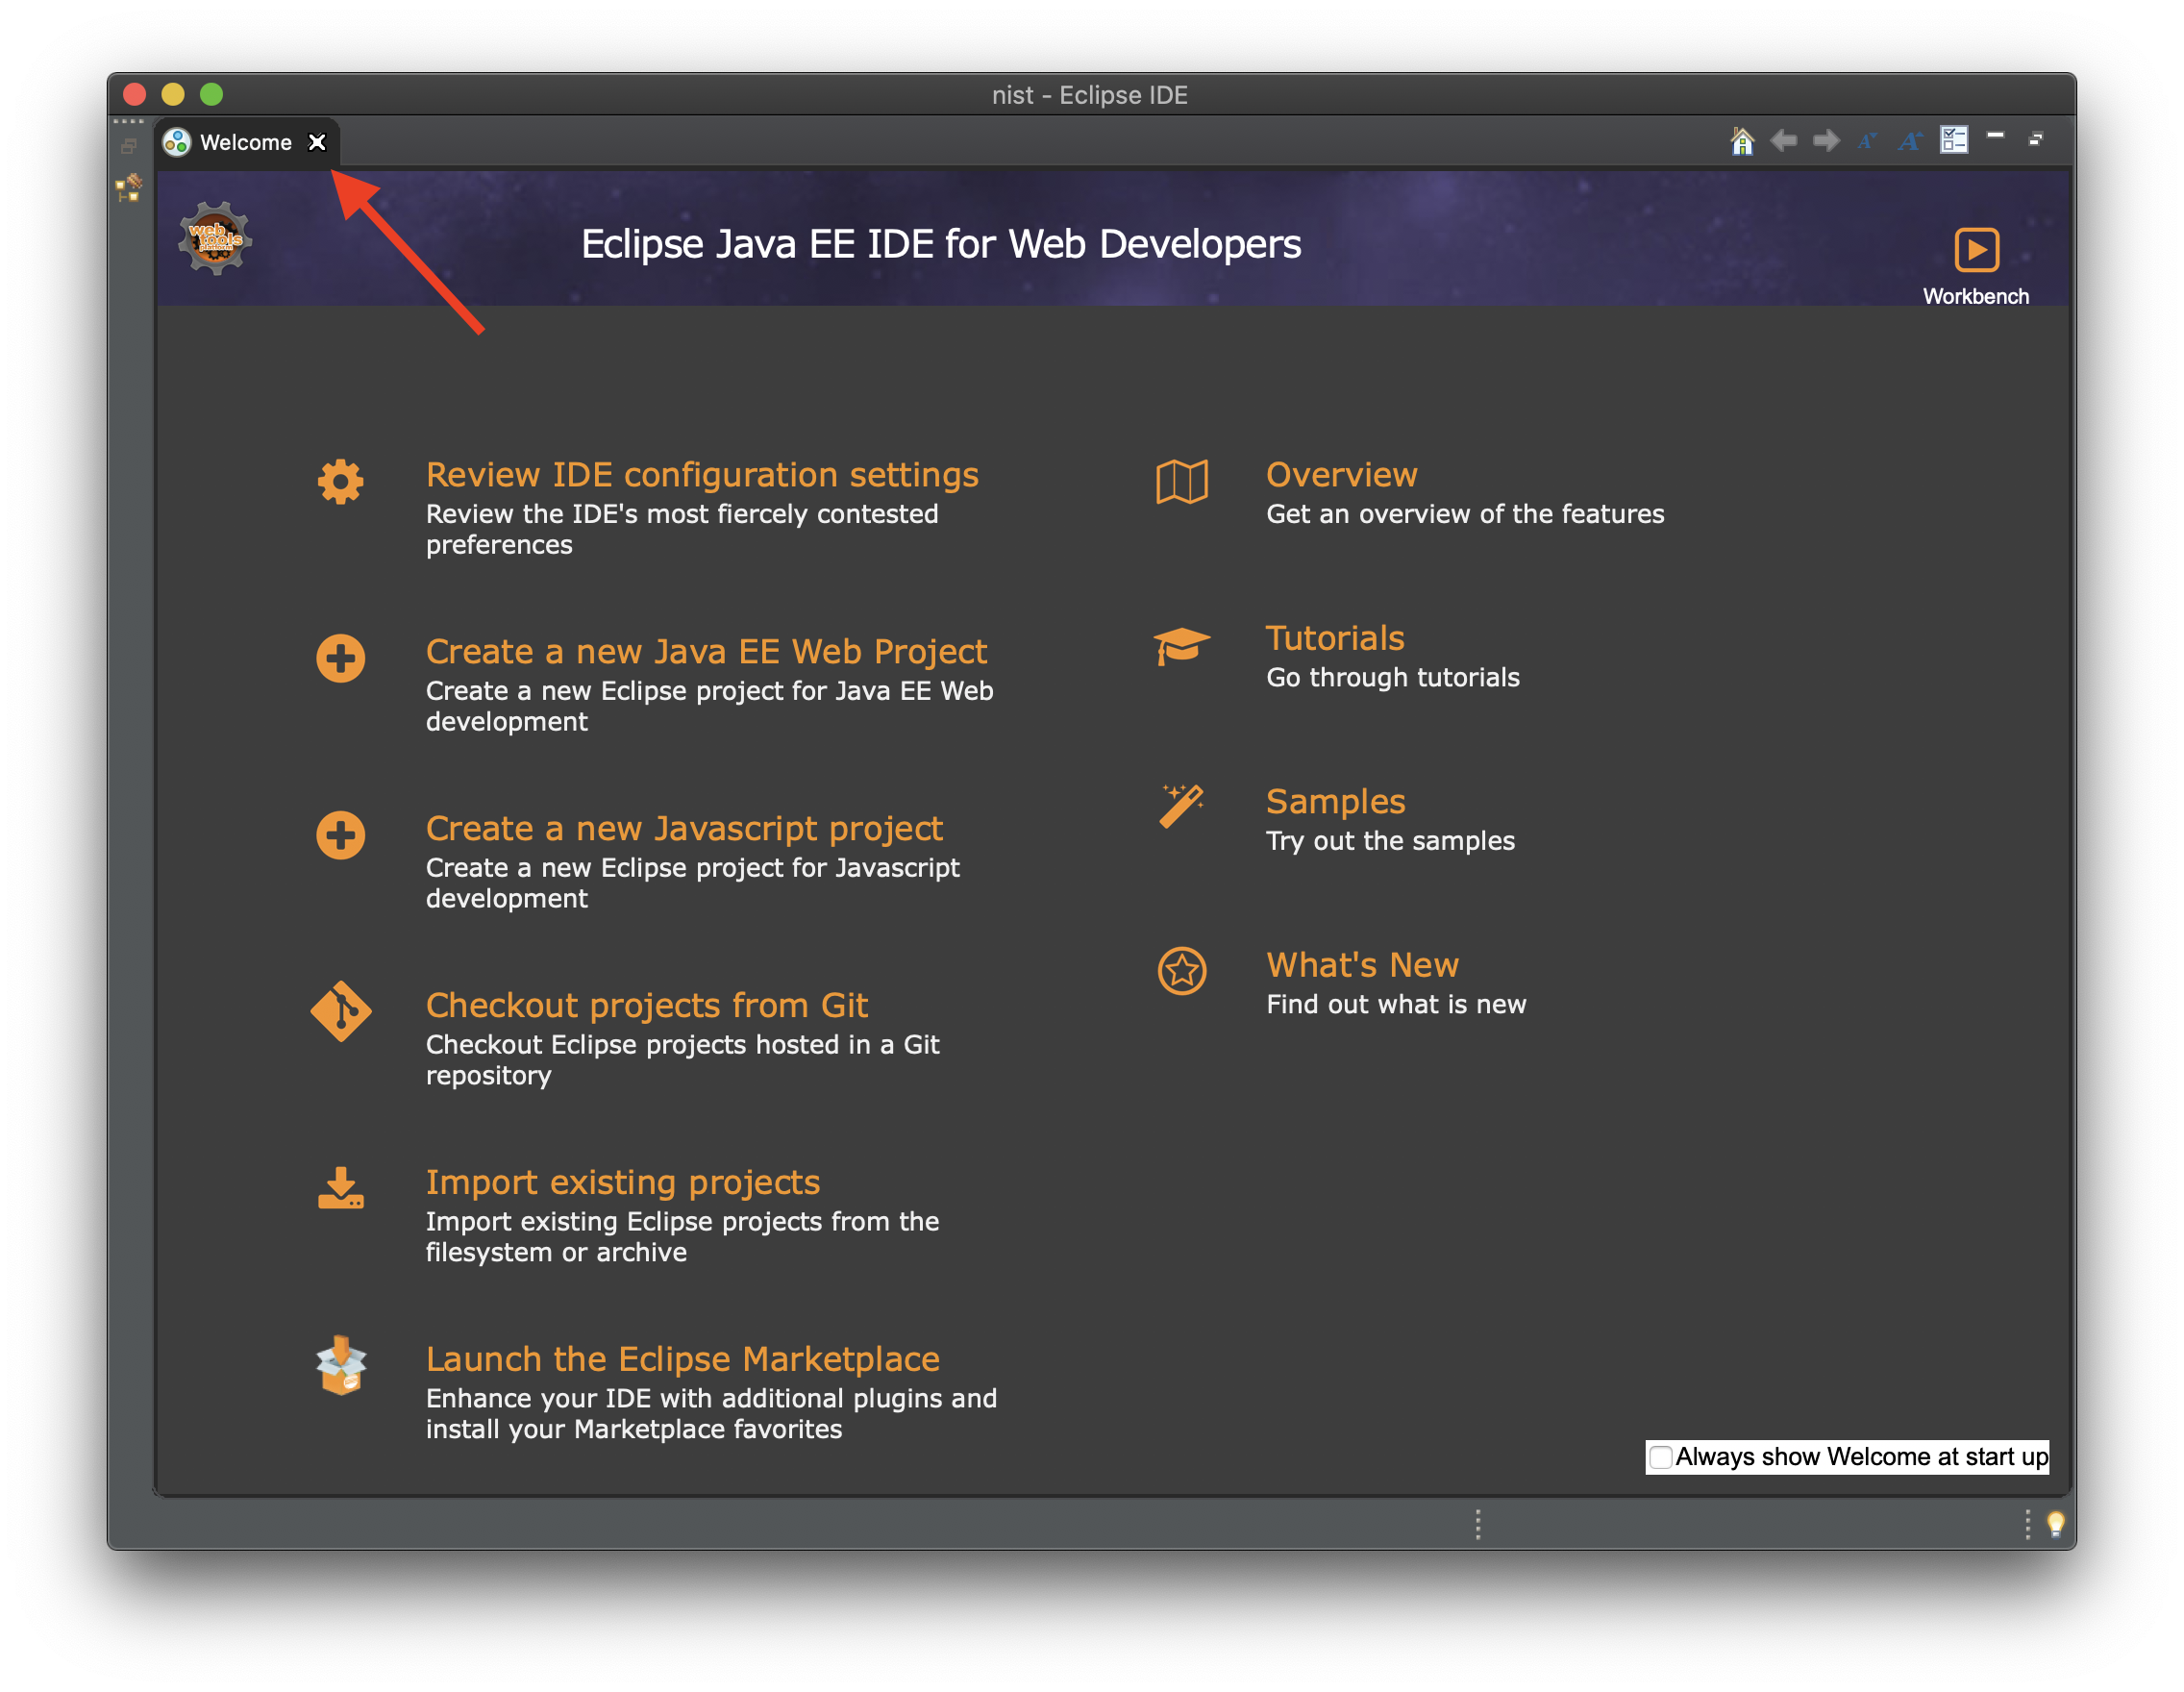
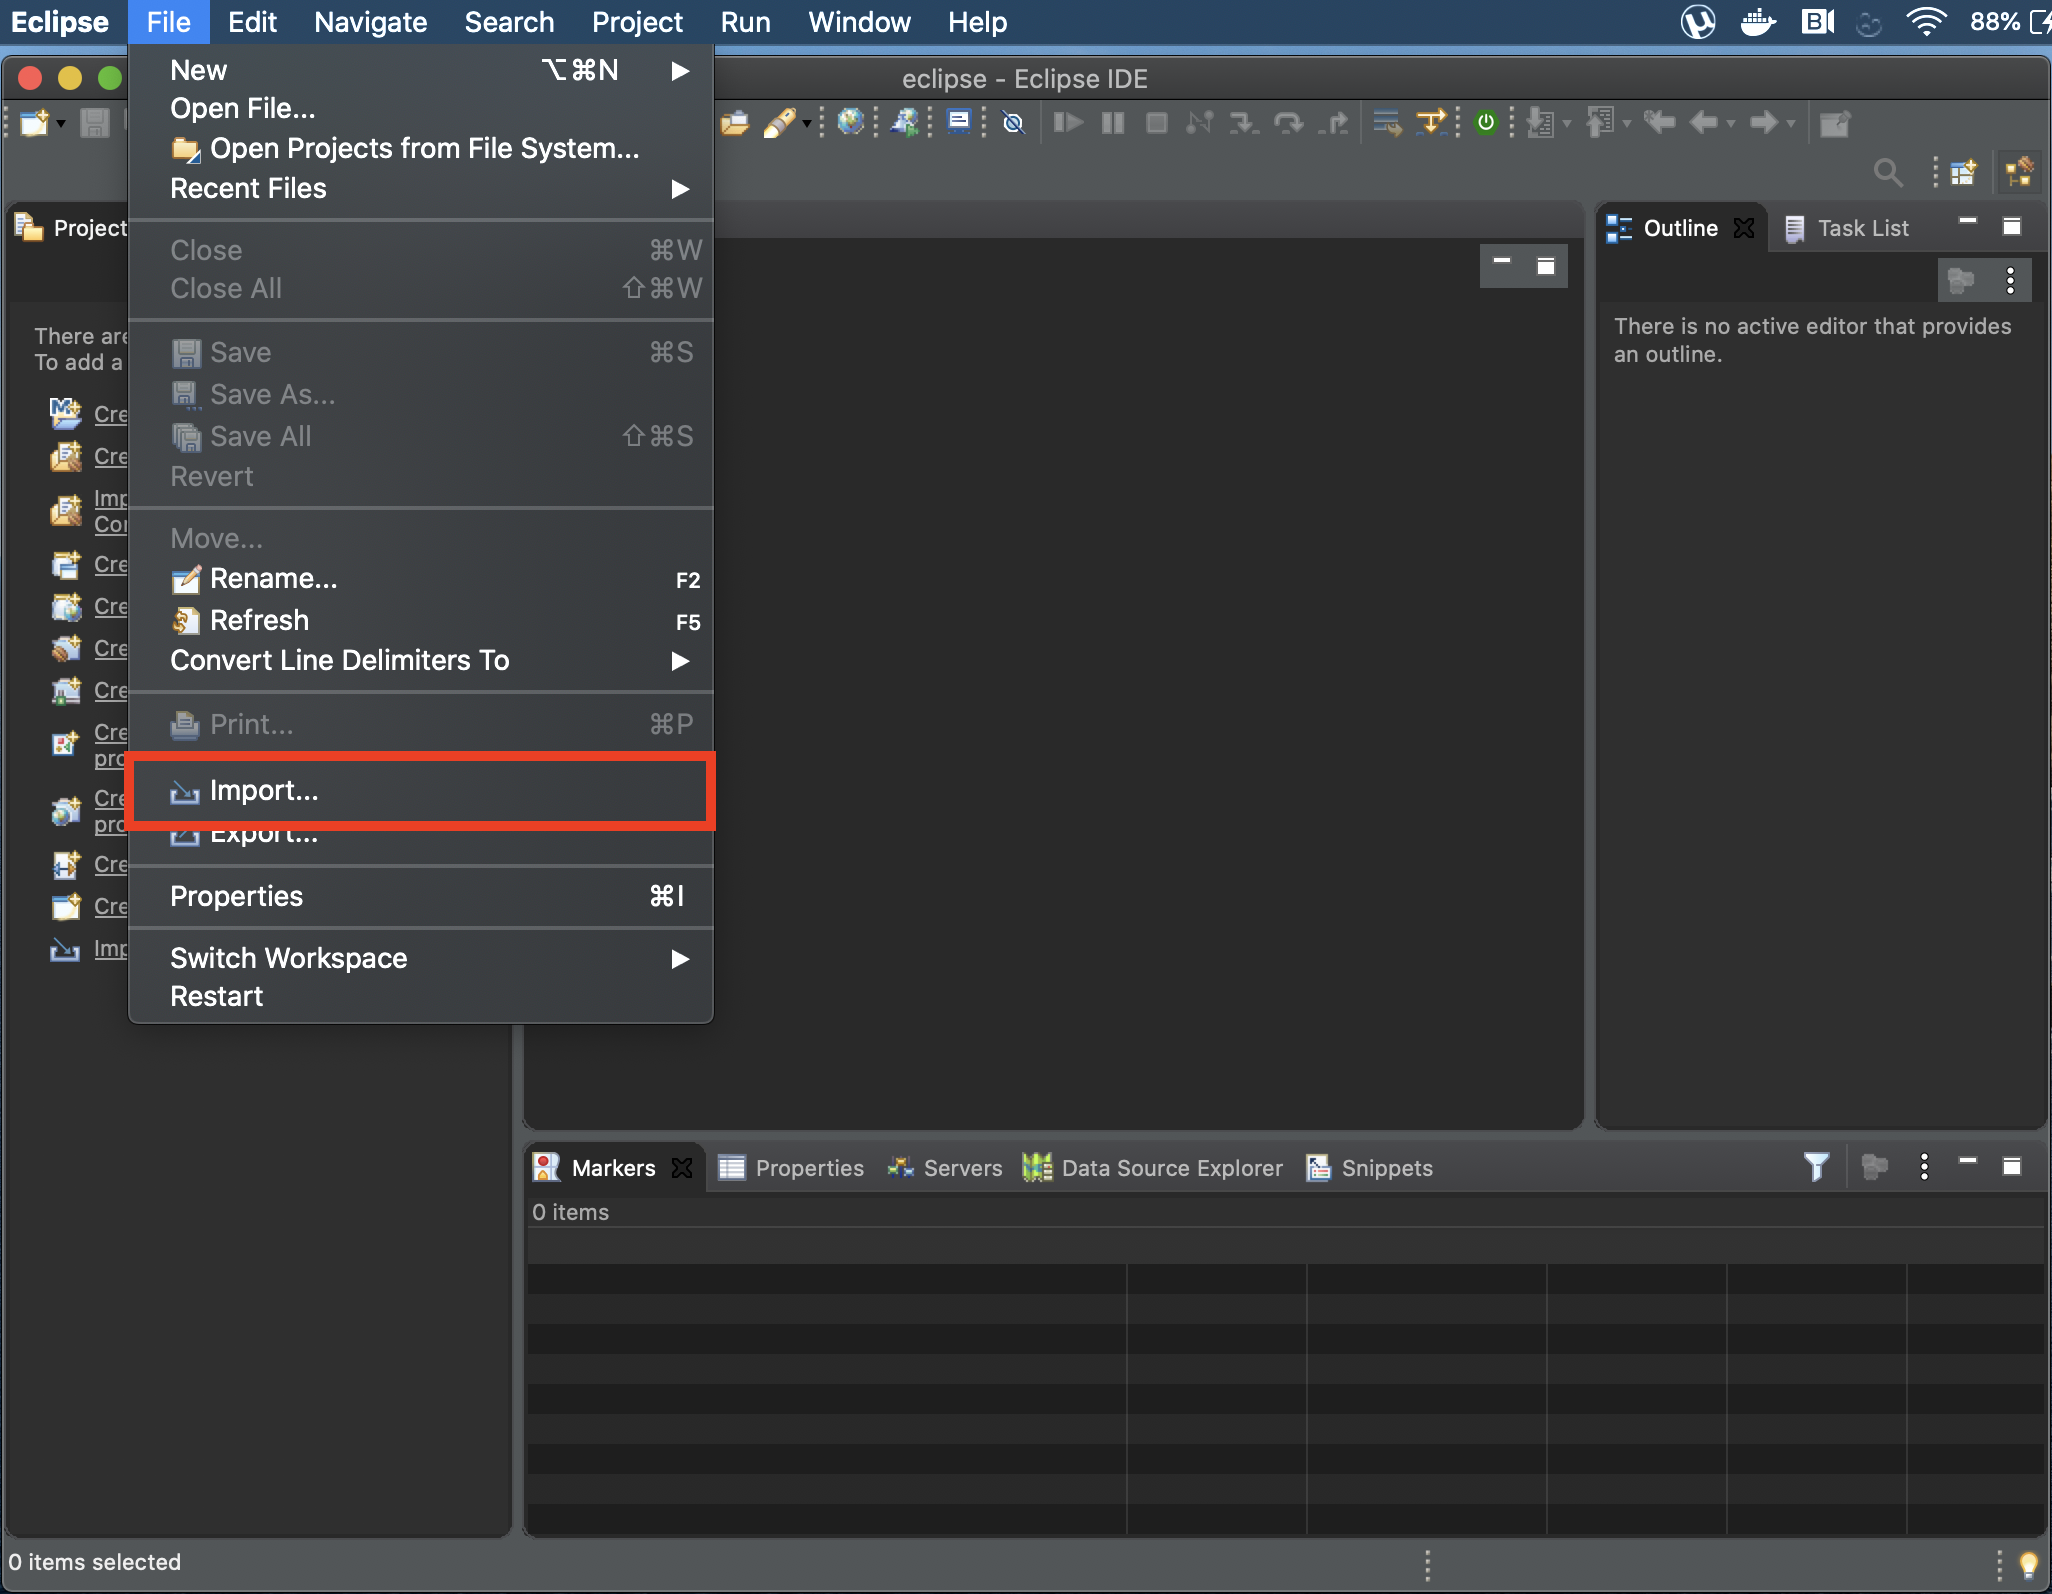
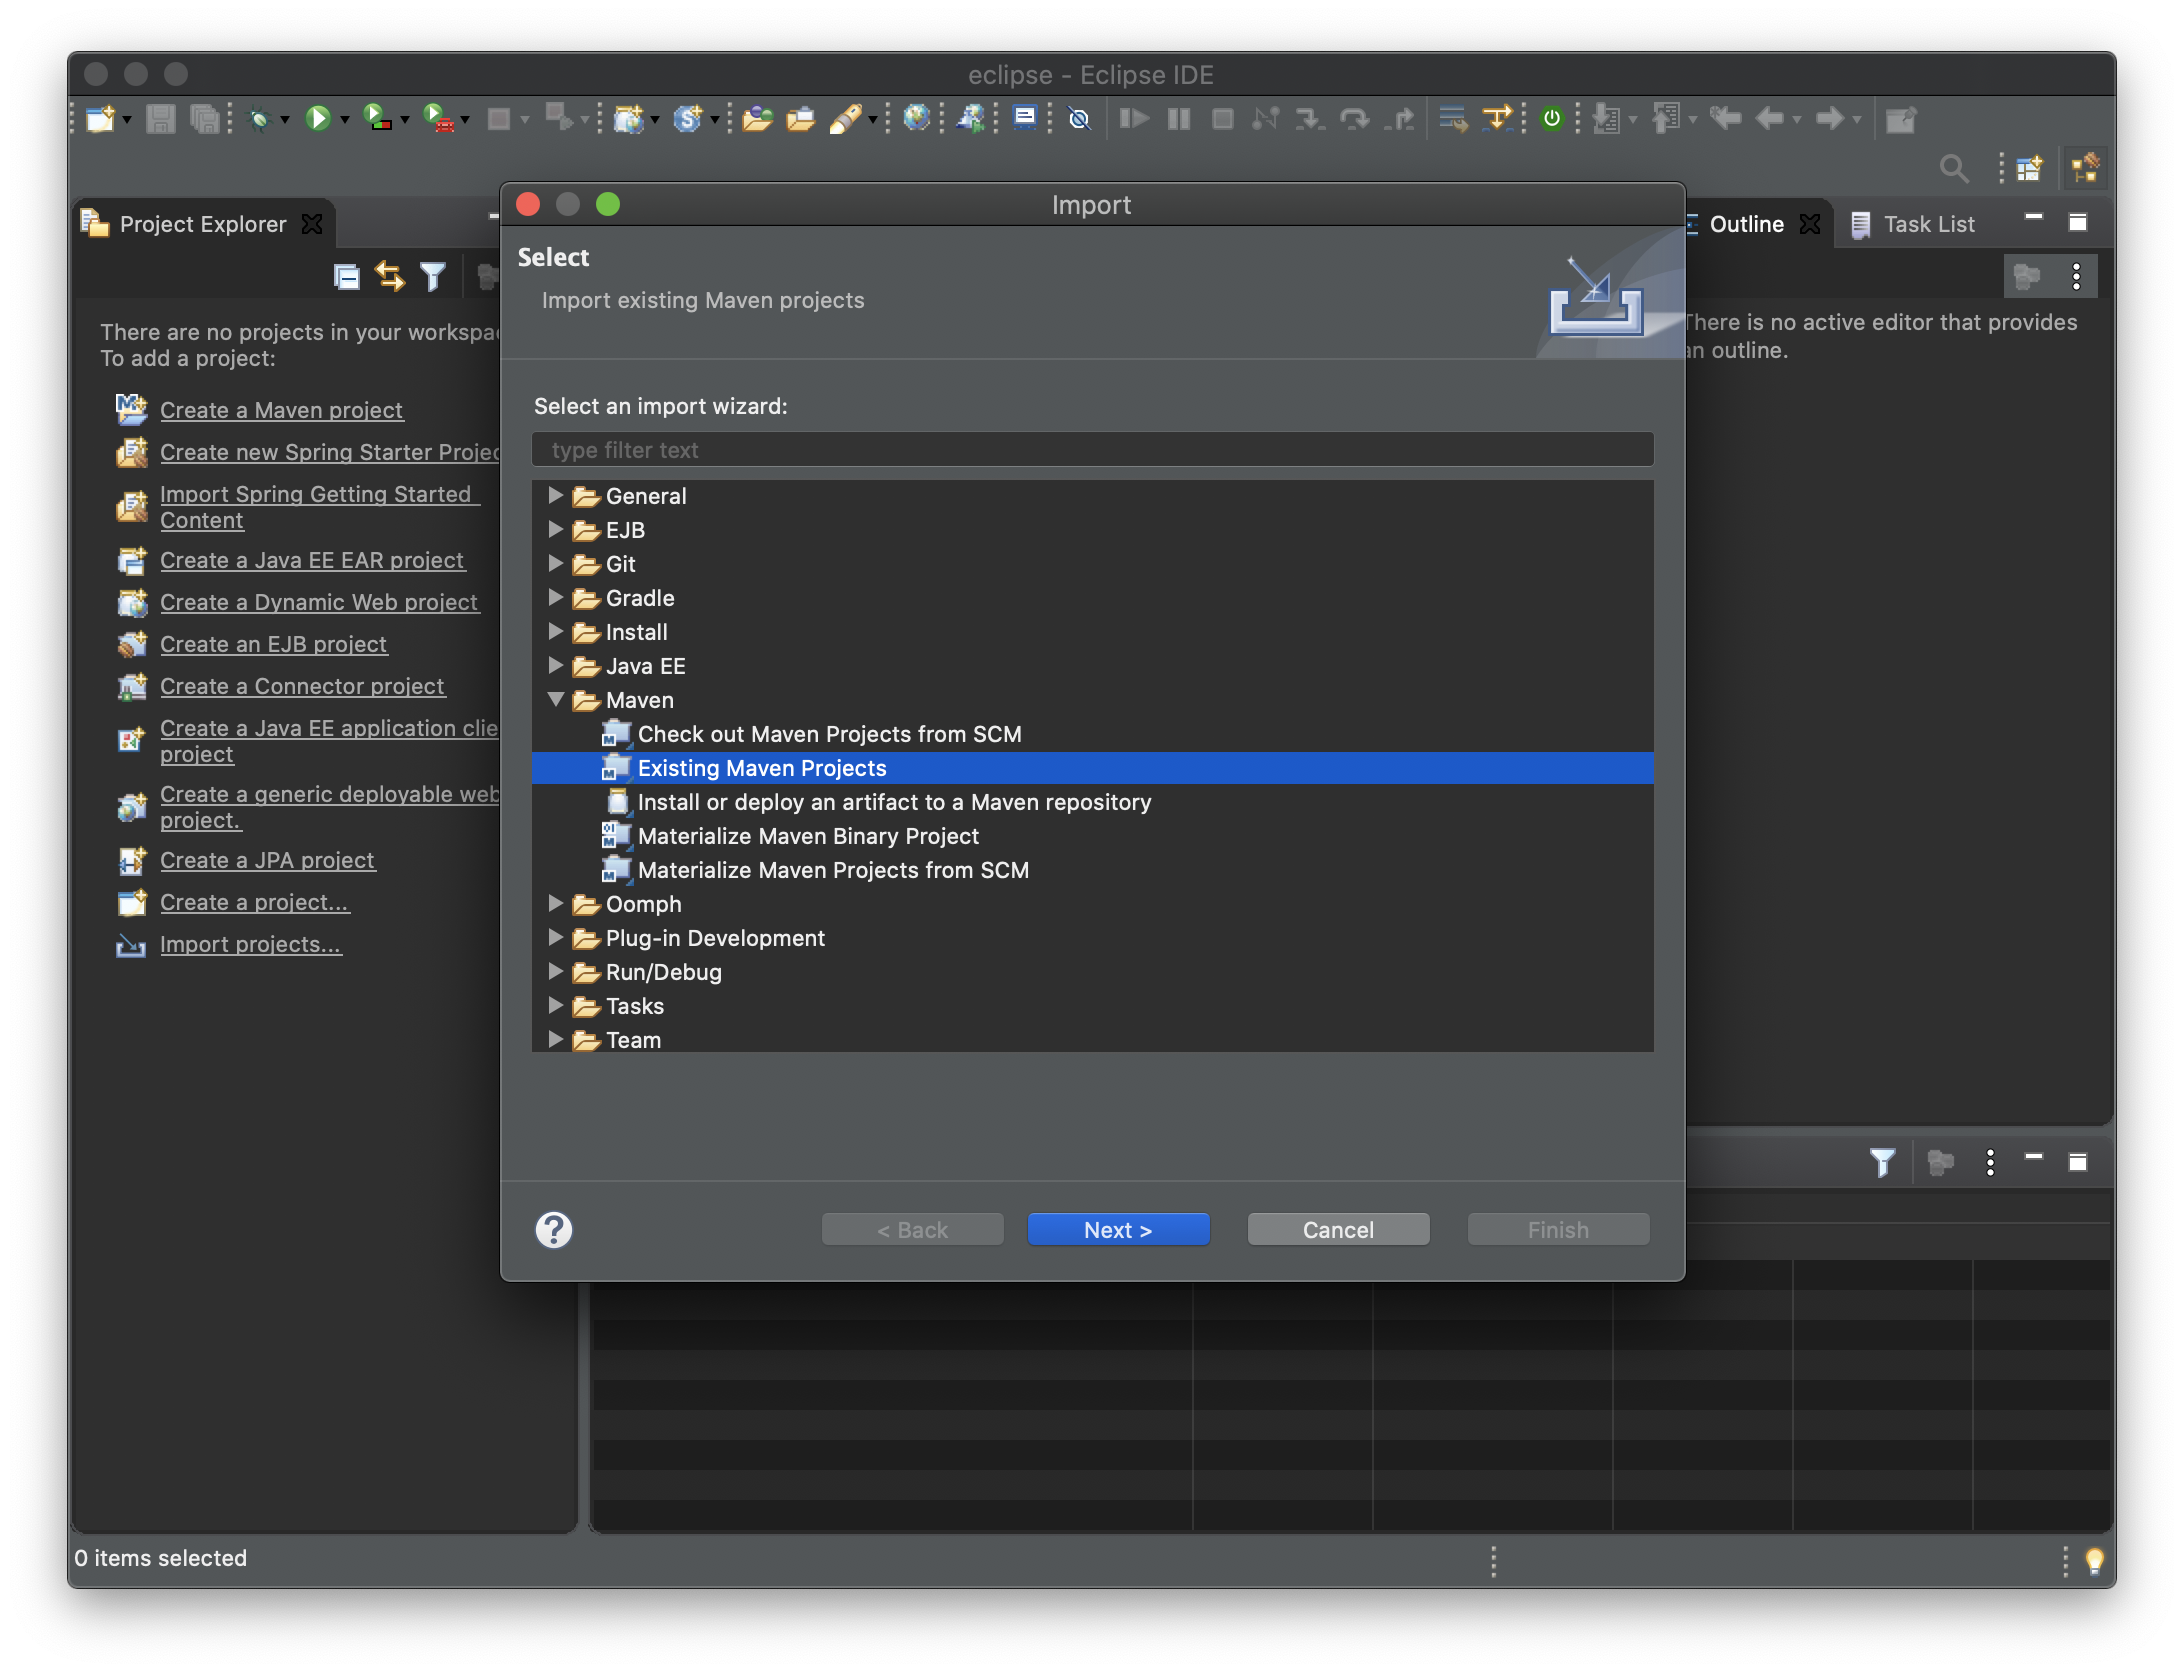
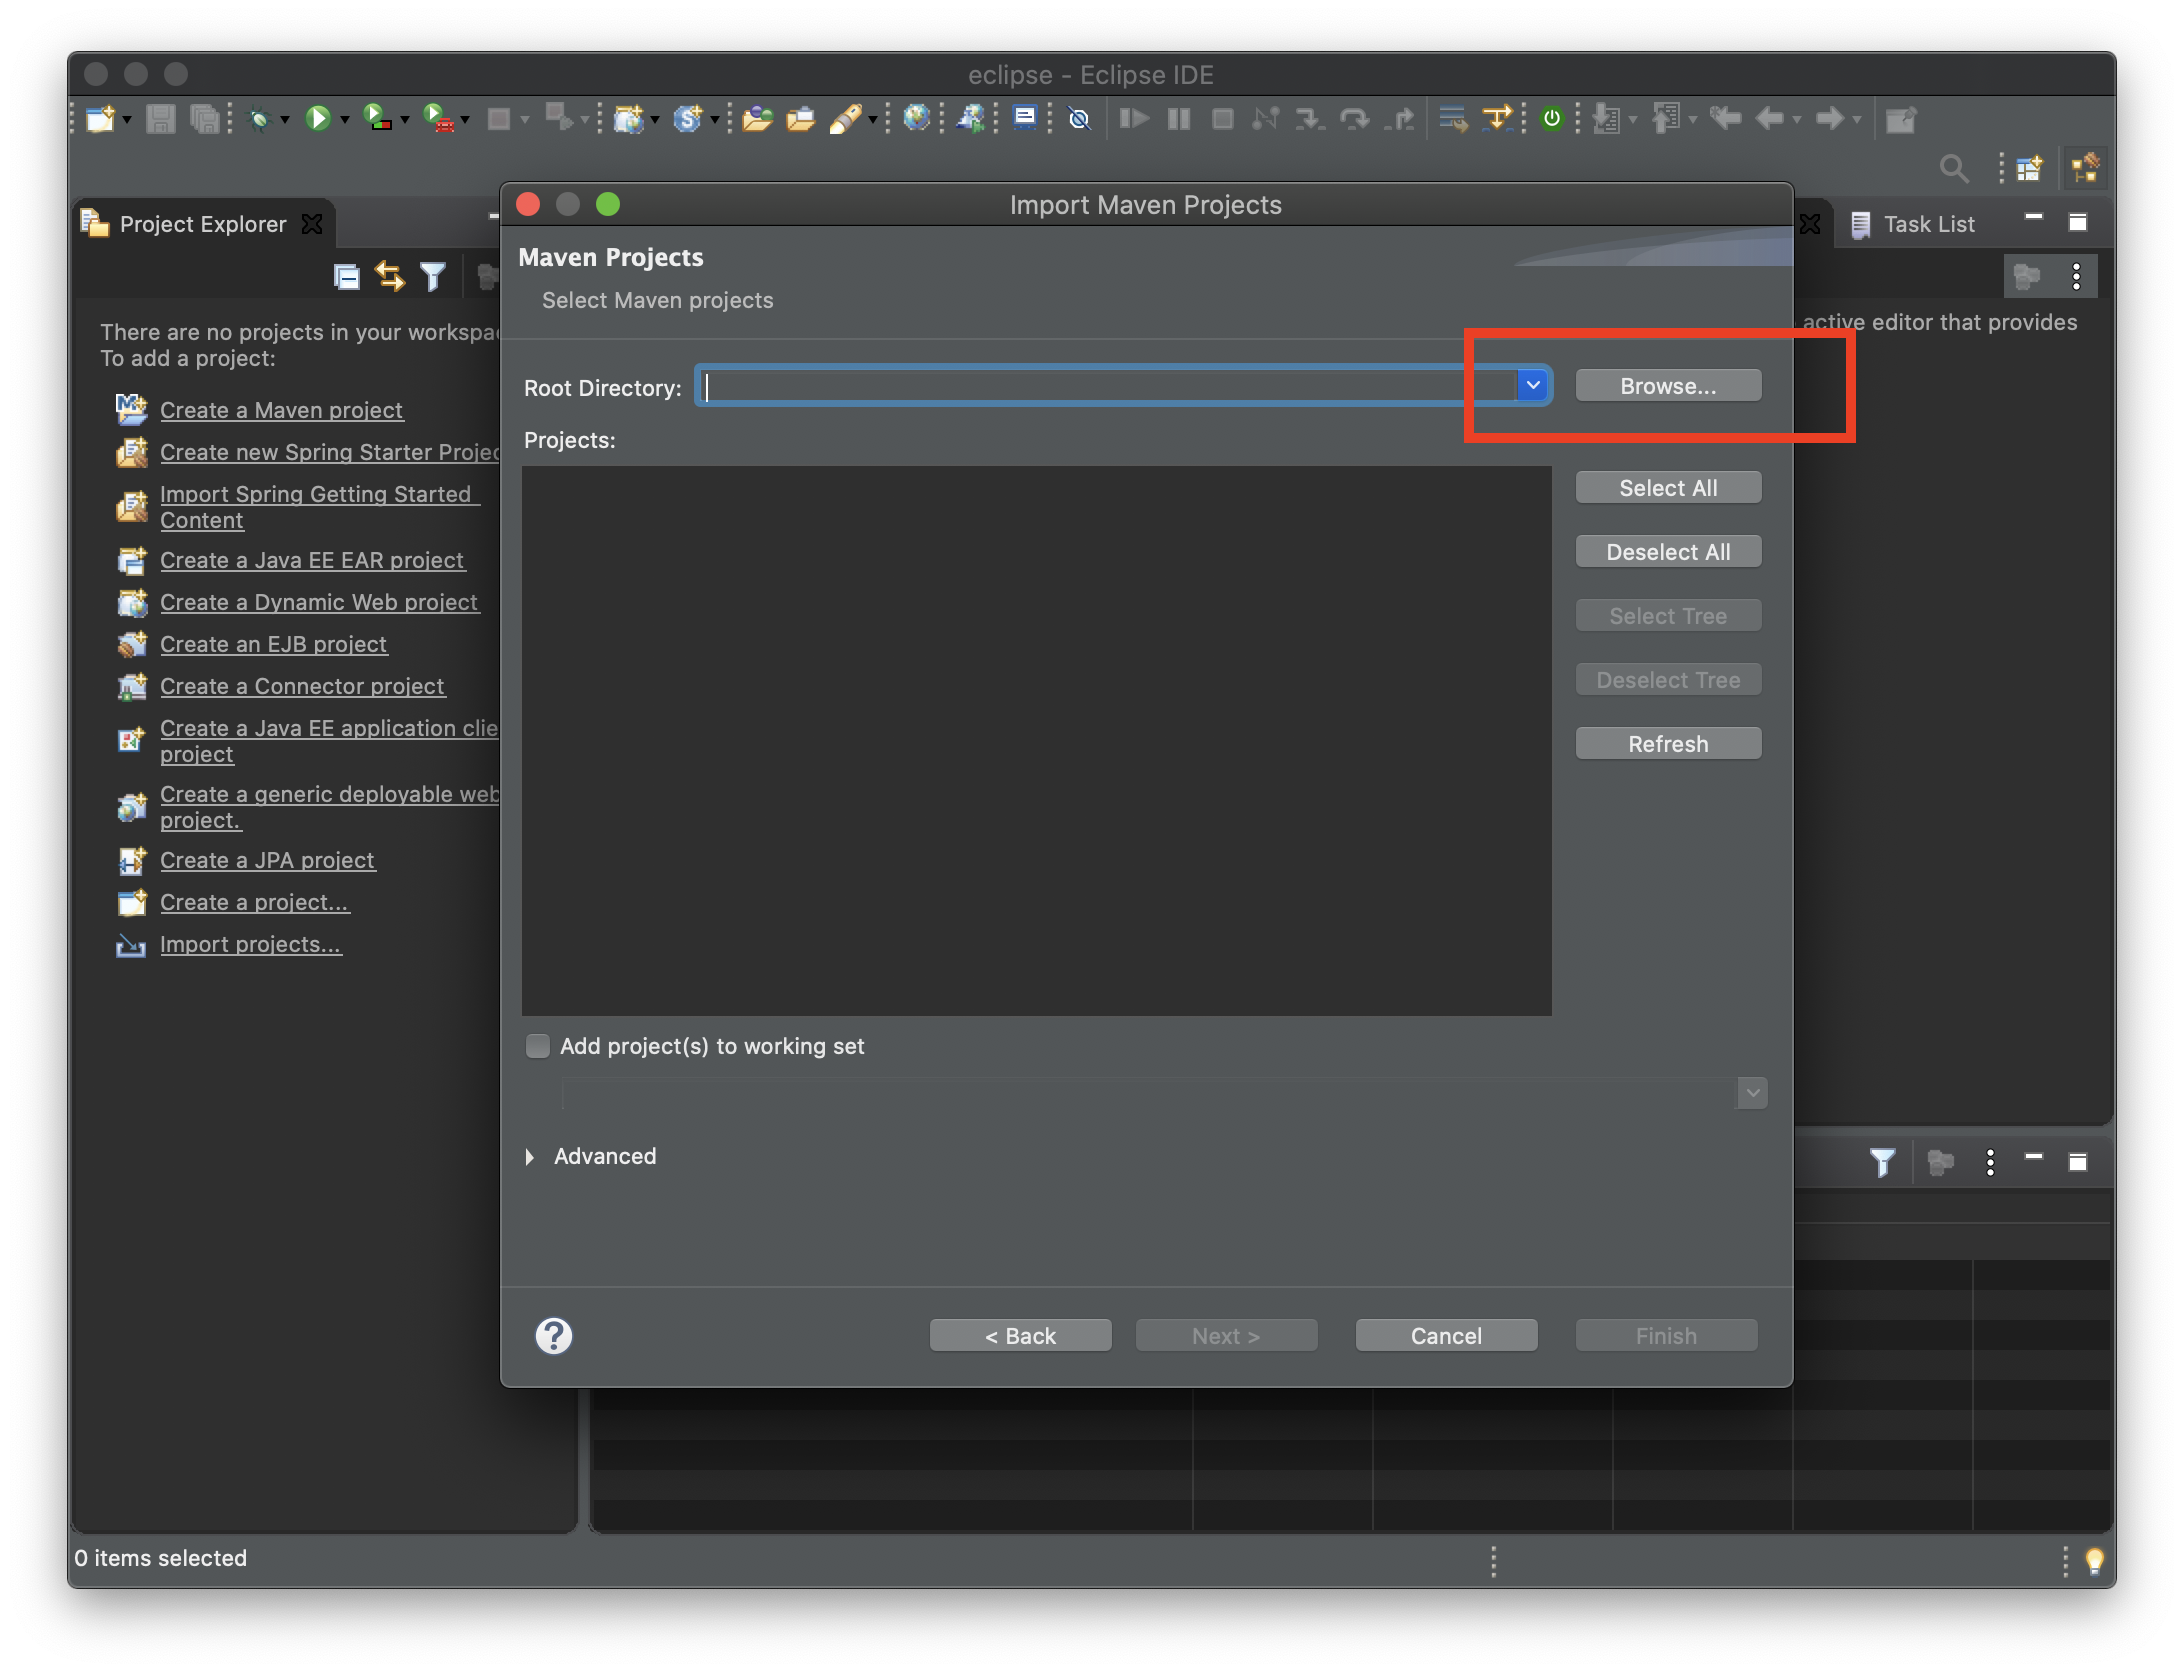
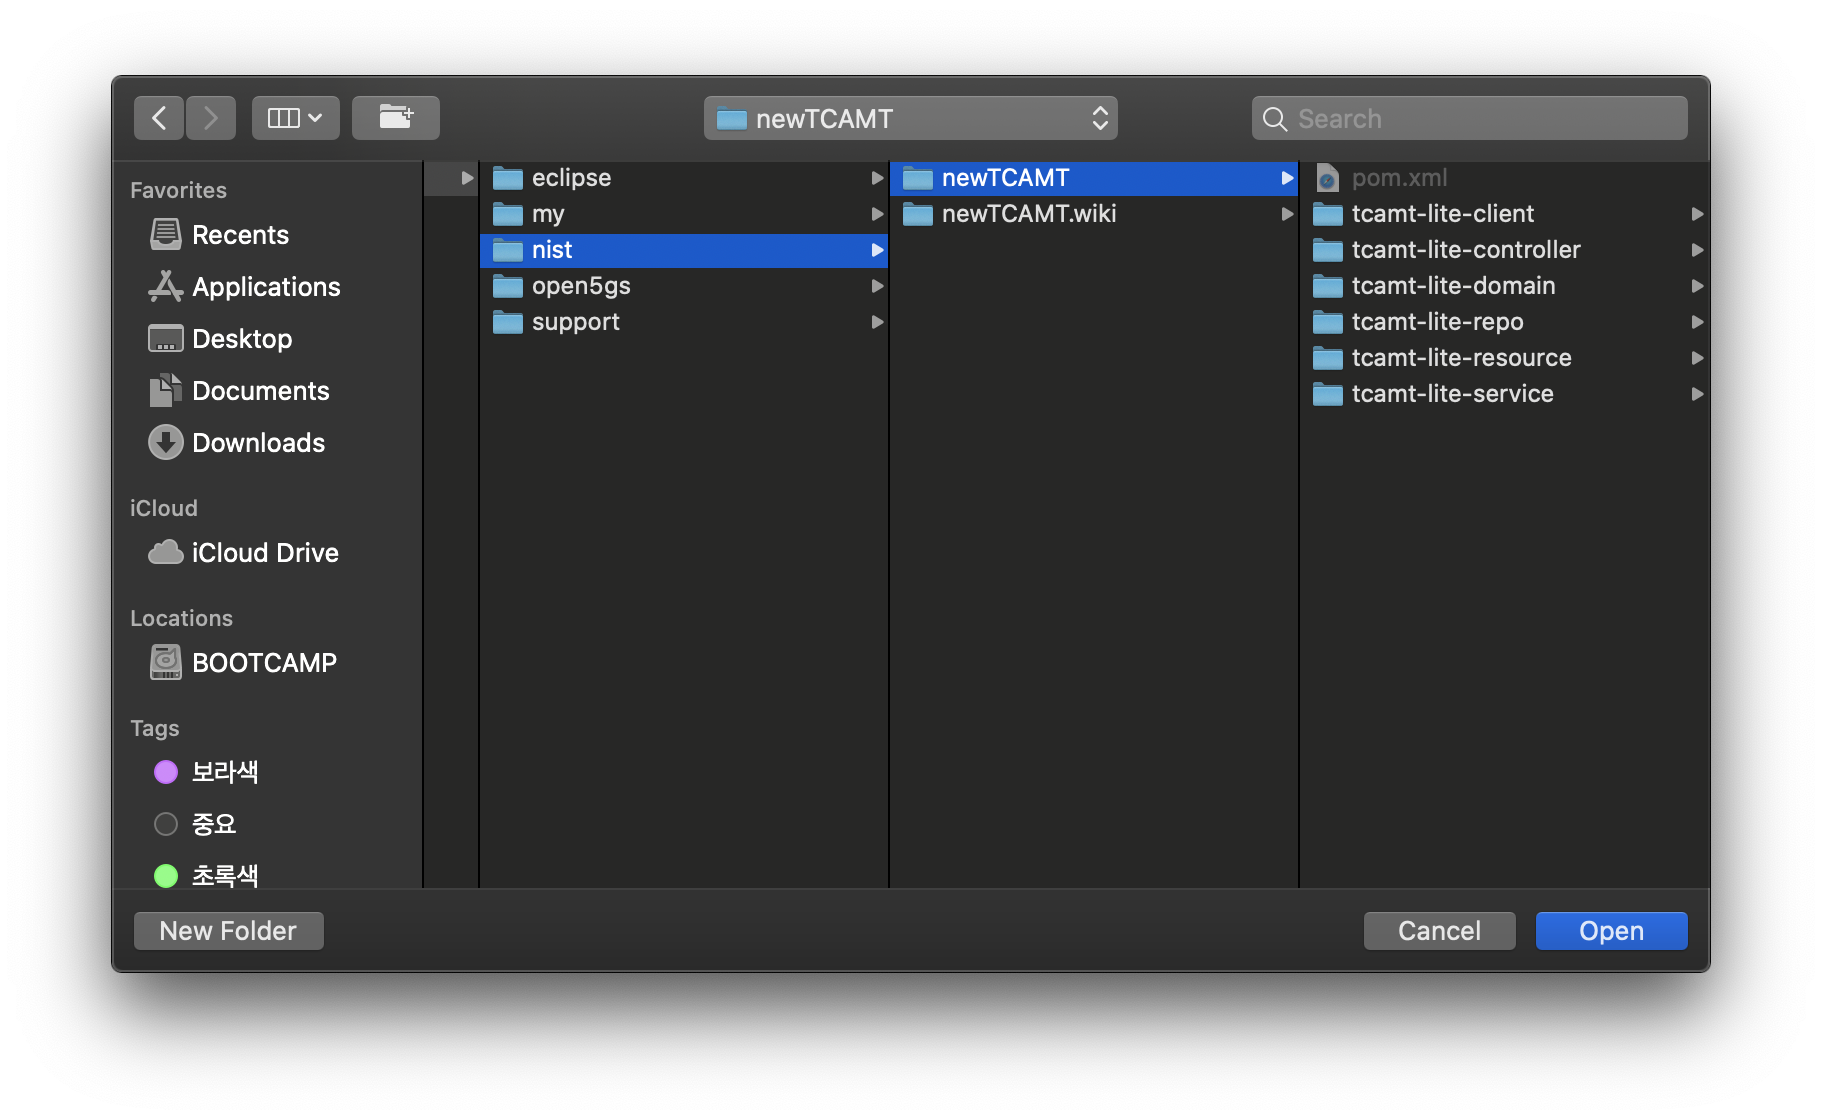
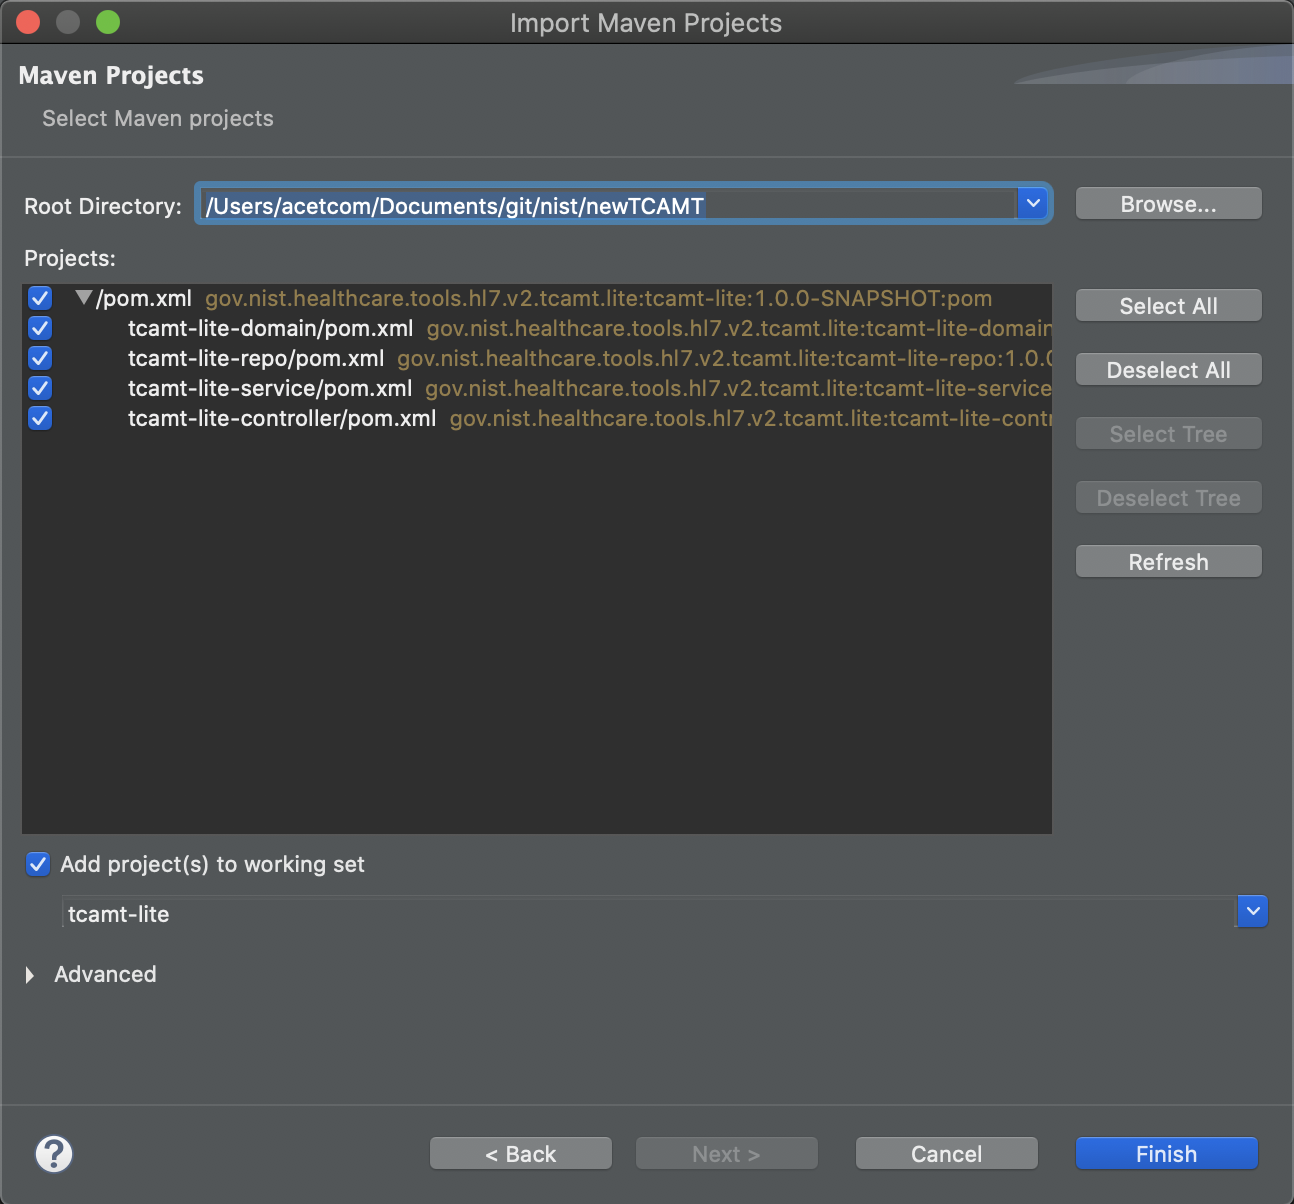
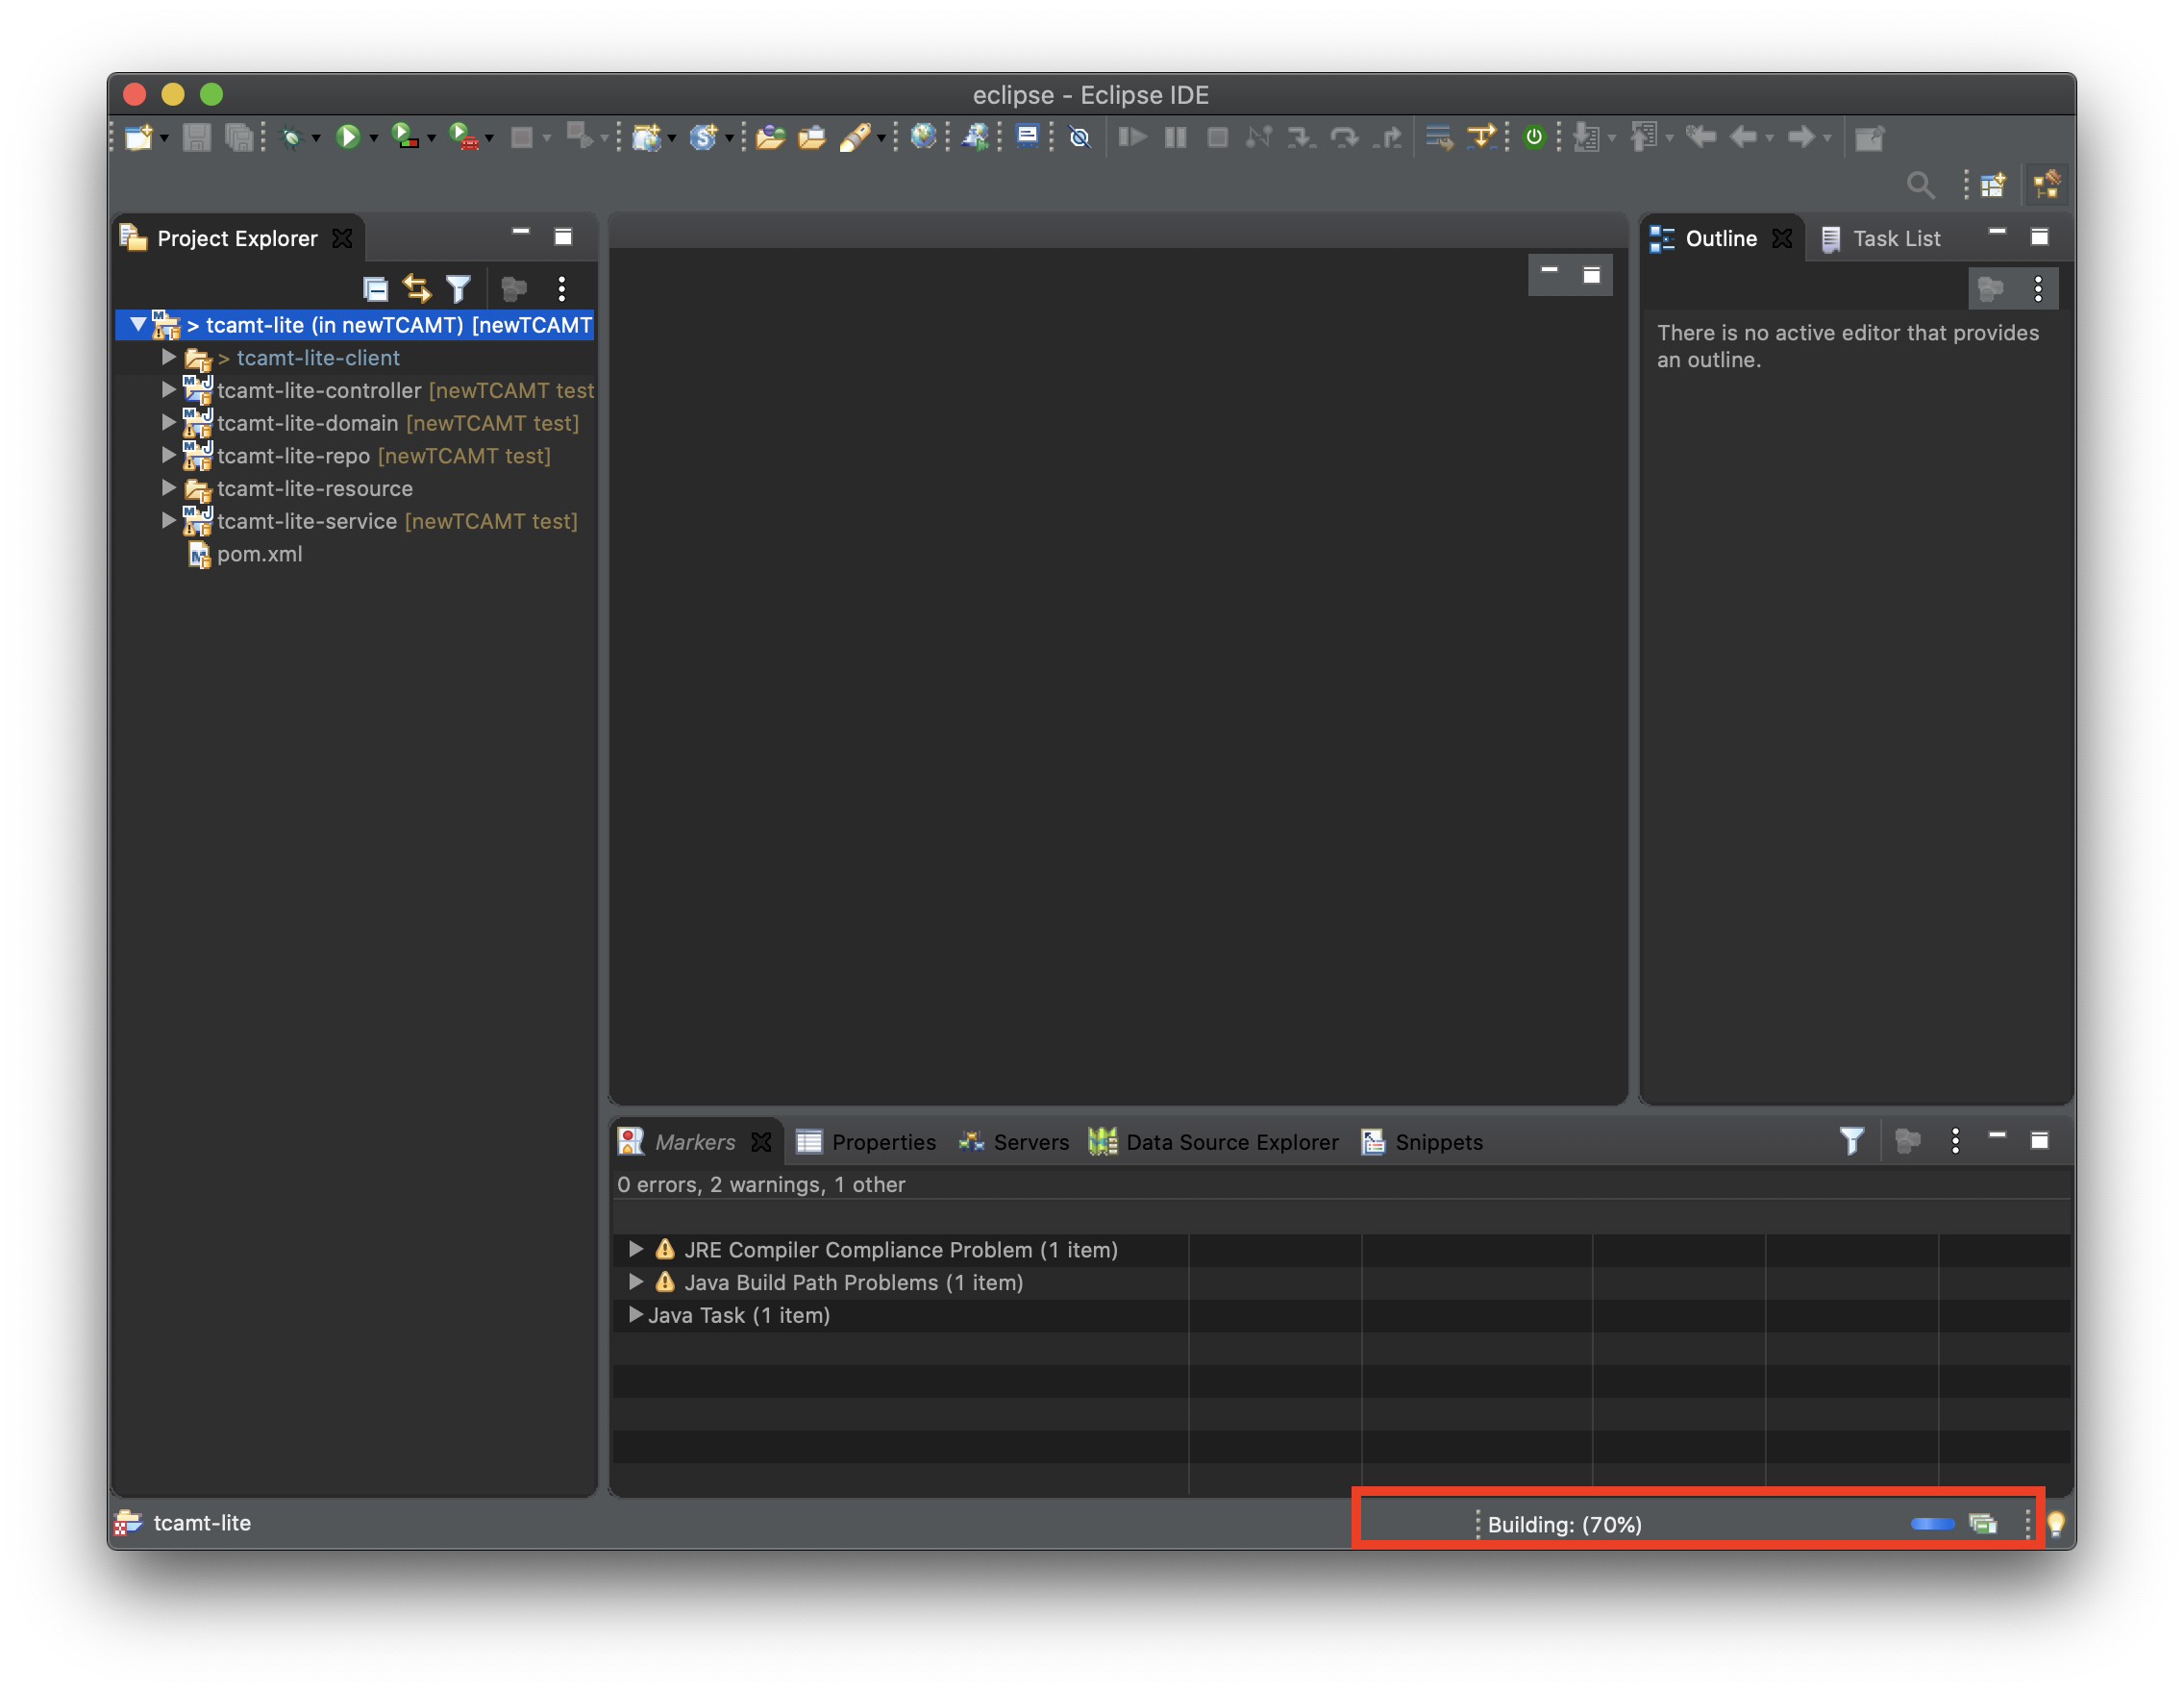
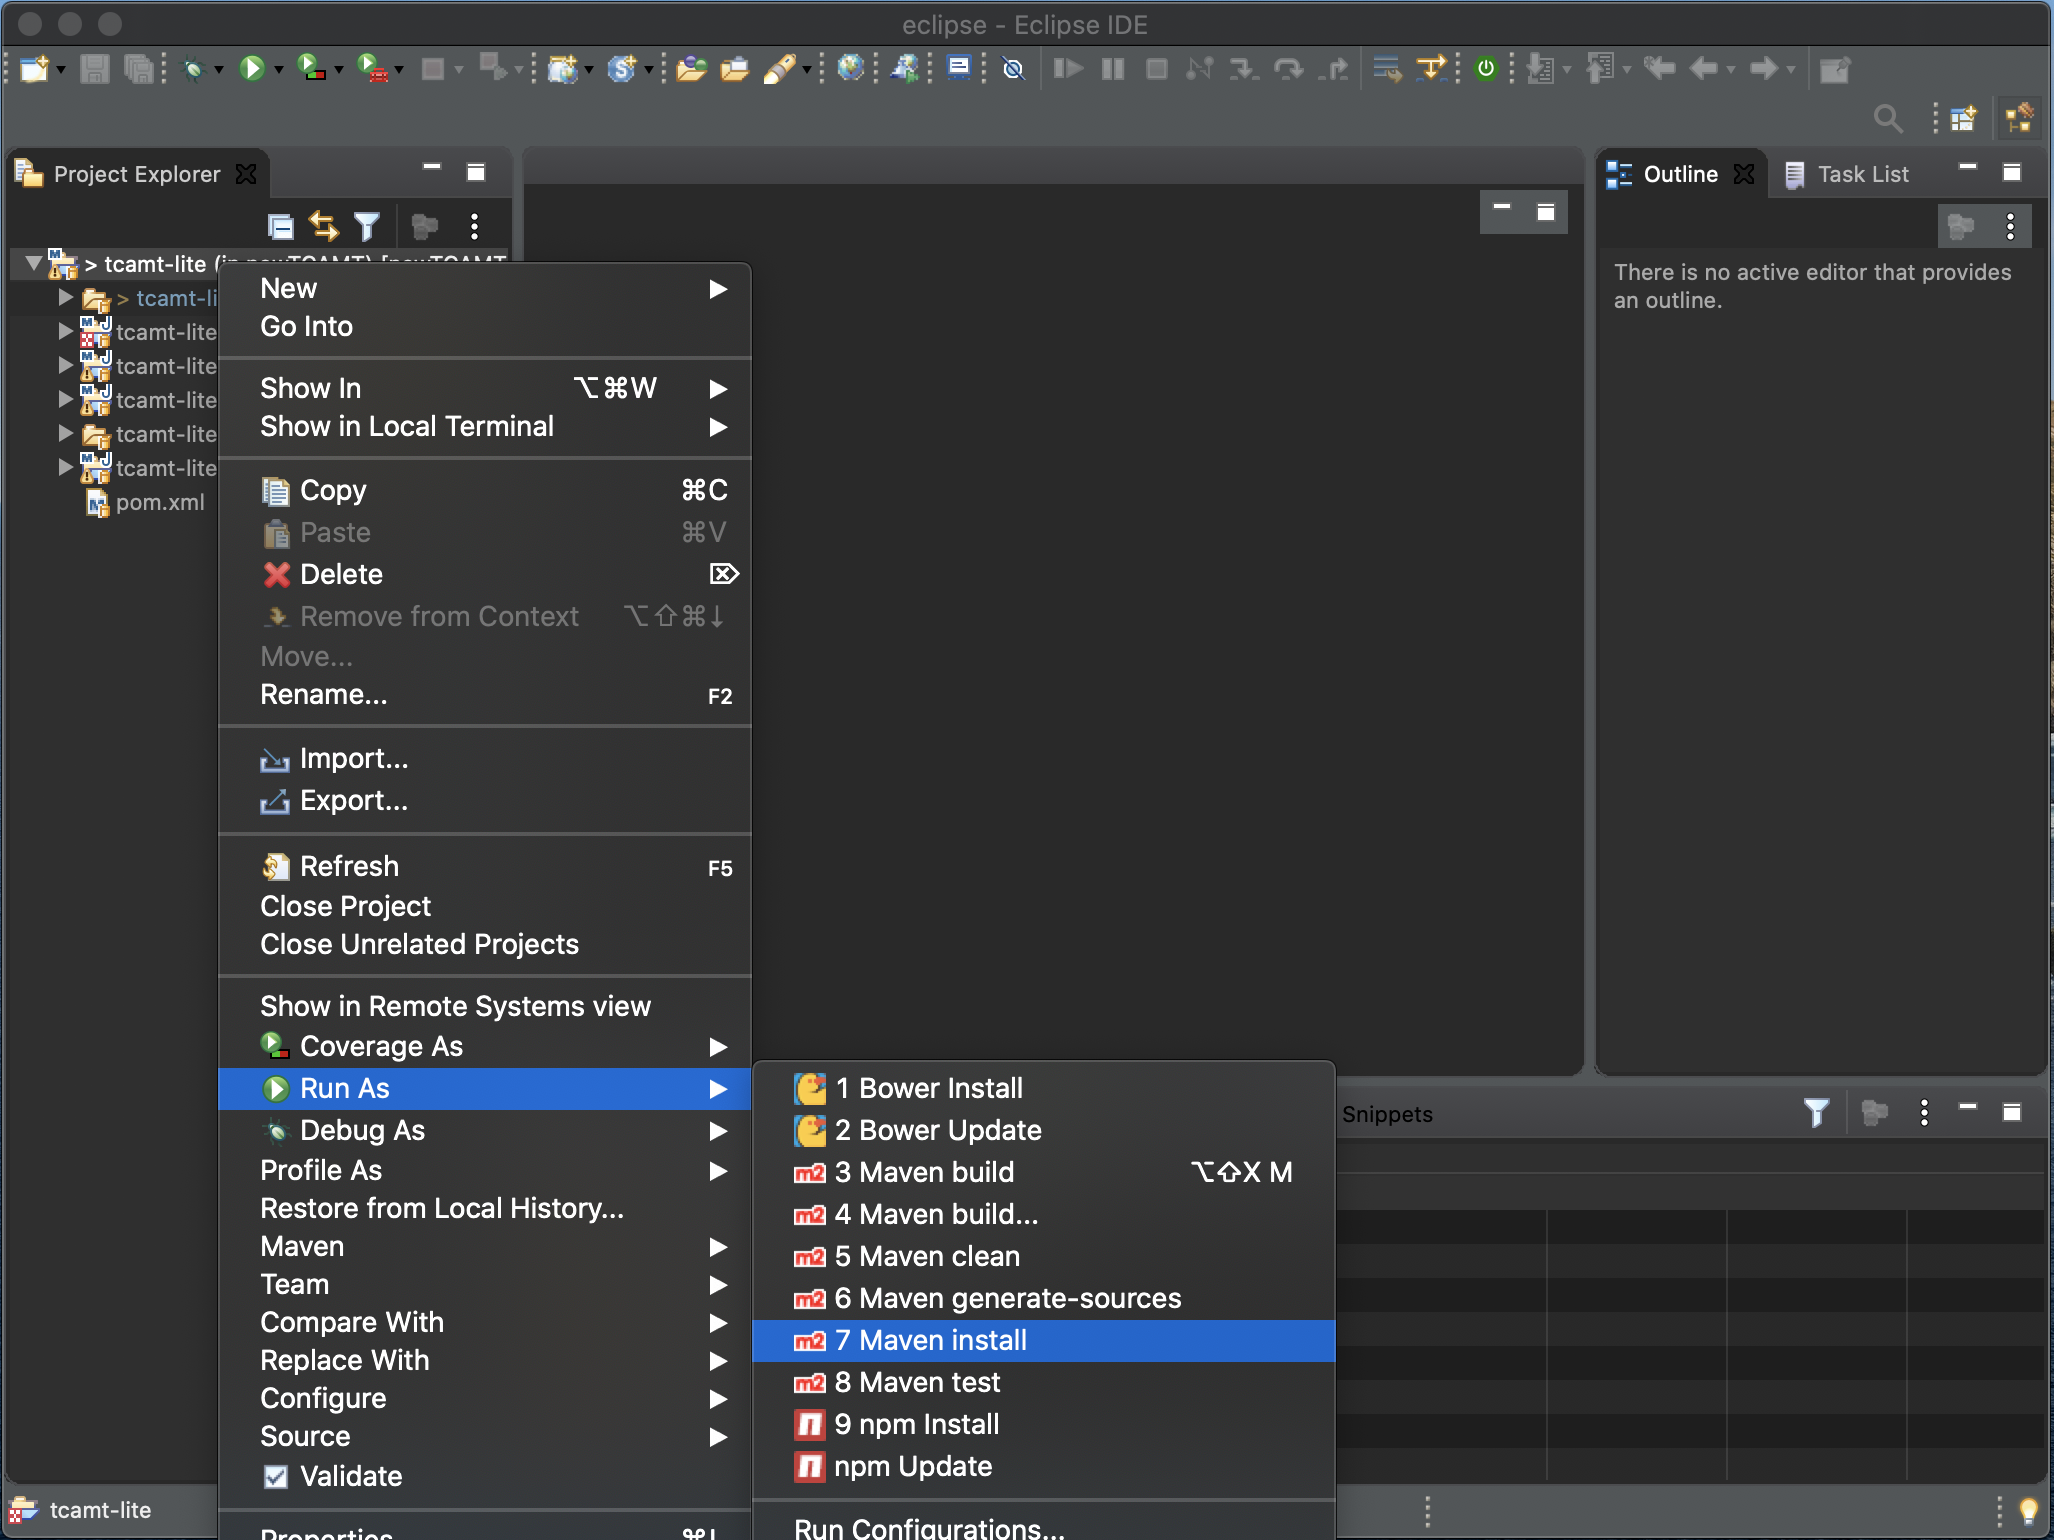
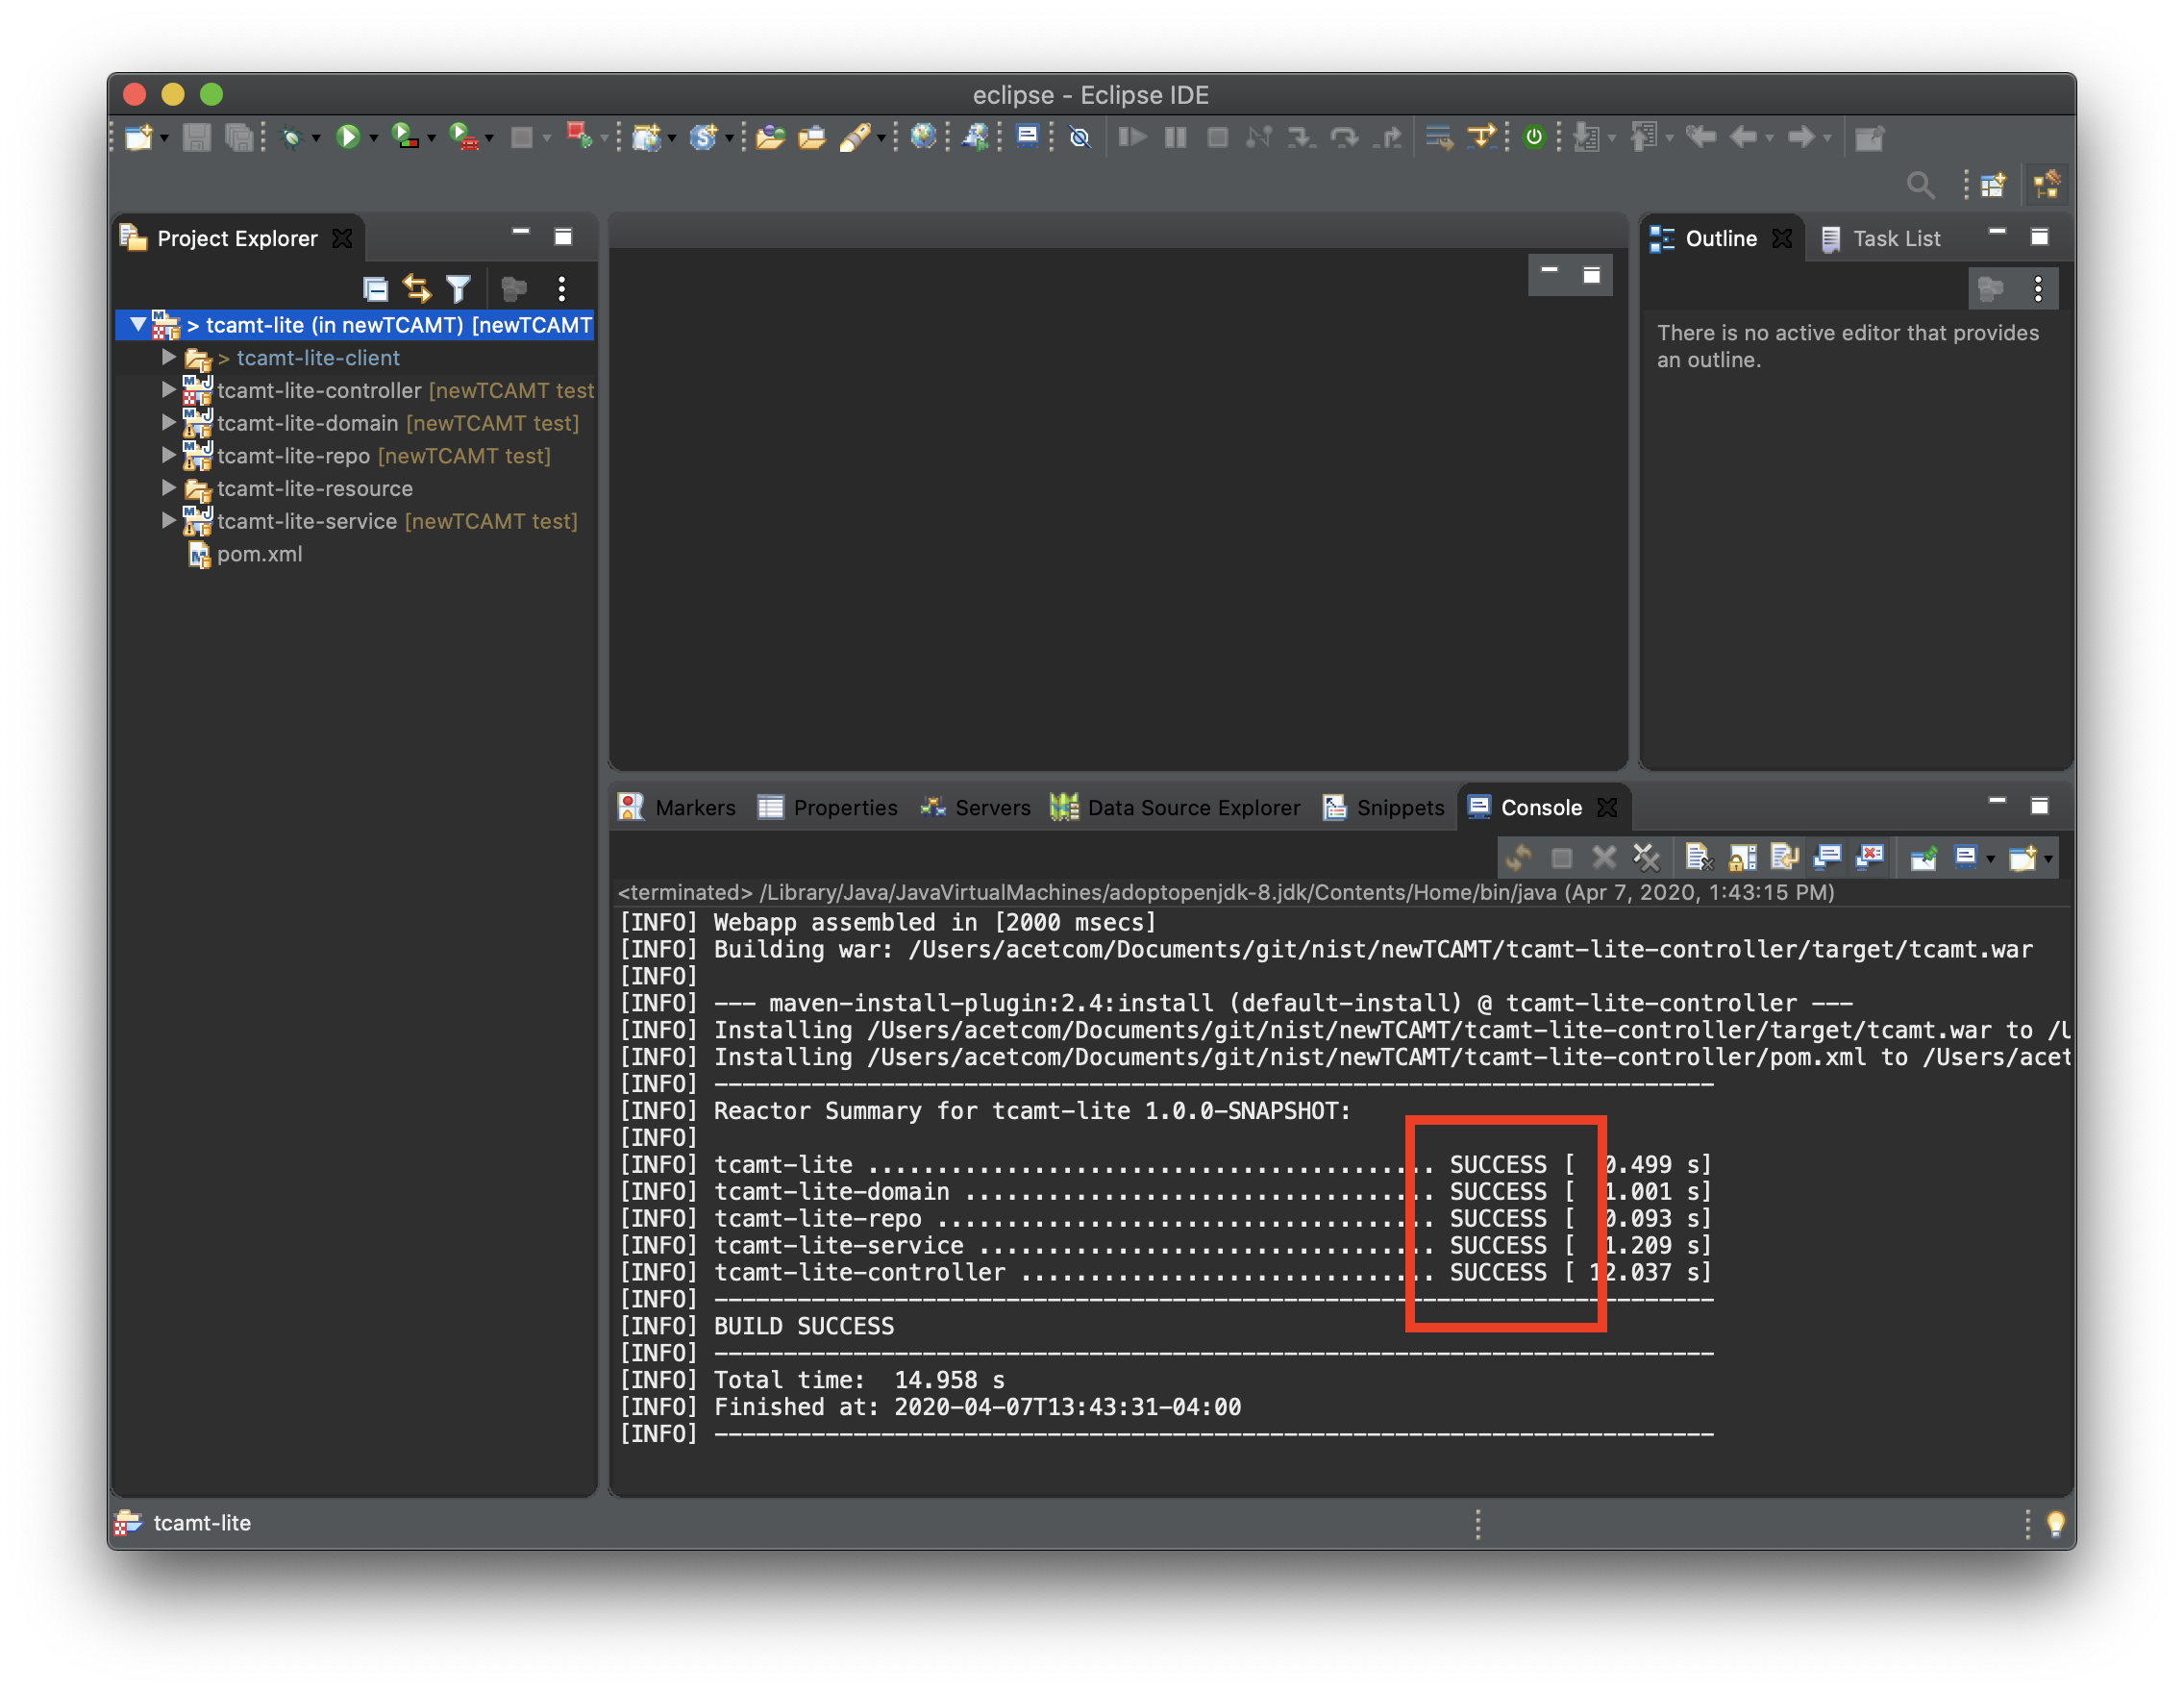
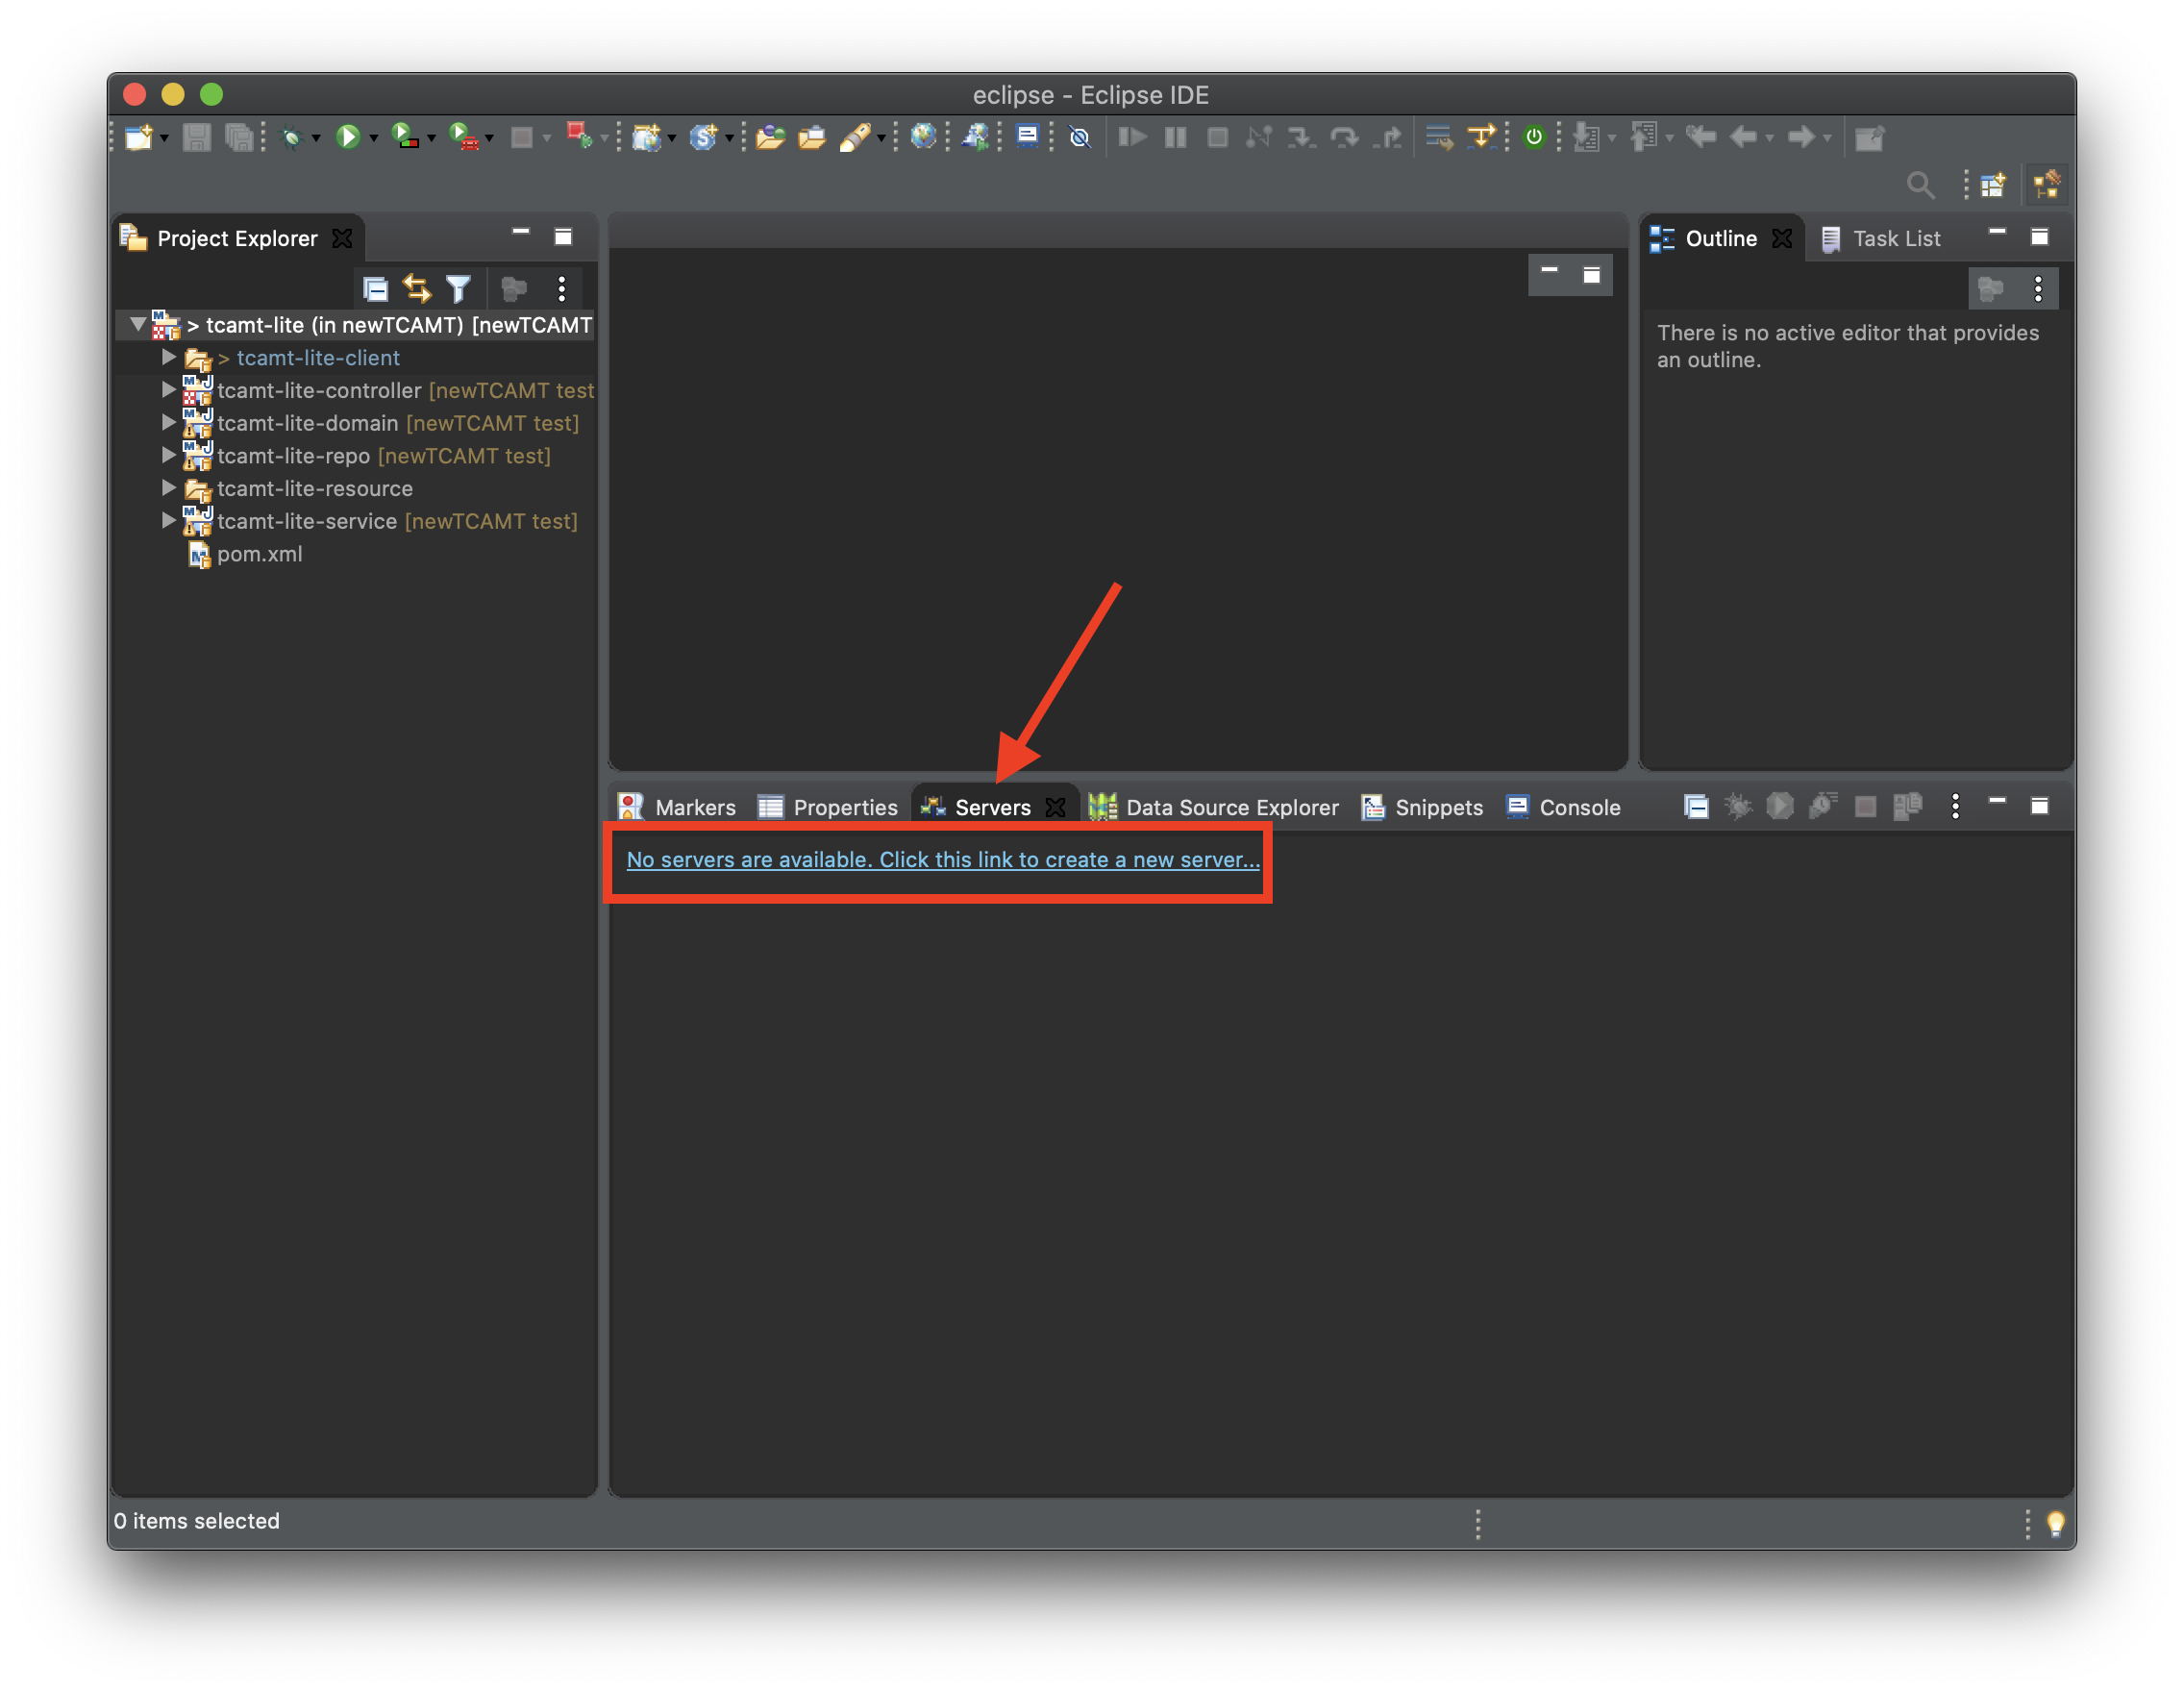
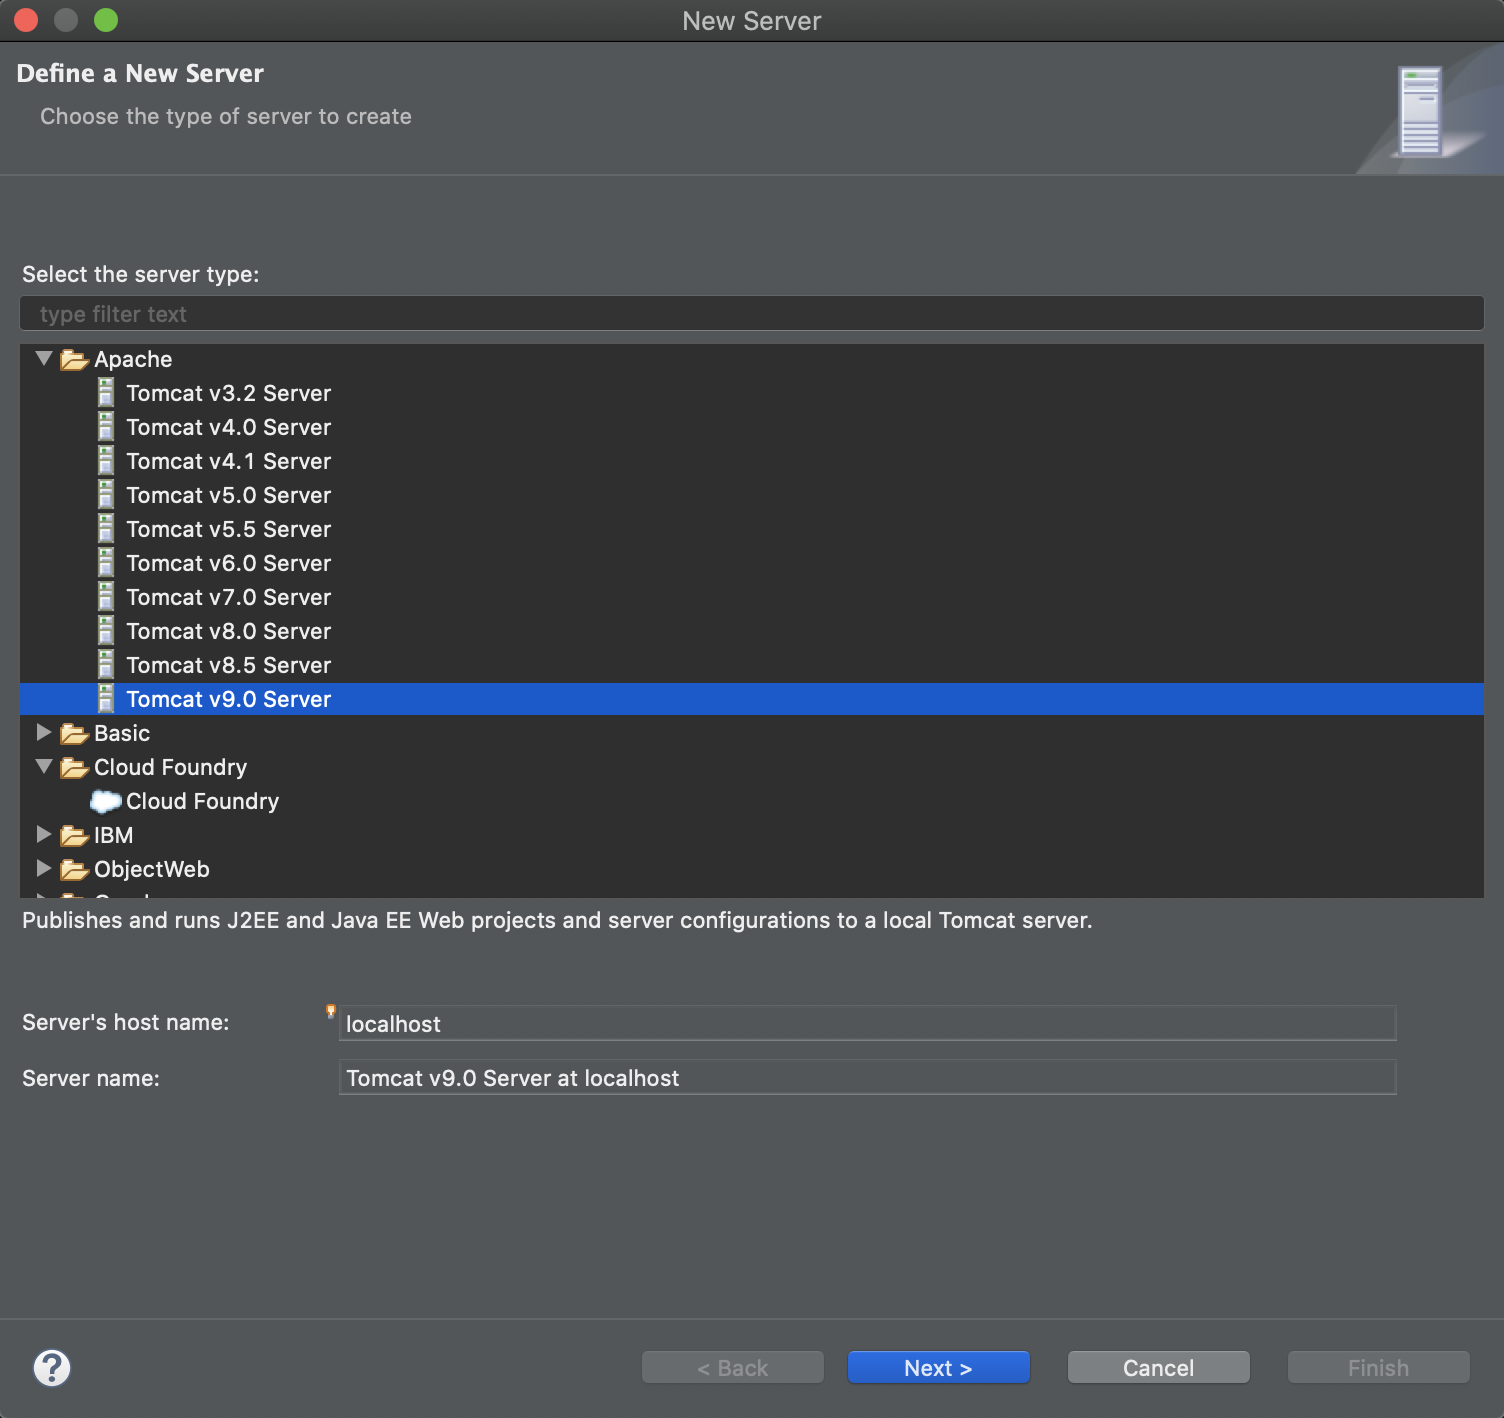
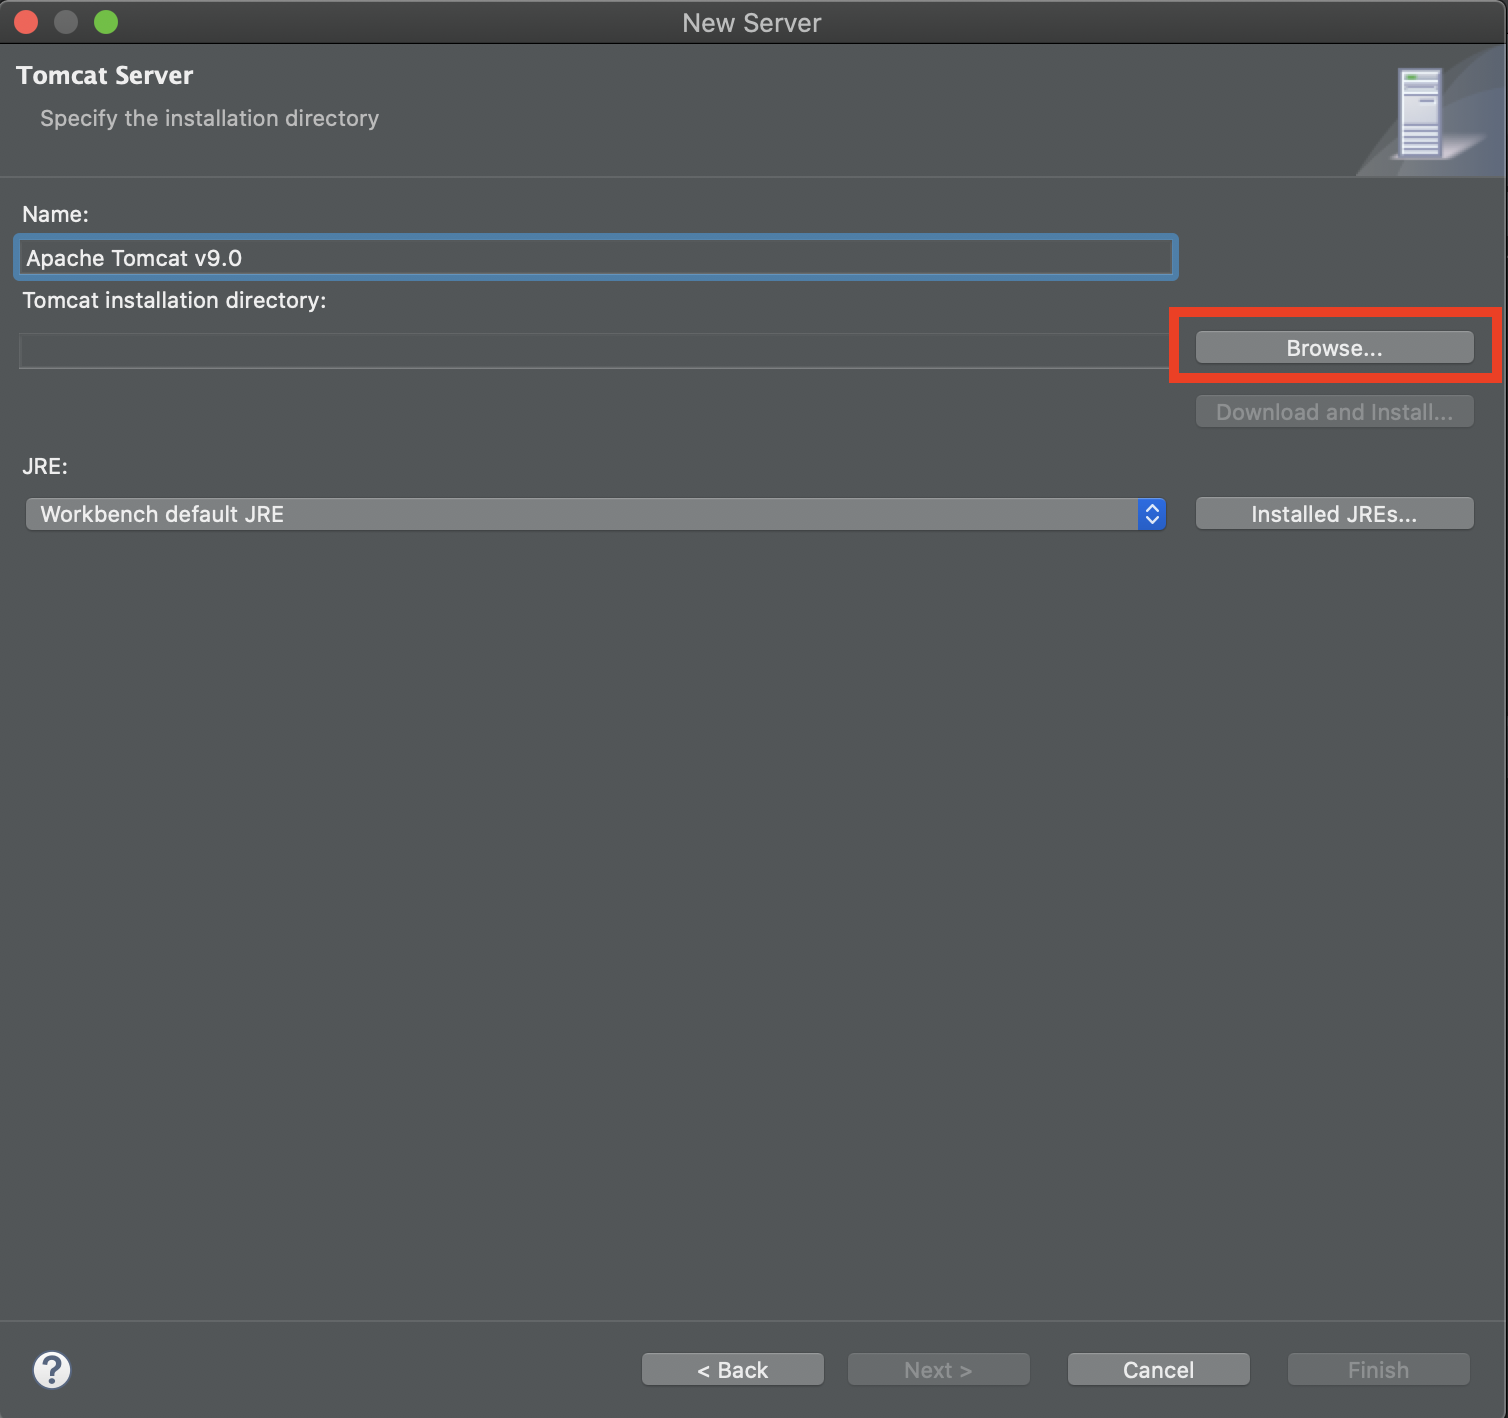
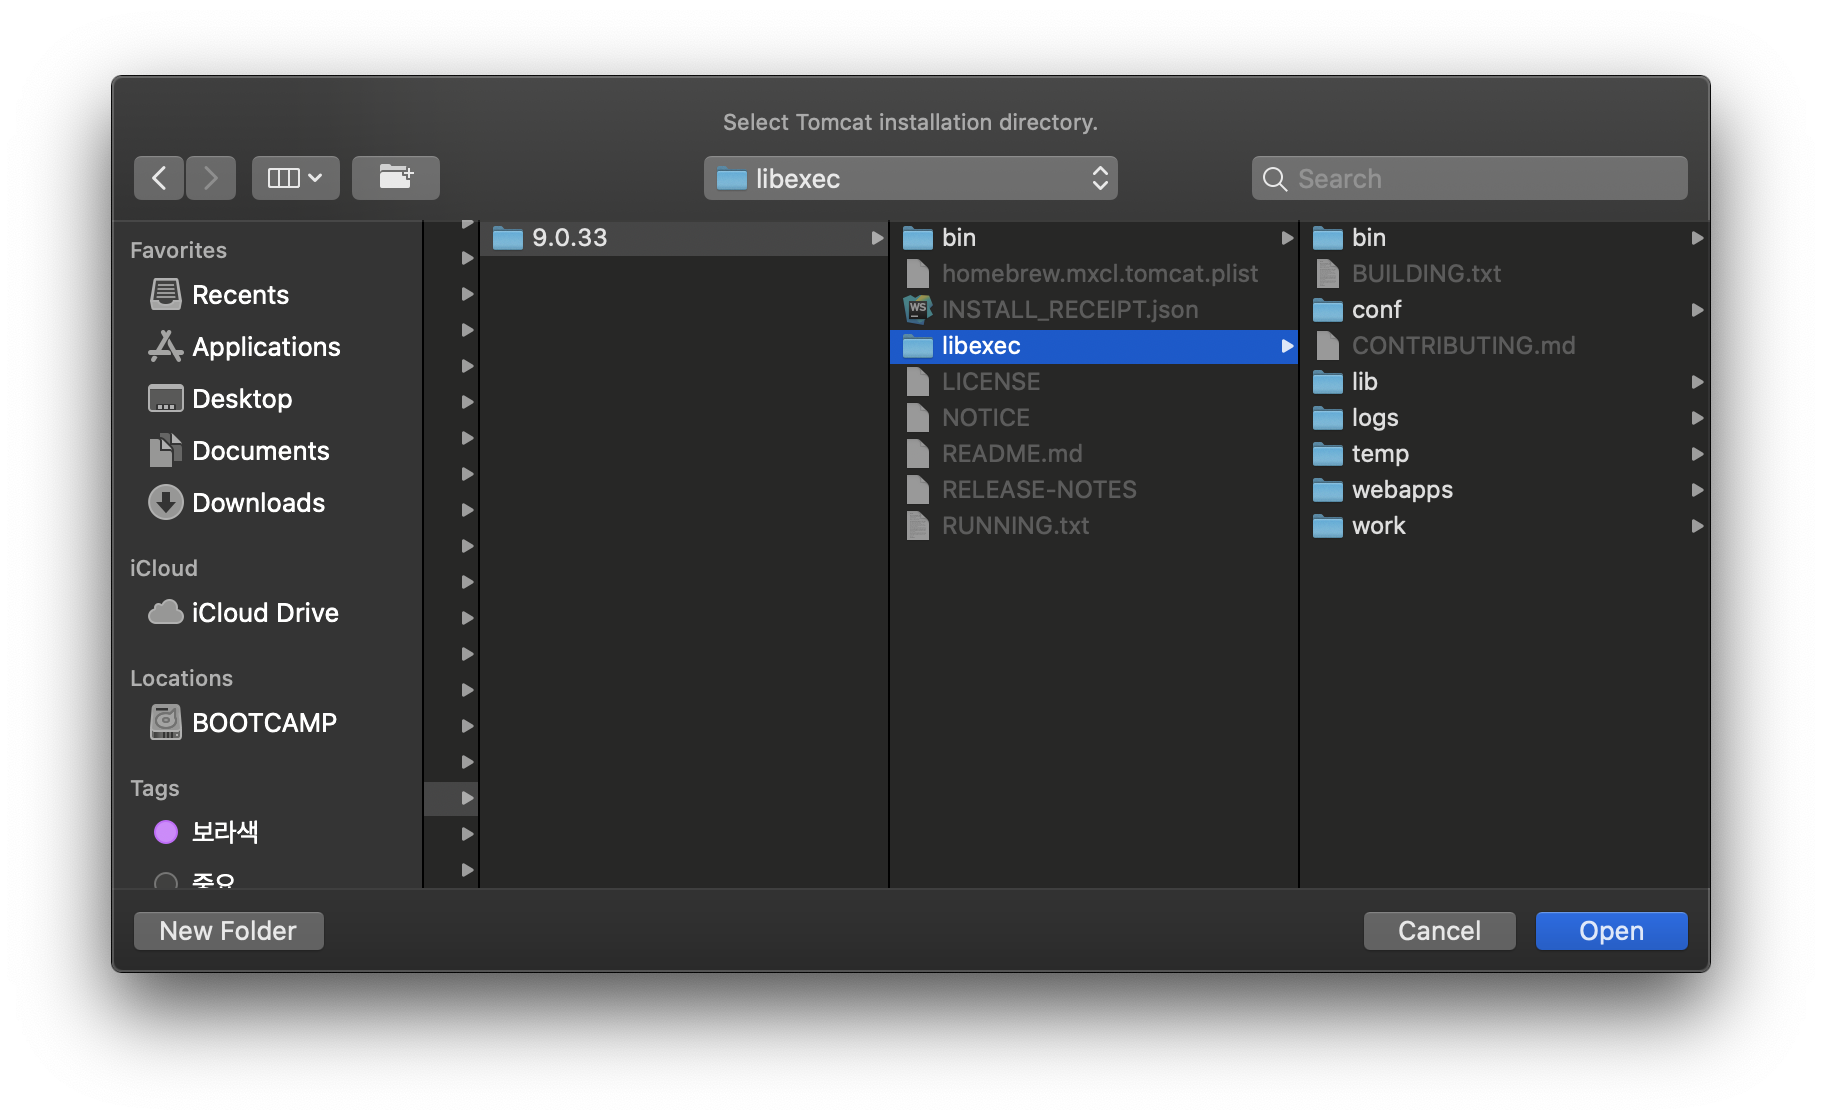
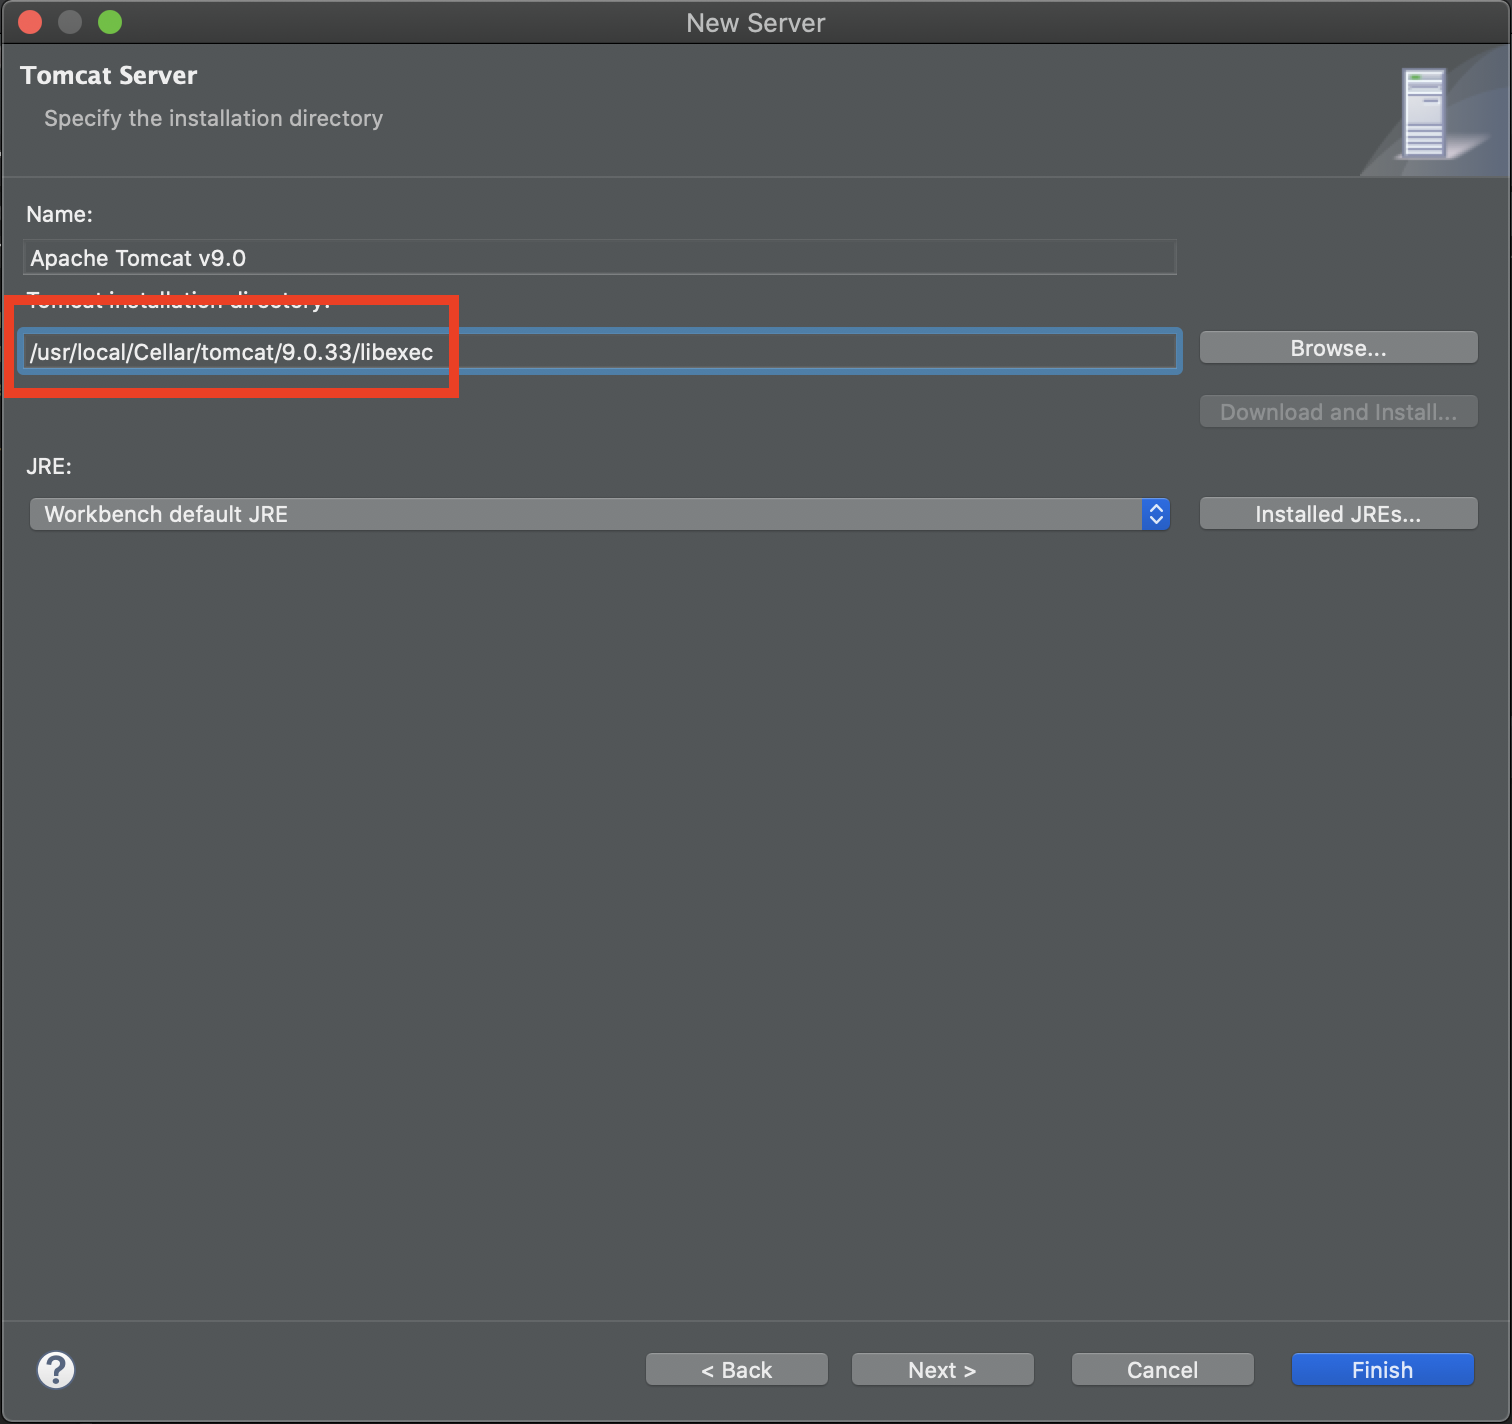
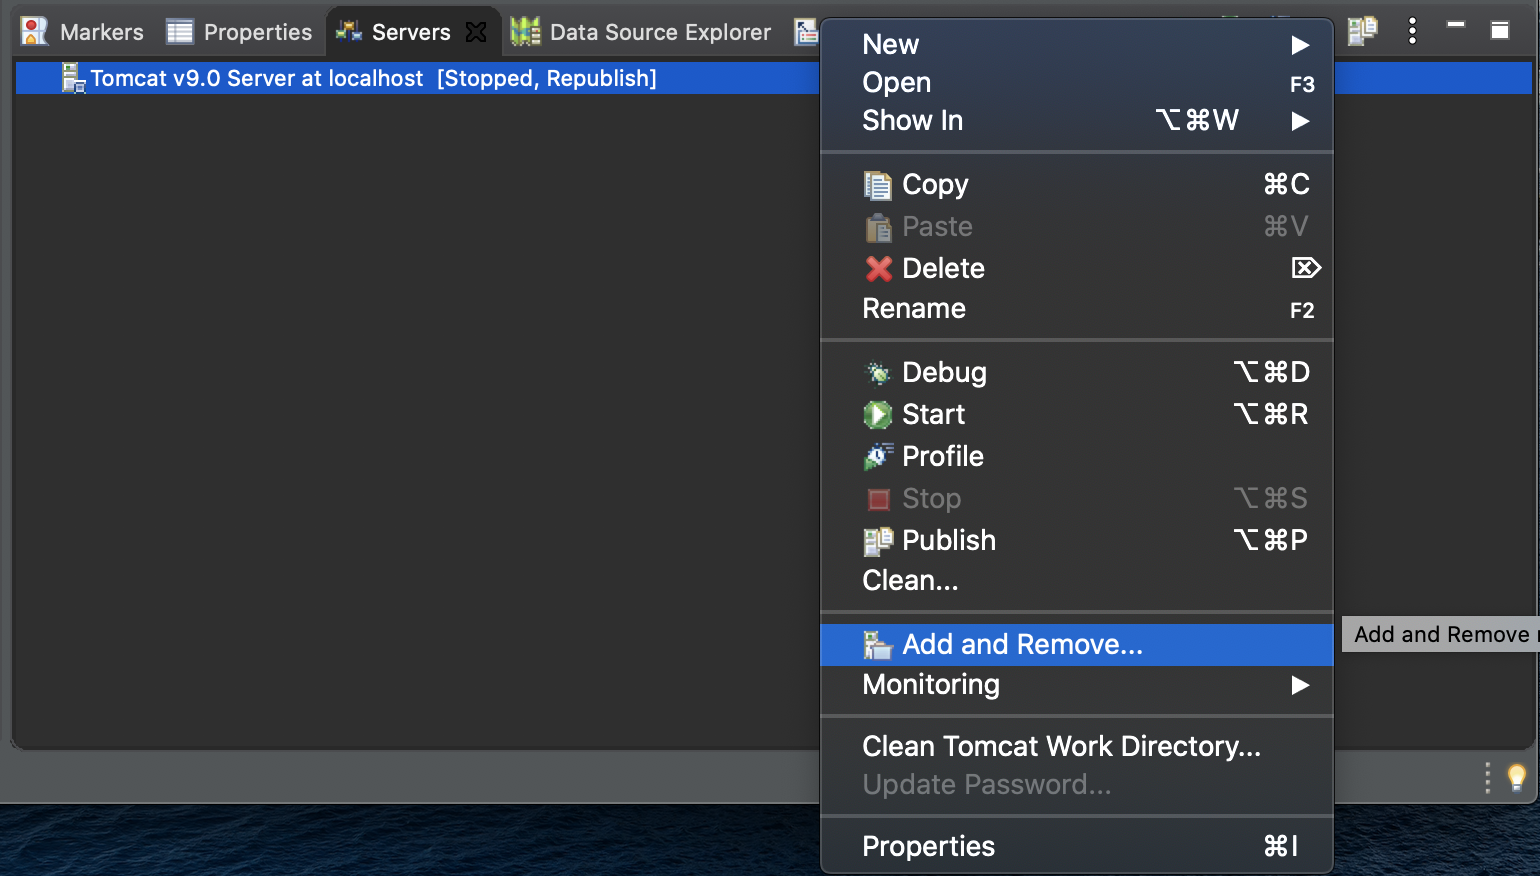
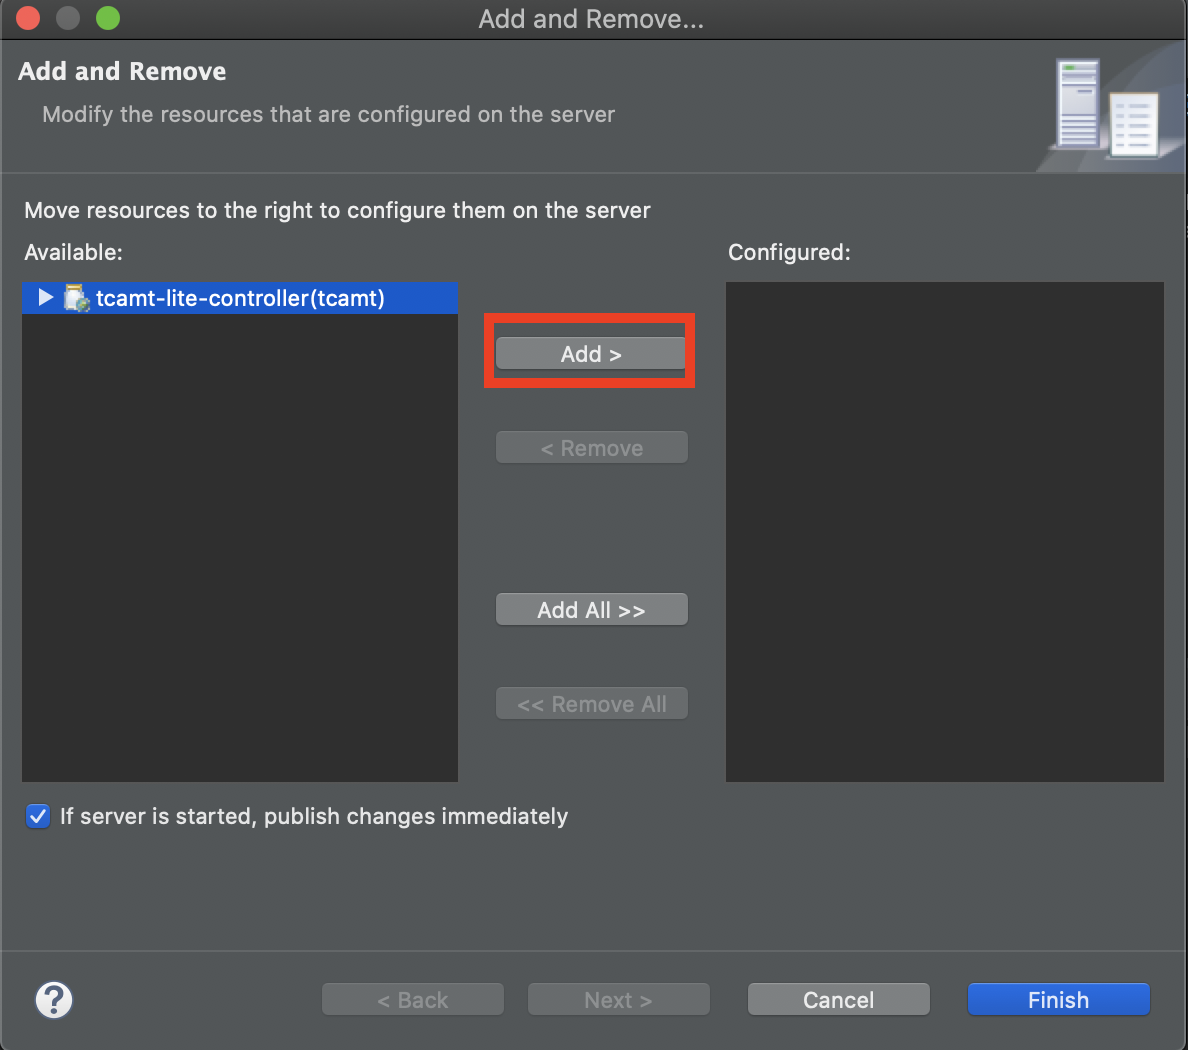
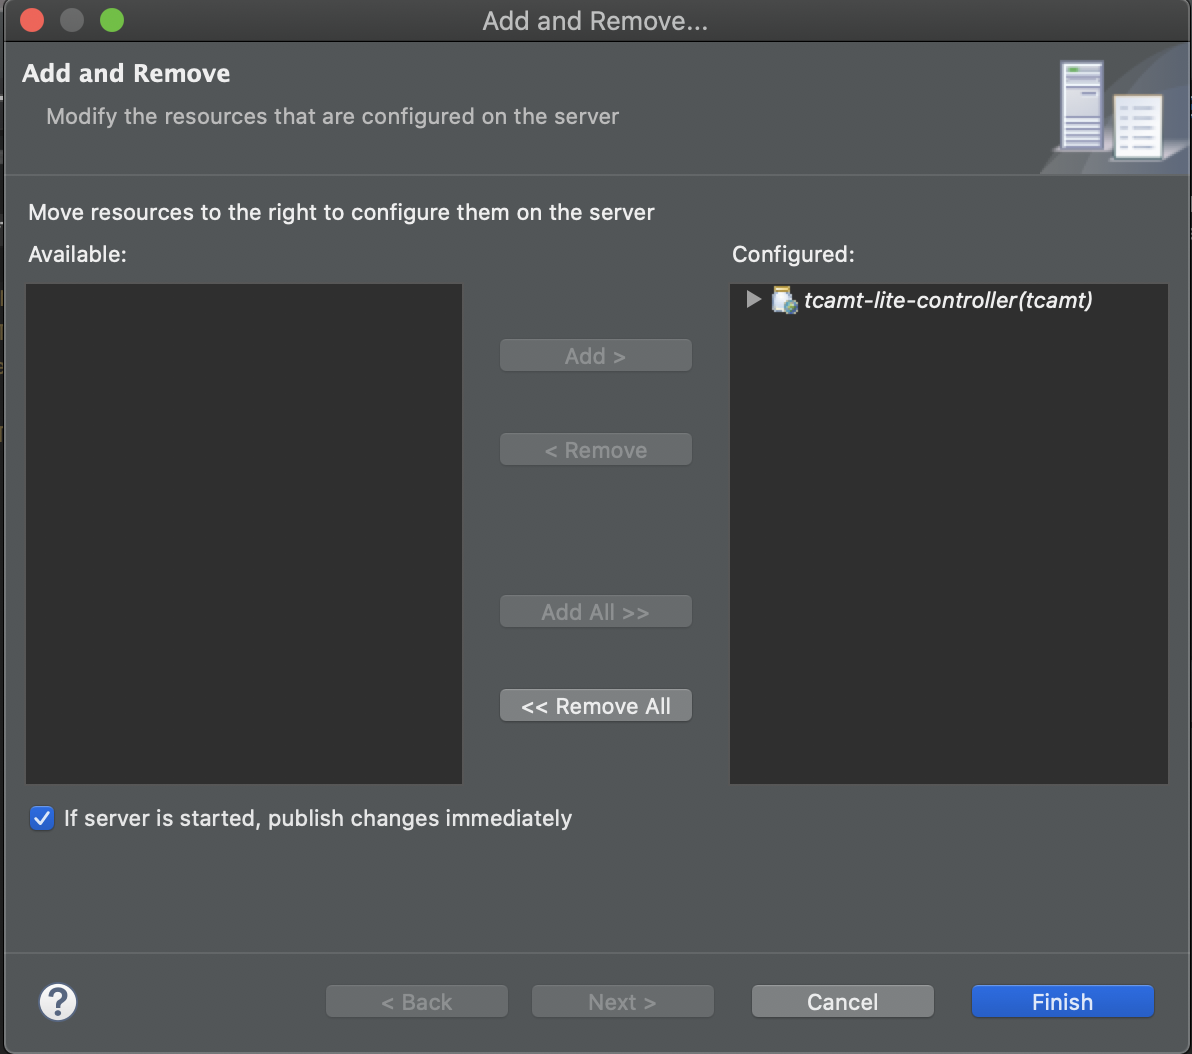
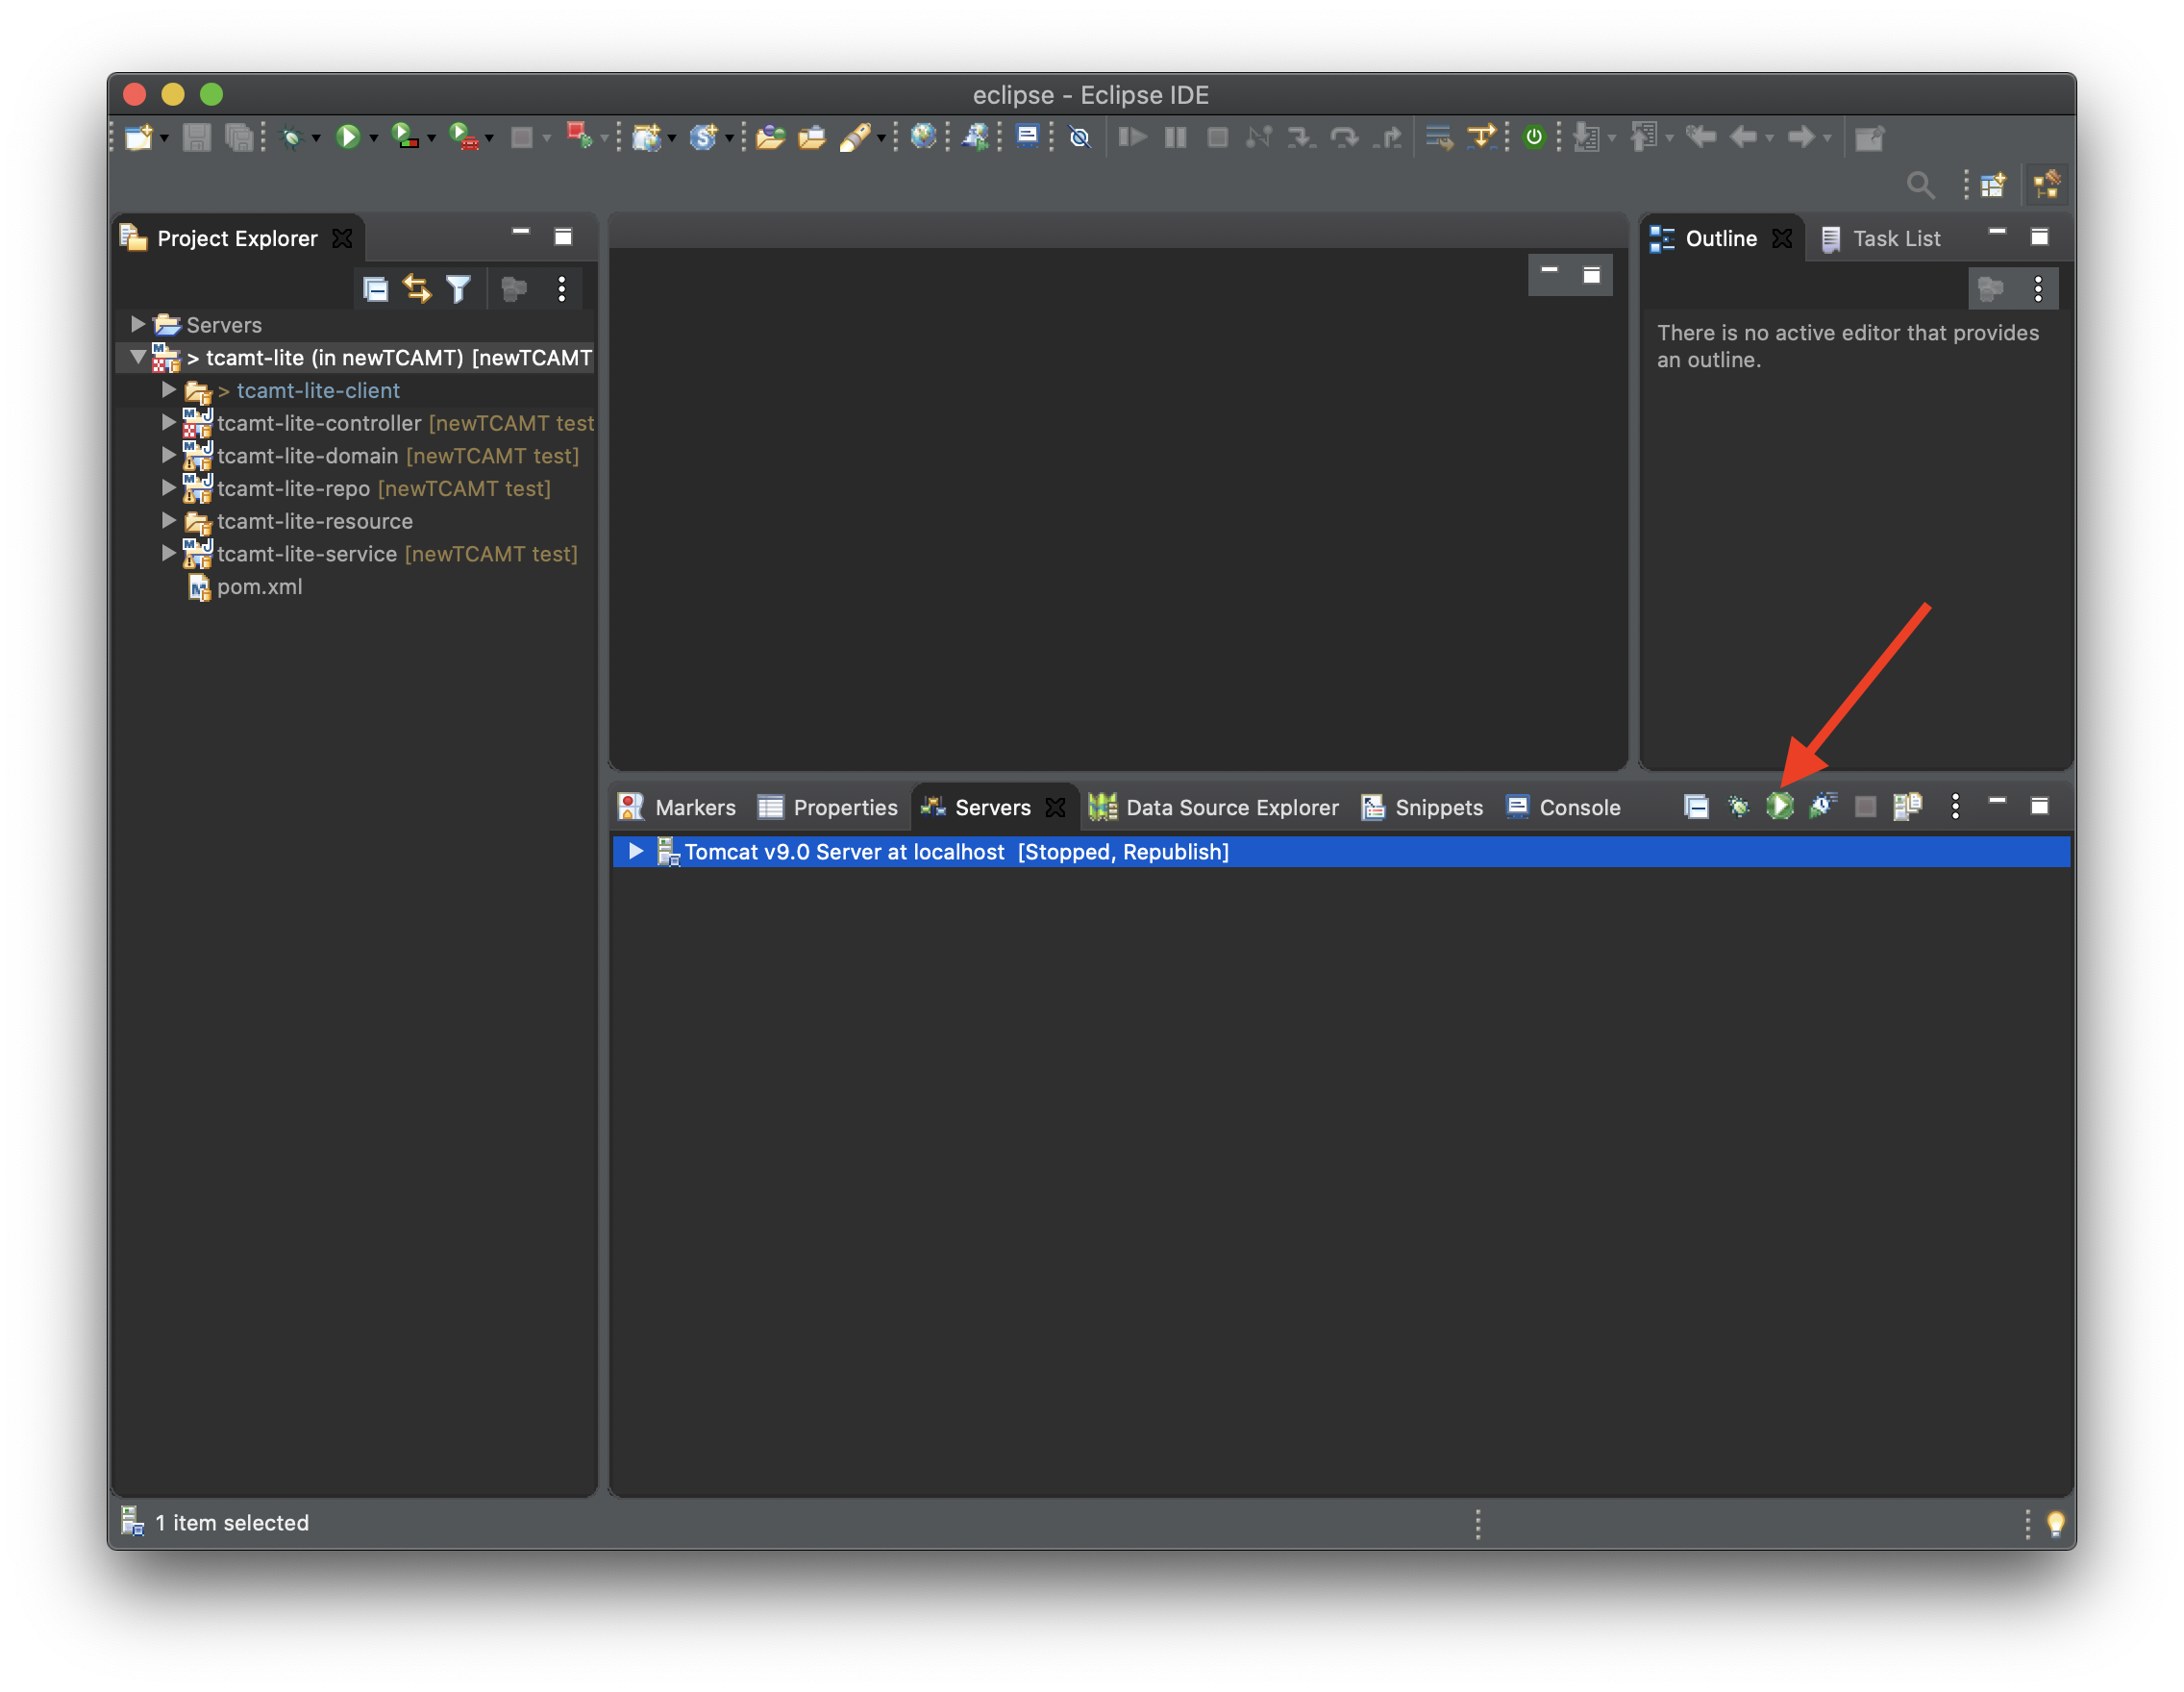
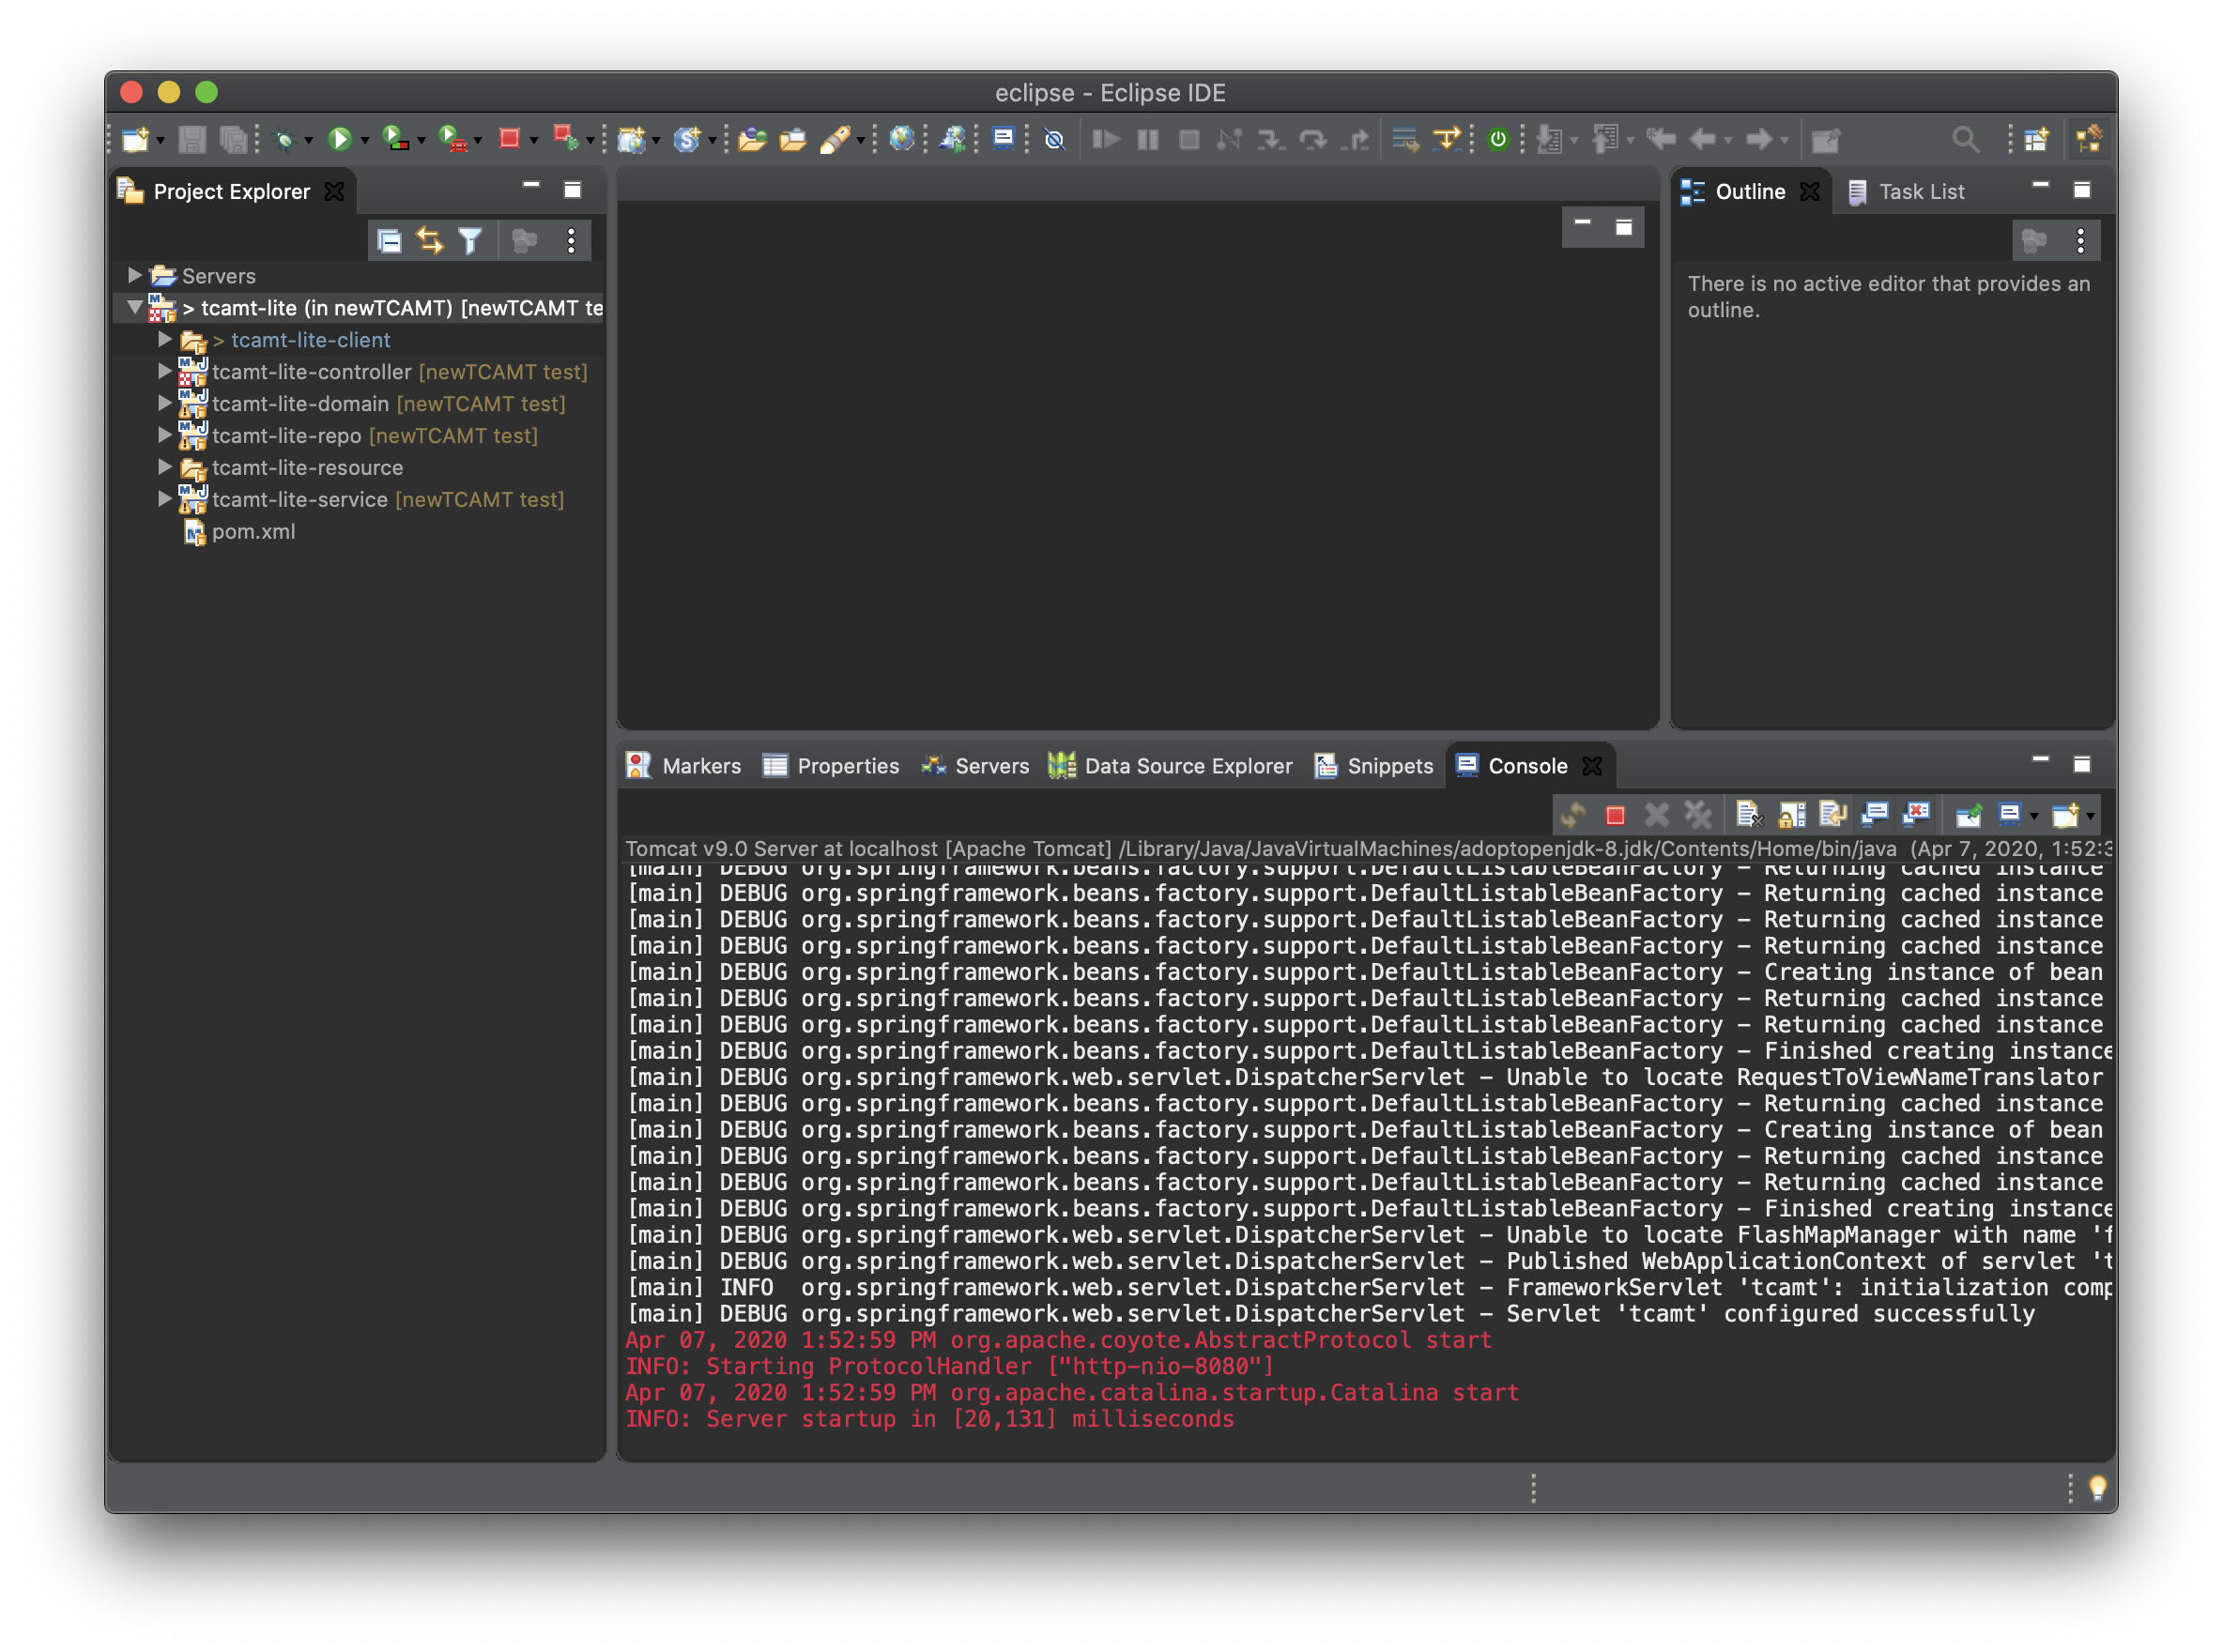
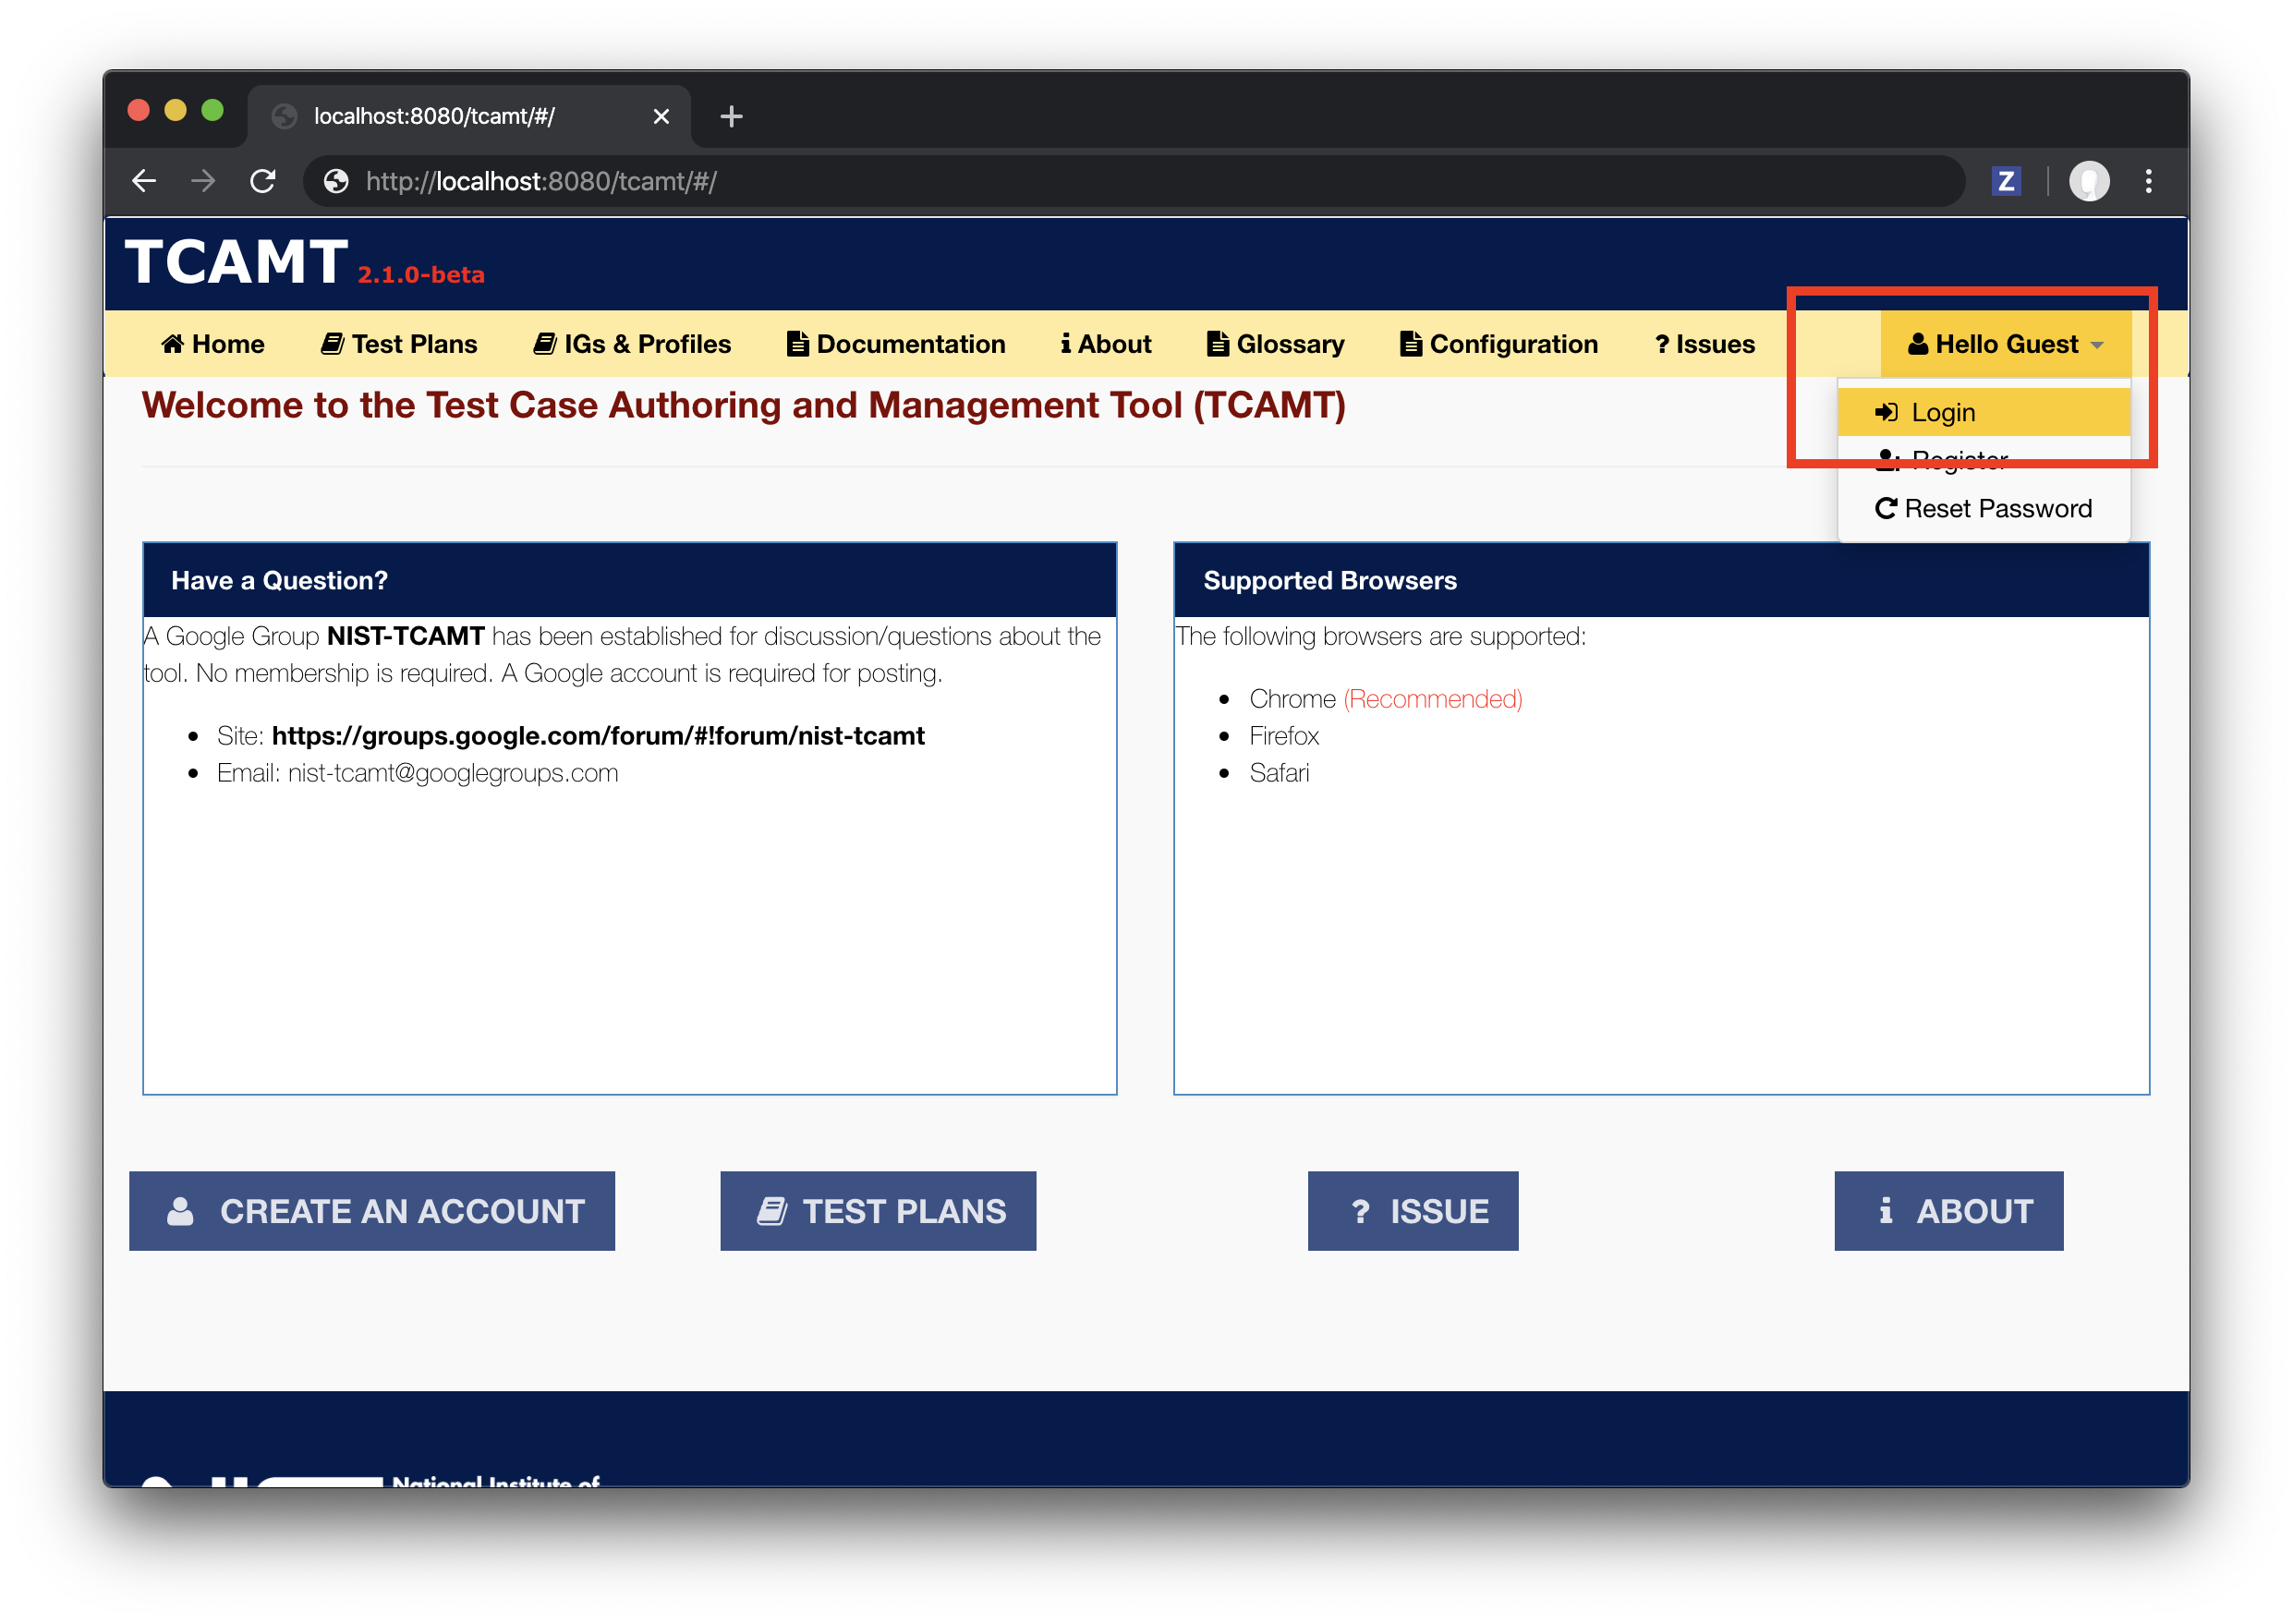
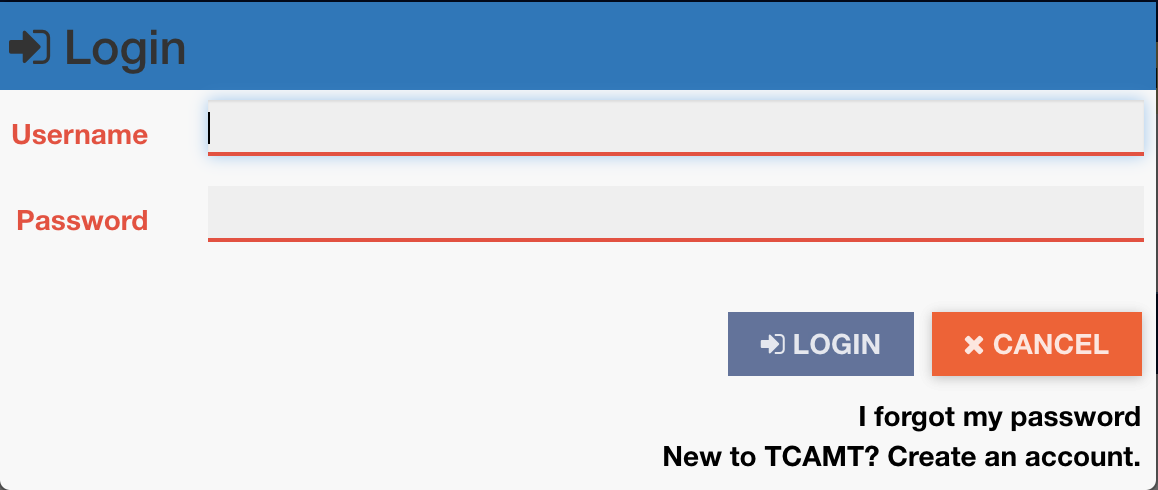
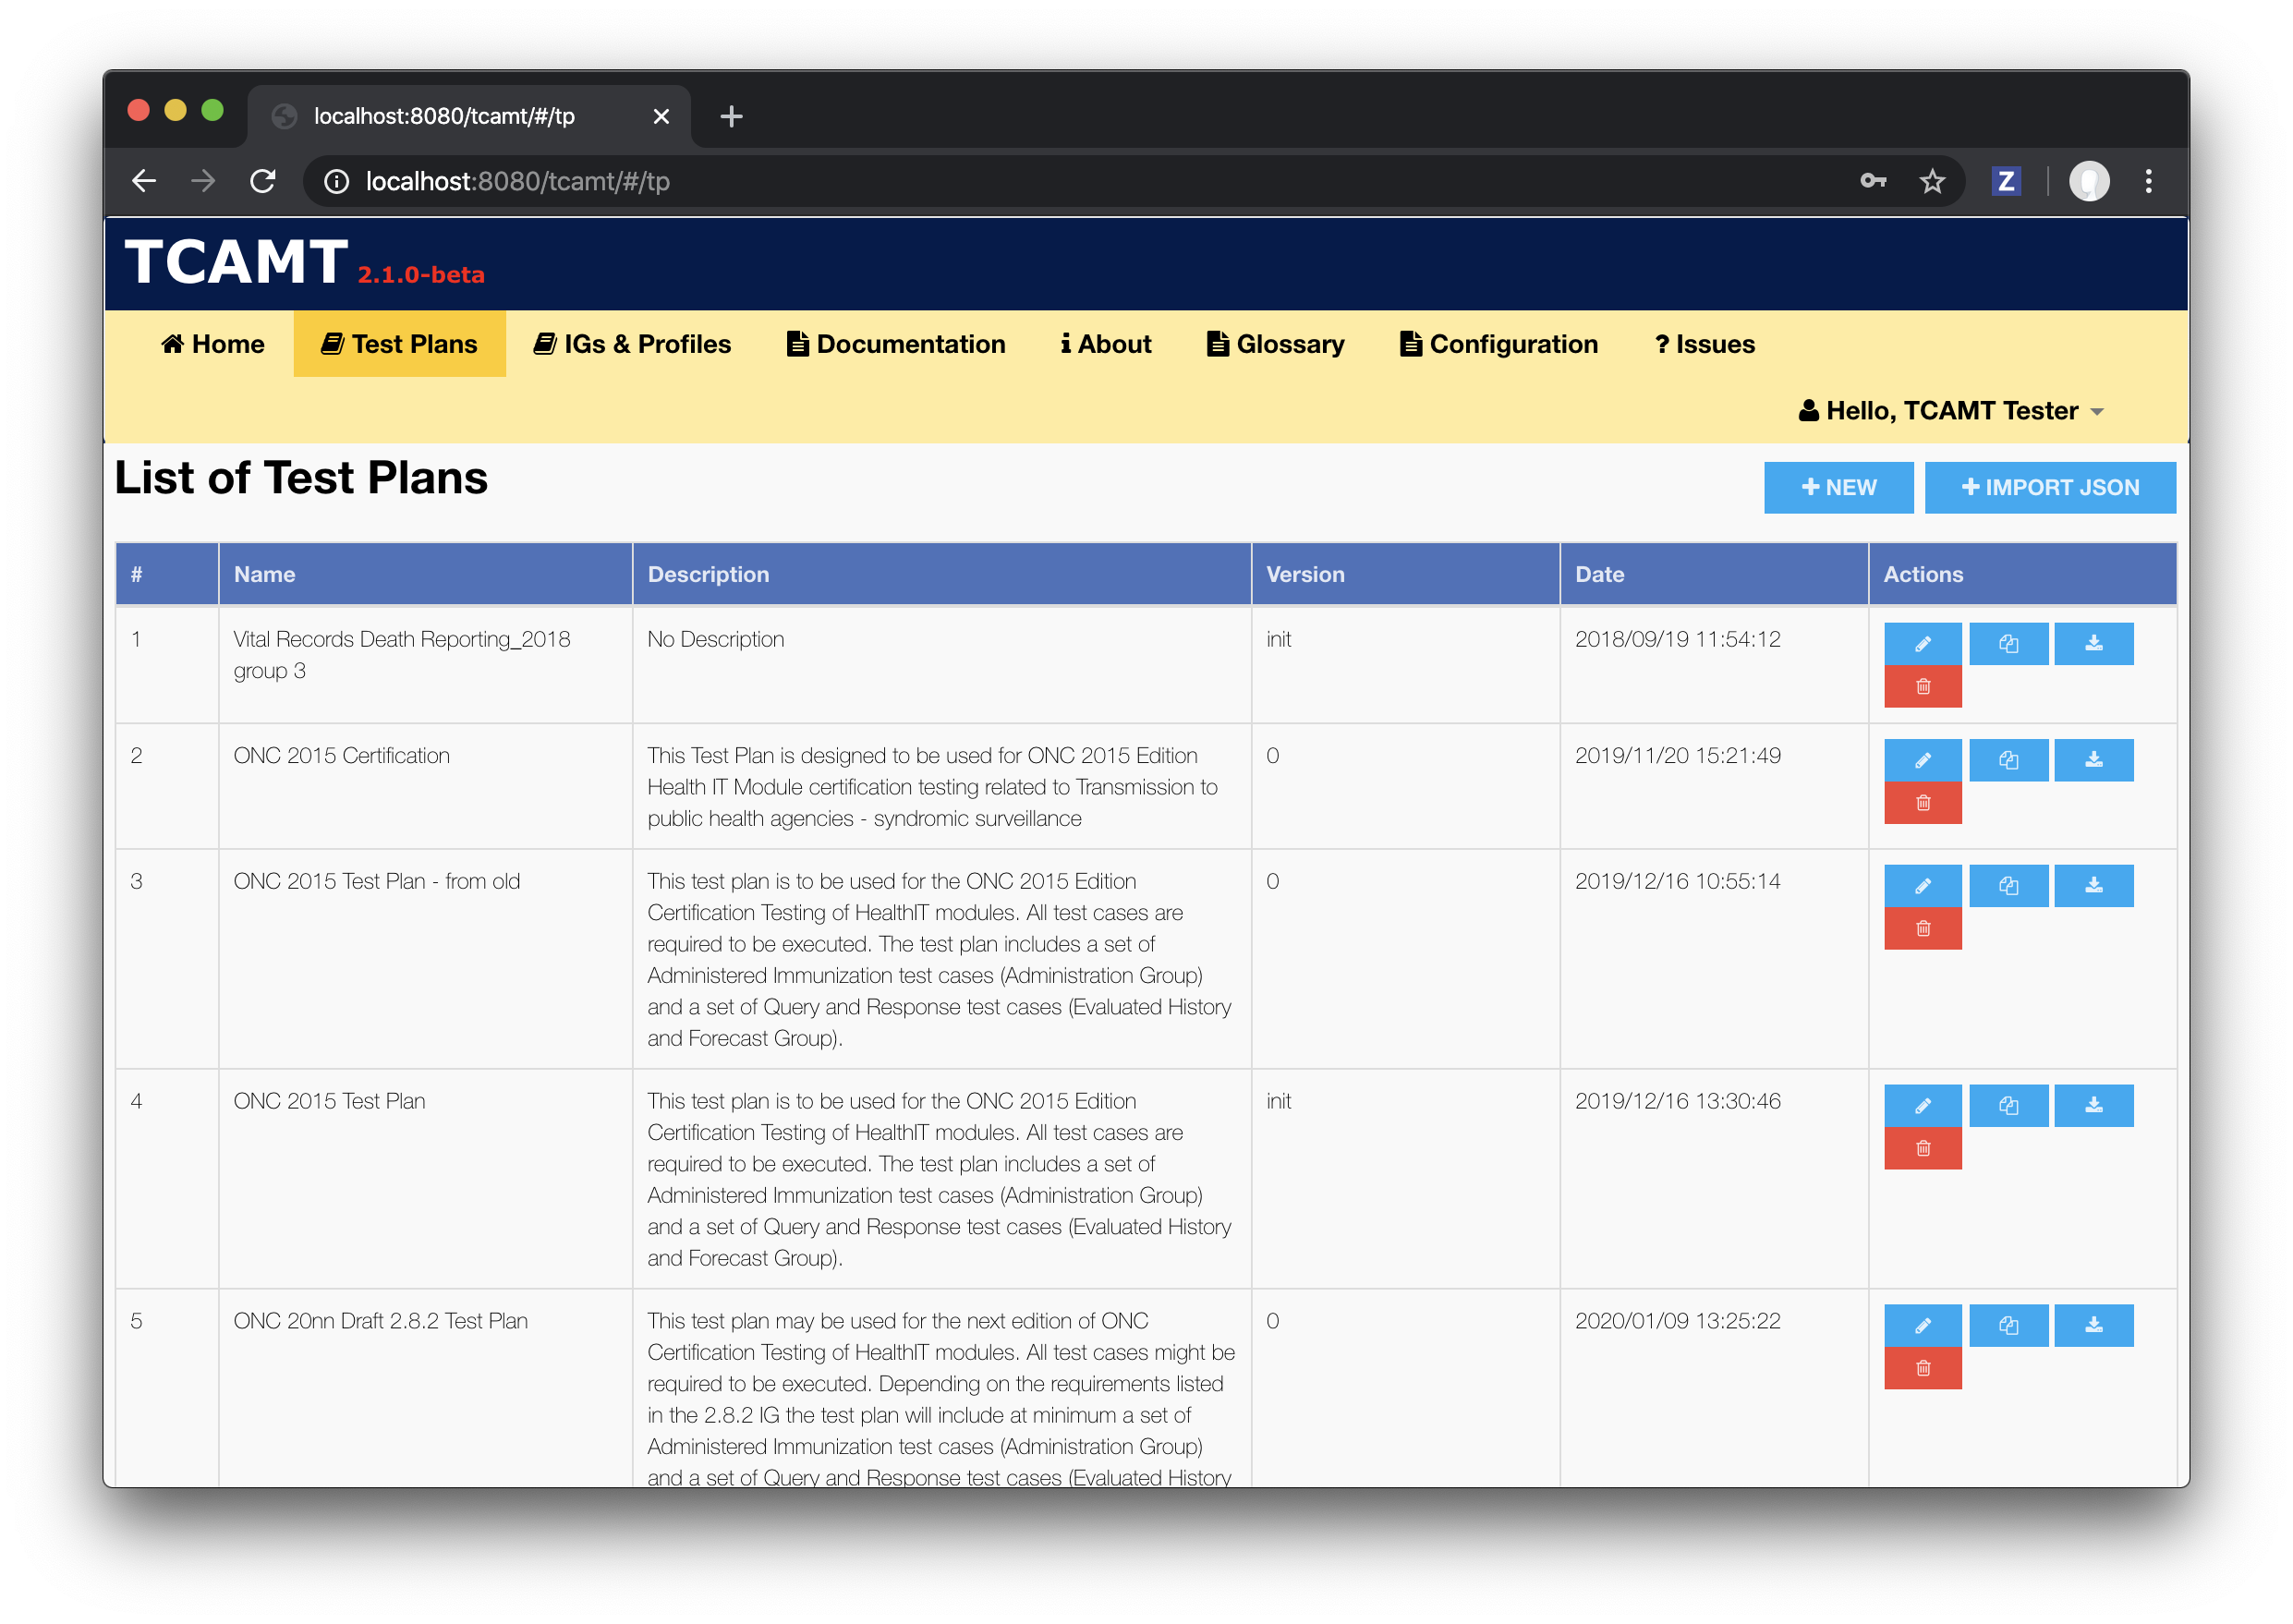
16. Go to http://localhost:8080/tcamt using your web browser.
$ brew services stop [email protected]
$ brew uninstall [email protected]
$ rm -Rf /usr/local/var/mysql
$ rm -Rf /usr/local/etc/my.cnf*
$ brew services stop [email protected]
$ brew uninstall [email protected]
$ brew uninstall tomcat
$ brew uninstall maven
$ brew cask uninstall adoptopenjdk8
$ brew cask uninstall eclipse-jee
$ rm -Rf ~/.eclipse
$ rm -Rf ~/.m2
$ rm -Rf eclipse-workspace