ESPHome configuration example to create an animated clock using the Neopixel 60 LED ring.
- "Loading" animation while initializing
- Works with (almost) any LED strip length
- Fading animations for all hands when switching
- Slowly fading tail behind the second hand
- Overlapping (additive) hand colors
- Settings
- Disable second hand
- Show hour indicators
- Create a new ESPHome configuration YAML file
- Customize the basic device configuration (Board, Wi-Fi, etc.) to your liking
- Add the contents of esphome_neopixel_clock_effect.yaml to the file
- Customize the fields in the
substitutionspart at the top
- Customize the fields in the
- Add the
clock.hfile from clock.h to theincludefolder of your ESPHome configuration - Add the contents of the
secrets.yamlfile to your ESPHome secrets file- Customize the Wi-Fi and NTP settings to your liking
- Upload the configuration to your ESP device
- Checkout the ESPHome documentation if you are new to ESPHome
- Optional: Take a look at esphome-deployment to automate ESHome device deployments without the need for Home Assistant Add-Ons or ESPHome Dashboard
- Create your watchface
- Print a paper watchface, or
- 3D print a case
- Deploy and enjoy!
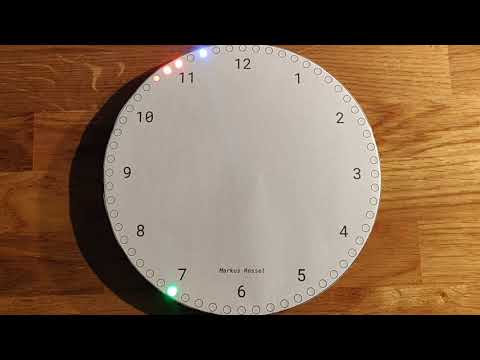
The provided Watchface.svg perfectly fits on the 60 LED NeoPixel ring. You can print this, cut it out and simply glue/tape it to the ring to create the look visible in the video above.
A simple 3D printed case can be found here: https://cad.onshape.com/documents/0e006a8827f608cb658e942e/w/b4c3cdc5ddb2e7bb623cce6a/e/1f500e2bfa3036f79058a29e?renderMode=0&uiState=697d0fb9b6af62c58ba61274

GitHub is for social coding: if you want to write code, I encourage contributions through pull requests from forks of this repository. Create GitHub tickets for bugs and new features and comment on the ones that you are interested in.
CC0 see LICENSE