Writing Your First OpenFrames Program
This tutorial gives step-by-step instructions for writing a simple OpenFrames program for execution on Windows. The code in this tutorial was built with the following tools:
- Windows 10 (version 1803, build no. 17134.228)
- CMake (version 3.10.3)
- Visual Studio 2013 (version 12.0.40629.00, update 5, which uses .NET Framework version 4.7.03056).
CMake (see CMake documentation) is a cross-platform tool that is used here to generate a Visual Studio solution .sln file. Visual Studio is then used to compile the program into an executable binary. Successful results may be possible with other versions of these tools; we will supplement the tutorial with more information as our testing expands.
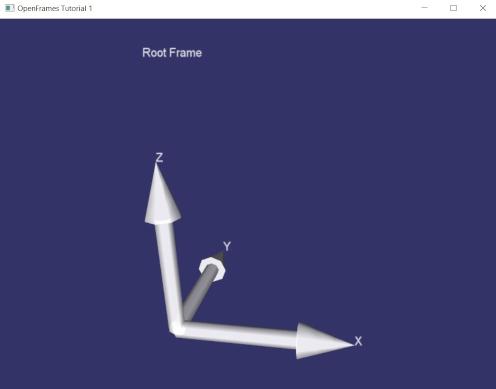
There are seven basic steps involved in making an OpenFrames program. The first step is to write a program that uses OpenFrames functionality. The short program below is an example. It draws a single Reference Frame, as shown in the image below. A Reference Frame and any associated content (e.g. geometric models, or text) is a basic component of the OpenFrames package.
/***********************************
   Copyright 2018 Ravishankar Mathur

   Licensed under the Apache License, Version 2.0 (the "License");
   you may not use this file except in compliance with the License.
   You may obtain a copy of the License at

       http://www.apache.org/licenses/LICENSE-2.0

   Unless required by applicable law or agreed to in writing, software
   distributed under the License is distributed on an "AS IS" BASIS,
   WITHOUT WARRANTIES OR CONDITIONS OF ANY KIND, either express or implied.
   See the License for the specific language governing permissions and
   limitations under the License.
***********************************/

#include <OpenFrames/FrameManager.hpp>
#include <OpenFrames/Model.hpp>
#include <OpenFrames/Sphere.hpp>
#include <OpenFrames/WindowProxy.hpp>
#include <osg/ArgumentParser>
#include <osgDB/FileNameUtils>

/////////////////////////////////////////////
//
//  Tutorial 1 - Drawing a reference frame.
//
/////////////////////////////////////////////

int main()
{
  // Create the window interface.
  unsigned int x = 30, y = 30;
  unsigned int winWidth = 800, winHeight = 600;
  unsigned int numRows = 1, numCols = 1;
  osg::ref_ptr<OpenFrames::WindowProxy> myWindow = new OpenFrames::WindowProxy( x, y, winWidth, winHeight, numRows, numCols );

  // Make a reference frame.
  OpenFrames::ReferenceFrame* myRoot = new OpenFrames::ReferenceFrame( "Root Frame" );
  myRoot->setPosition( 0.0, 0.0, 0.0 );

  // Make a frame manager for the scene.
  osg::ref_ptr<OpenFrames::FrameManager> myFrmMgr = new OpenFrames::FrameManager;
  myFrmMgr->setFrame( myRoot );

  // Place the scene at a specified location.
  myWindow->setScene( myFrmMgr, 0, 0 );

  // Set the window's name (optional).
  myWindow->setWindowName( "OpenFrames Tutorial 1" );

  myWindow->startThread();  // Start window animation.
  myWindow->join();         // Wait for window animation to finish.

  return 0;
}
The short length of the example file gives an idea of OpenFrames ease-of-use.
For reasons discussed further below, it is convenient to place the code for a standalone OpenFrames application into a folder of its own. Here that has been done by placing the file Tutorial1.cpp in a folder called [OF_FOLDER]\Demos\CPP\Tutorial1\.
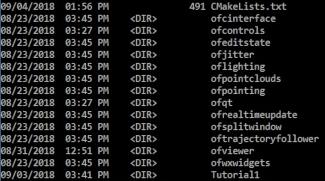
In addition to the source-code file, a file named CMakeLists.txt should be placed in the folder. There is one such file in all of the folders in [OF_FOLDER]\Demos\CPP\. For the most part, these files only differ by a single SET assignment line, shown here:

The name of the folder should be put in the place where Tutorial1 appears above. This specification is used by the CMake application to build a separate executable from all of the others in the various folders in [OF_FOLDER]\Demos\CPP\.
In Step 4 of the overall process, CMake is used to generate a new Visual Studio solution file. As shown here.

The Generate button, circled in red, should be clicked to produce a new Visual Studio solution file. The latter will contain Tutorial1 as a distinct project.
The new solution file will be located in whatever folder has been specified to CMake in the Where to build the binaries line, as can be seen in the above figure. It will be named OpenFrames.sln. When it is opened in Visual Studio, the Solution Explorer in this case should show Tutorial1 as a distinct project.

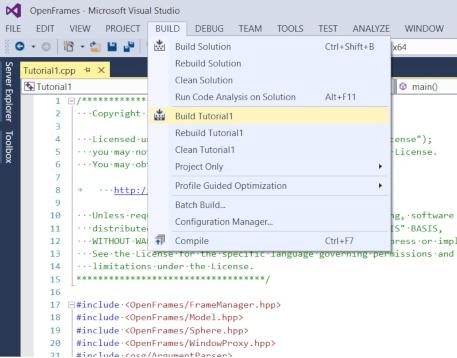
To confirm that everything is working as expected, you can open the project and build the tutorial, as show here:
When the application finishes compiling you should install the binary into the folder that holds all the executables; this is done by right-clicking on the INSTALL target and selecting Build.

The binary, Tutorial1.exe in this case, can then be found in the folder [OF_FOLDER]\OpenFrames-Windows-install\bin\ that contains all the other executables in the solution. The final step of this tutorial is to cd into that folder and run the example by typing .\Tutorial1.exe (followed by the Enter key). The first figure of this tutorial should then appear on-screen in a popup.