-
Notifications
You must be signed in to change notification settings - Fork 2
Android (Eclipse) HowTo
Prerequisites for this guide are HowTo:
In this guide, you will be covering the following topics:
- Set Up Eclipse Environment for Android
- Import sample project from Android SDK
- Run sample implementation on Emulator
- Run sample implementation on Actual Device
Note: If you have eclipse with the Android Plugin already you can skip to section 2, where there is a supplementary video that shows how to use Android Eclipse in action.
The guide concludes with running the Android sample source code from section 2 on a hardware device.
1.1 Follow HowTo Build a Java Application (in Eclipse)
Note: With this guide you can learn the basics of how to work with Eclipse projects and some of its nifty features.
The most relevant section is #1 Download, Extract and Open an Eclipse Version, and the remaining sections help to familiarize with eclipse.
To add the ADT plugin to Eclipse:
-
Start Eclipse, then select Help > Install New Software.
-
Click Add, in the top-right corner.
-
In the Add Repository dialog that appears, enter "ADT Plugin" for the Name and the following URL for the
URL:
https://dl-ssl.google.com/android/eclipse/
Note: The Android Developer Tools update site requires a secure connection. Make sure the update site URL you enter starts with HTTPS. Click OK.
-
In the Available Software dialog, select the checkbox next to Developer Tools and click Next.
-
In the next window, you'll see a list of the tools to be downloaded. Click Next.
-
Read and accept the license agreements, then click Finish.
If you get a security warning saying that the authenticity or validity of the software can't be established, click OK.
- When the installation completes, restart Eclipse.
Note: Check out Installing the Eclipse Plugin for more detail on this configuration process (or for troubleshooting).
The image below links to a video that provides an example of how to import an Android SDK sample. (CTRL + Click to open video in a new window or tab).
The steps from the video can be followed in section 2.1+
Click the icon on the Menu bar that resembles a Box (with an Android in it).

Then click "Deselect All" on the bottom center of SDK Manager, to only download the needed content.

The SDK Manager will open and you can then select "Samples For SDK" under "Android 2.3.3 (API 10)".
Note: If you do not have "Android 2.3.3 (API 10)", "SDK Platform" you will need it as well for the sample to work.

Click "Install 1 Package" on the bottom right of SDK Manager, or "Install 2 Packages" if adding "SDK Platform".

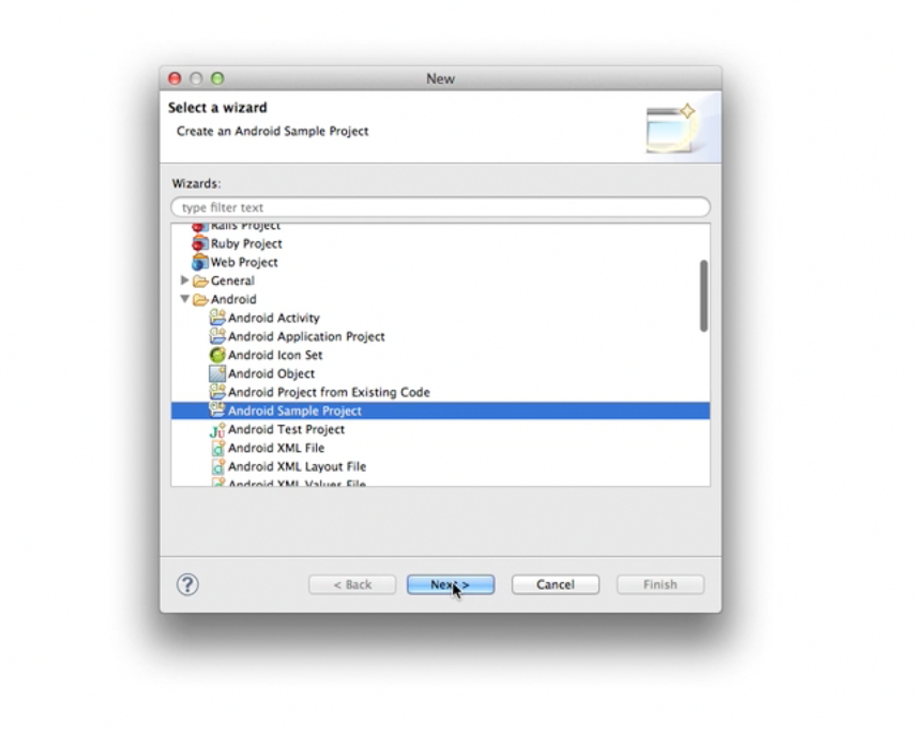
Create New Android Sample Project, under the other category

In the Wizard options select "Android Sample Project"
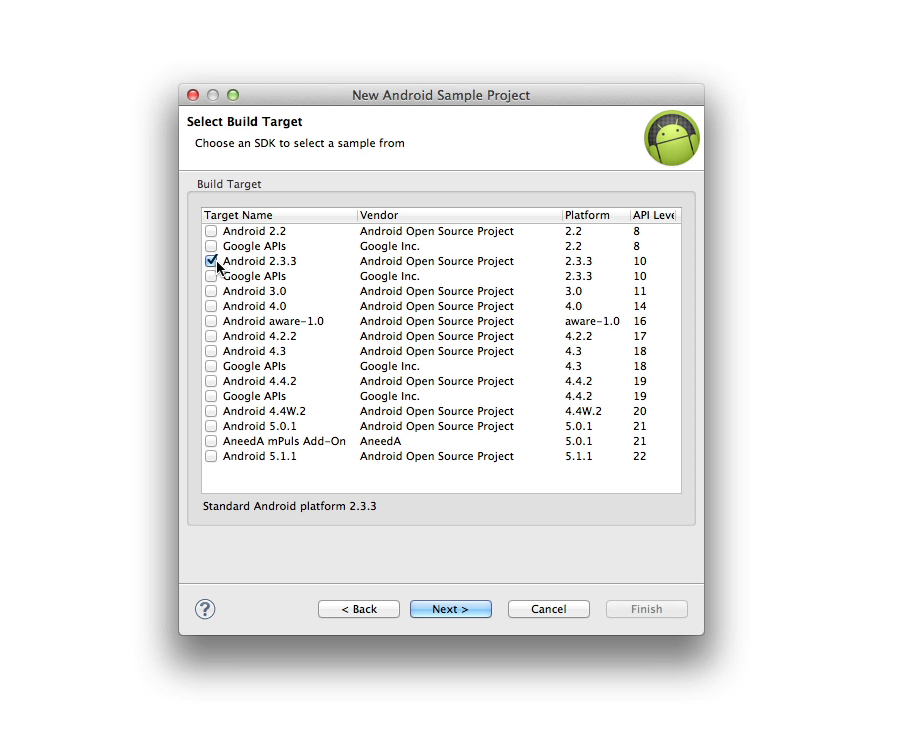
Select the SDK Version 2.3 for its samples
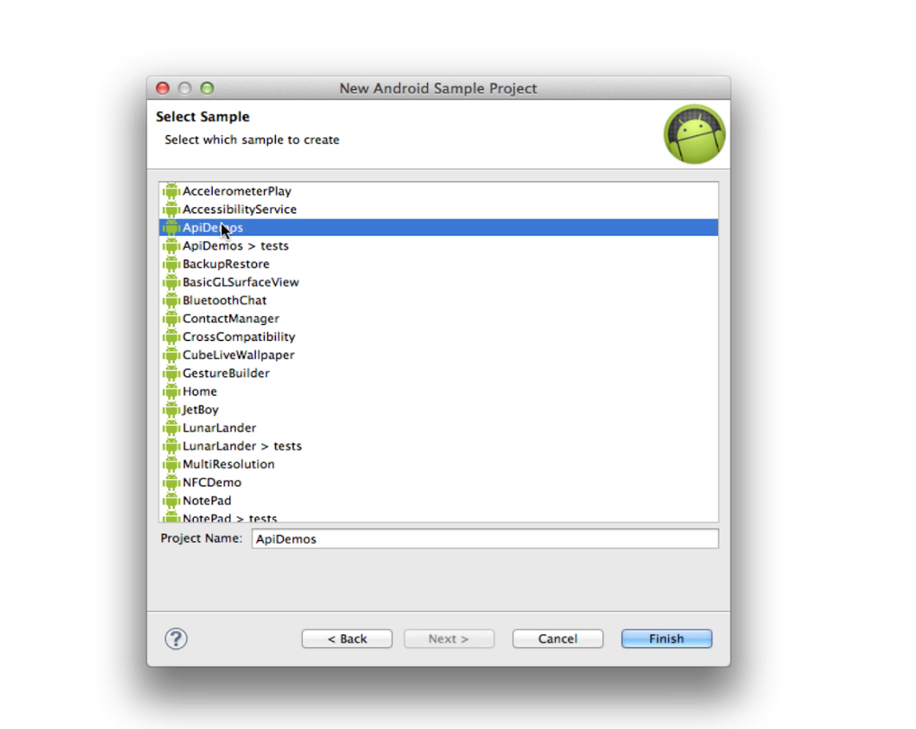
Select API Demos from the list of 2.3 samples
Finally, there is a small bug in the Android XML file progressbar_2.xml that needs to be fixed.

To fix this bug you can simply replace all instances of "+android:" with "+" within progressbar_2.xml.

The image below links to a video that provides an example of how to run an Android SDK sample. (CTRL + Click to open video in a new window or tab).
The steps from the video can be followed in section 3.1+
Click the icon on the Menu bar that resembles a phone (with an Android inside of it).
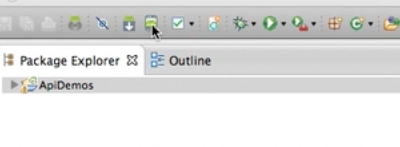
The AVD Manager will open and you can then select "Create" on the top right of dialog.
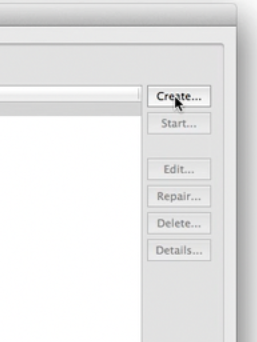
Note: If you do not have "Android 2.3.3 (API 10)" or higher, "SDK Platform" you will need it for the emulator to run the sample.
You will now see the "Create new Android Virtual Device (AVD)".
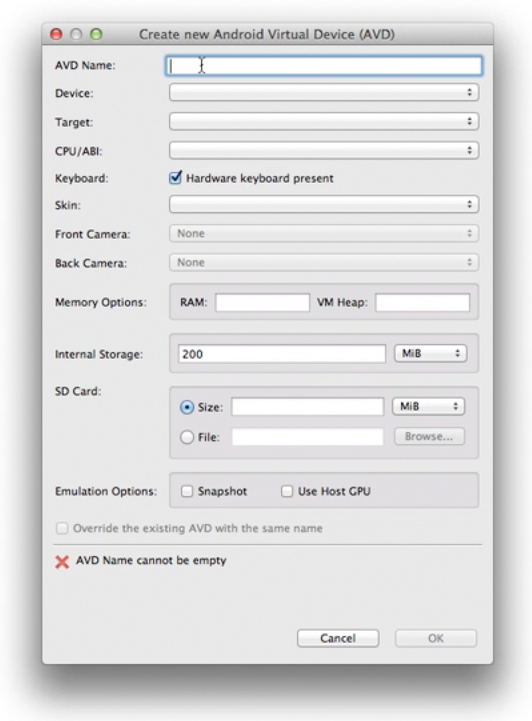
You will then fill in details for the AVD, please take note of the defaults used in example.

Once the details are fill into the device, you can then start the emulator.
After selecting the emulator that you created, click the Start button on the right hand side of the AVD Manager.

There will be another dialog titled "Launch Options" that will show, but you can simply press "Launch" to start the emulator.

The Emulator will launch and load (for the next minute roughly).

The emulator is now ready for the API Demos App, so we can go to the "Run" Menu (or right click in Package Explorer) to run the application.
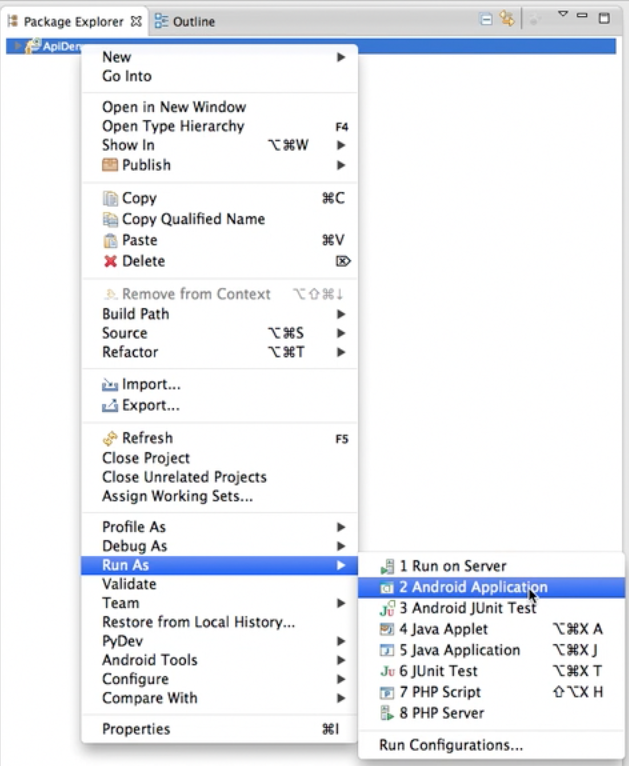
Now Right Click project for "Context Menu" -> "Run As" -> "Android Application"
The API Demos Application running on the emulator will look as follows:

To access Developer settings, open the Developer options in the system Settings. On Android 4.2 and higher, the Developer options screen is hidden by default.
To enable it, you can go to System Settings (where you can set date and time settings).
- Scroll to the bottom and click on "About phone".

About Phone
- In the list displayed, find the heading called "Build number". It is usually at the bottom of the list.

Build Number
- Tap on the "Build number" seven times (sounds funny, I know).
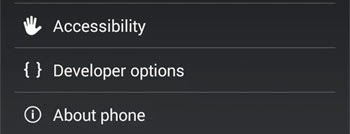
Developer options is now turned on. You will find it in the Settings (the previous menu) usually right above "About phone".
After returning to the previous screen to find Developer options at the bottom, enter "Developer Options" and Enable debugging over USB.
Note: Check out Using Hardware Devices for more detail on this configuration process (or for troubleshooting).
The device is now ready for the API Demos App, so we can go to the "Run" Menu (or right click in Package Explorer) to run the application.

Now Right Click project for "Context Menu" -> "Run As" -> "Android Application"
The API Demos Application running on the device will look as follows:


