

This tool takes MRI or CT datasets in the file formats as the input.
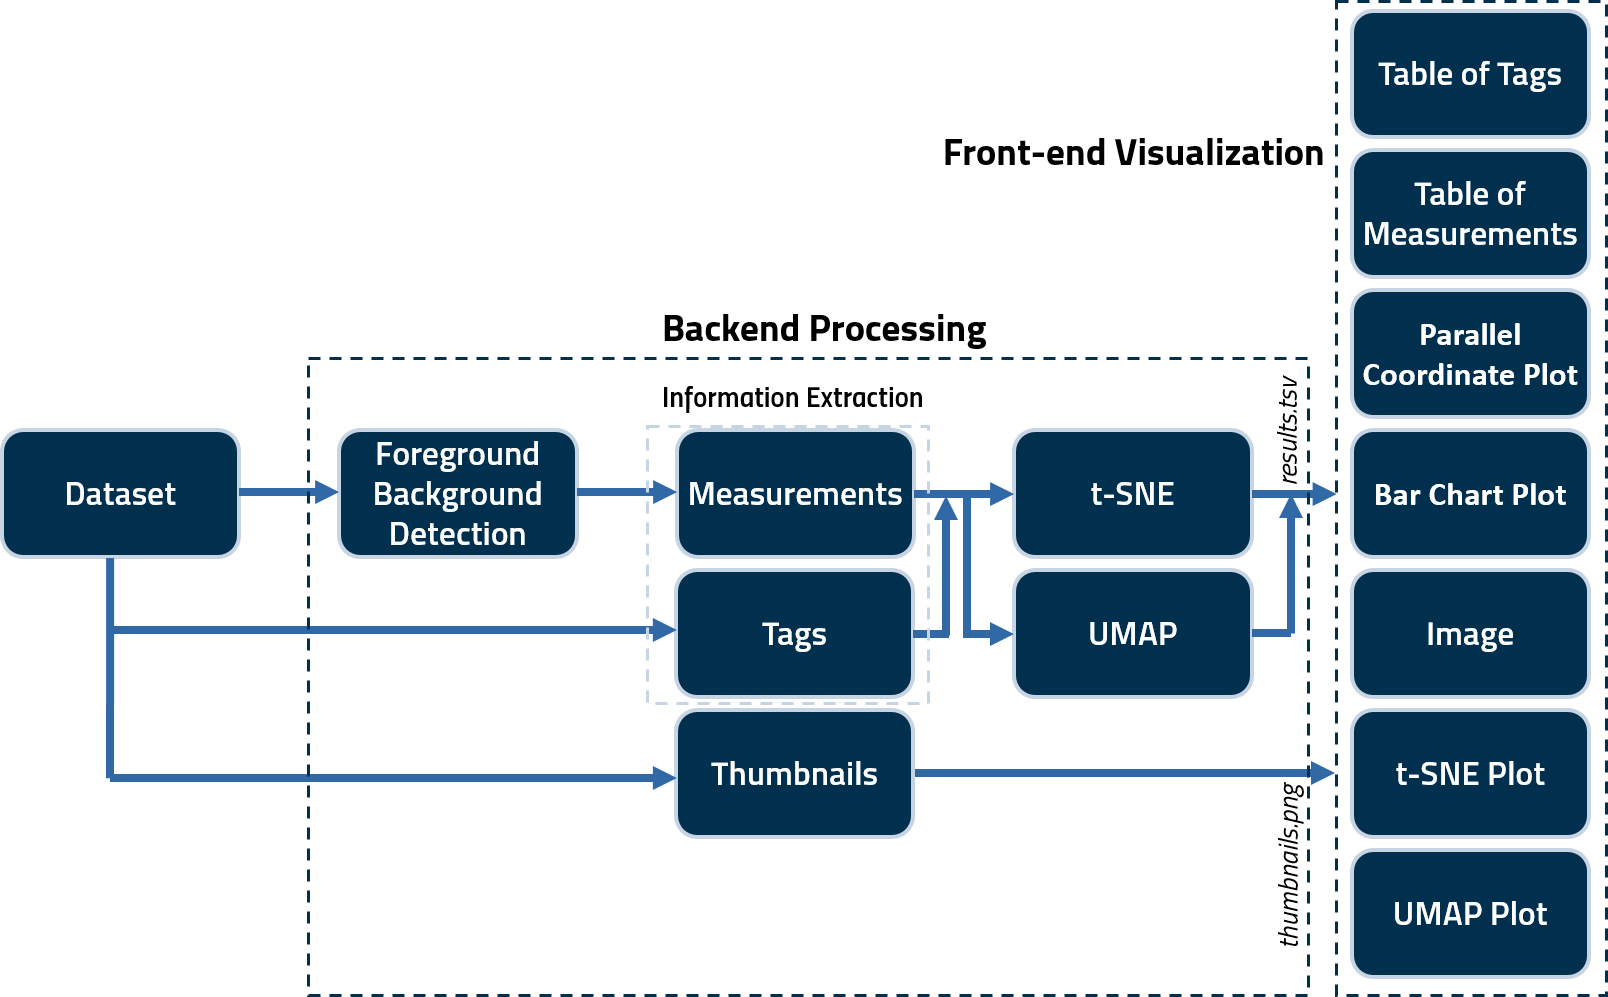
A CLI command is used to generate several tags and noise/information measurements for quality assessment. These scripts save the calculated measures in a .tsv file as well as generate .png thumbnails for all images in a subject volume. These are then fed to .js scripts to create the user interface (index.html) output. A schematic illustrating the framework of the tool is as follows.
RadQy can be installed via pip or conda.
pip install radqyconda create -n radqy python=3.10
conda activate radqy
pip install radqyDisplay the help message:
radqy --helpExpected Output:
usage: radqy [-h] [--ui-download] [--ui-run] [-s S] [-b B] [-u U] [-t {MRI,CT}]
             output_folder_name inputdir [inputdir ...]

positional arguments:
  output_folder_name    The subfolder name in the '...\UserInterface\Data\output_folder_name' directory.
  inputdir              Input folder(s) containing *.dcm, *.mha, *.nii, or *.mat files.
                        Example: 'E:\Data\Rectal\input_data_folder'

optional arguments:
  -h, --help            Show this help message and exit
  --ui-download         Download the UserInterface.zip file
  --ui-run              Run the User Interface
  -s S                  Save foreground masks (default: False)
  -b B                  Number of samples (default: 1)
  -u U                  Percent of middle images to process (default: 100)
  -t {MRI,CT}           Type of scan (MRI or CT)
Run the radqy command using the following syntax:
radqy output_folder_name "input_directory" [options]Example:
radqy output_results "E:\Data\Rectal\input_data_folder" -s True -b 5 -u 50 -t CTArguments:
- output_folder_name (required): The subfolder name in the
...\UserInterface\Data\output_folder_namedirectory. - input_directory (required): Path to the input directory containing image files.
Options:
- -s: Save foreground masks (
TrueorFalse). Default isFalse. - -b: Number of samples. Default is
1. - -u: Percent of middle images to process. Default is
100. - -t (required): Type of scan (
MRIorCT).
Notes:
- There is no need to manually create a subfolder in the Data directory; specifying its name in the command is sufficient.
- All actions will be printed in the output console for transparency.
- Thumbnail images in .png format will be saved in
...\UserInterface\Data\output_folder_name, with each original filename as a subfolder name.
To download the User Interface, run the following command:
radqy --ui-downloadThis command will download and unzip the User Interface into the appropriate directory.
To run the User Interface, execute:
radqy --ui-runIf the User Interface is not already downloaded, this command will download it automatically before launching.
If you prefer to access the User Interface without using the --ui-run command:
-
Open the Interface: Navigate to the UserInterface directory (e.g.,
C:\Users\YourUserName\.radqy\UserInterface). Double-click onindex.htmlto open the front-end user interface. -
Load Results:
In the interface, select the appropriate results.tsv file from the ...\UserInterface\Data\output_folder_name directory.
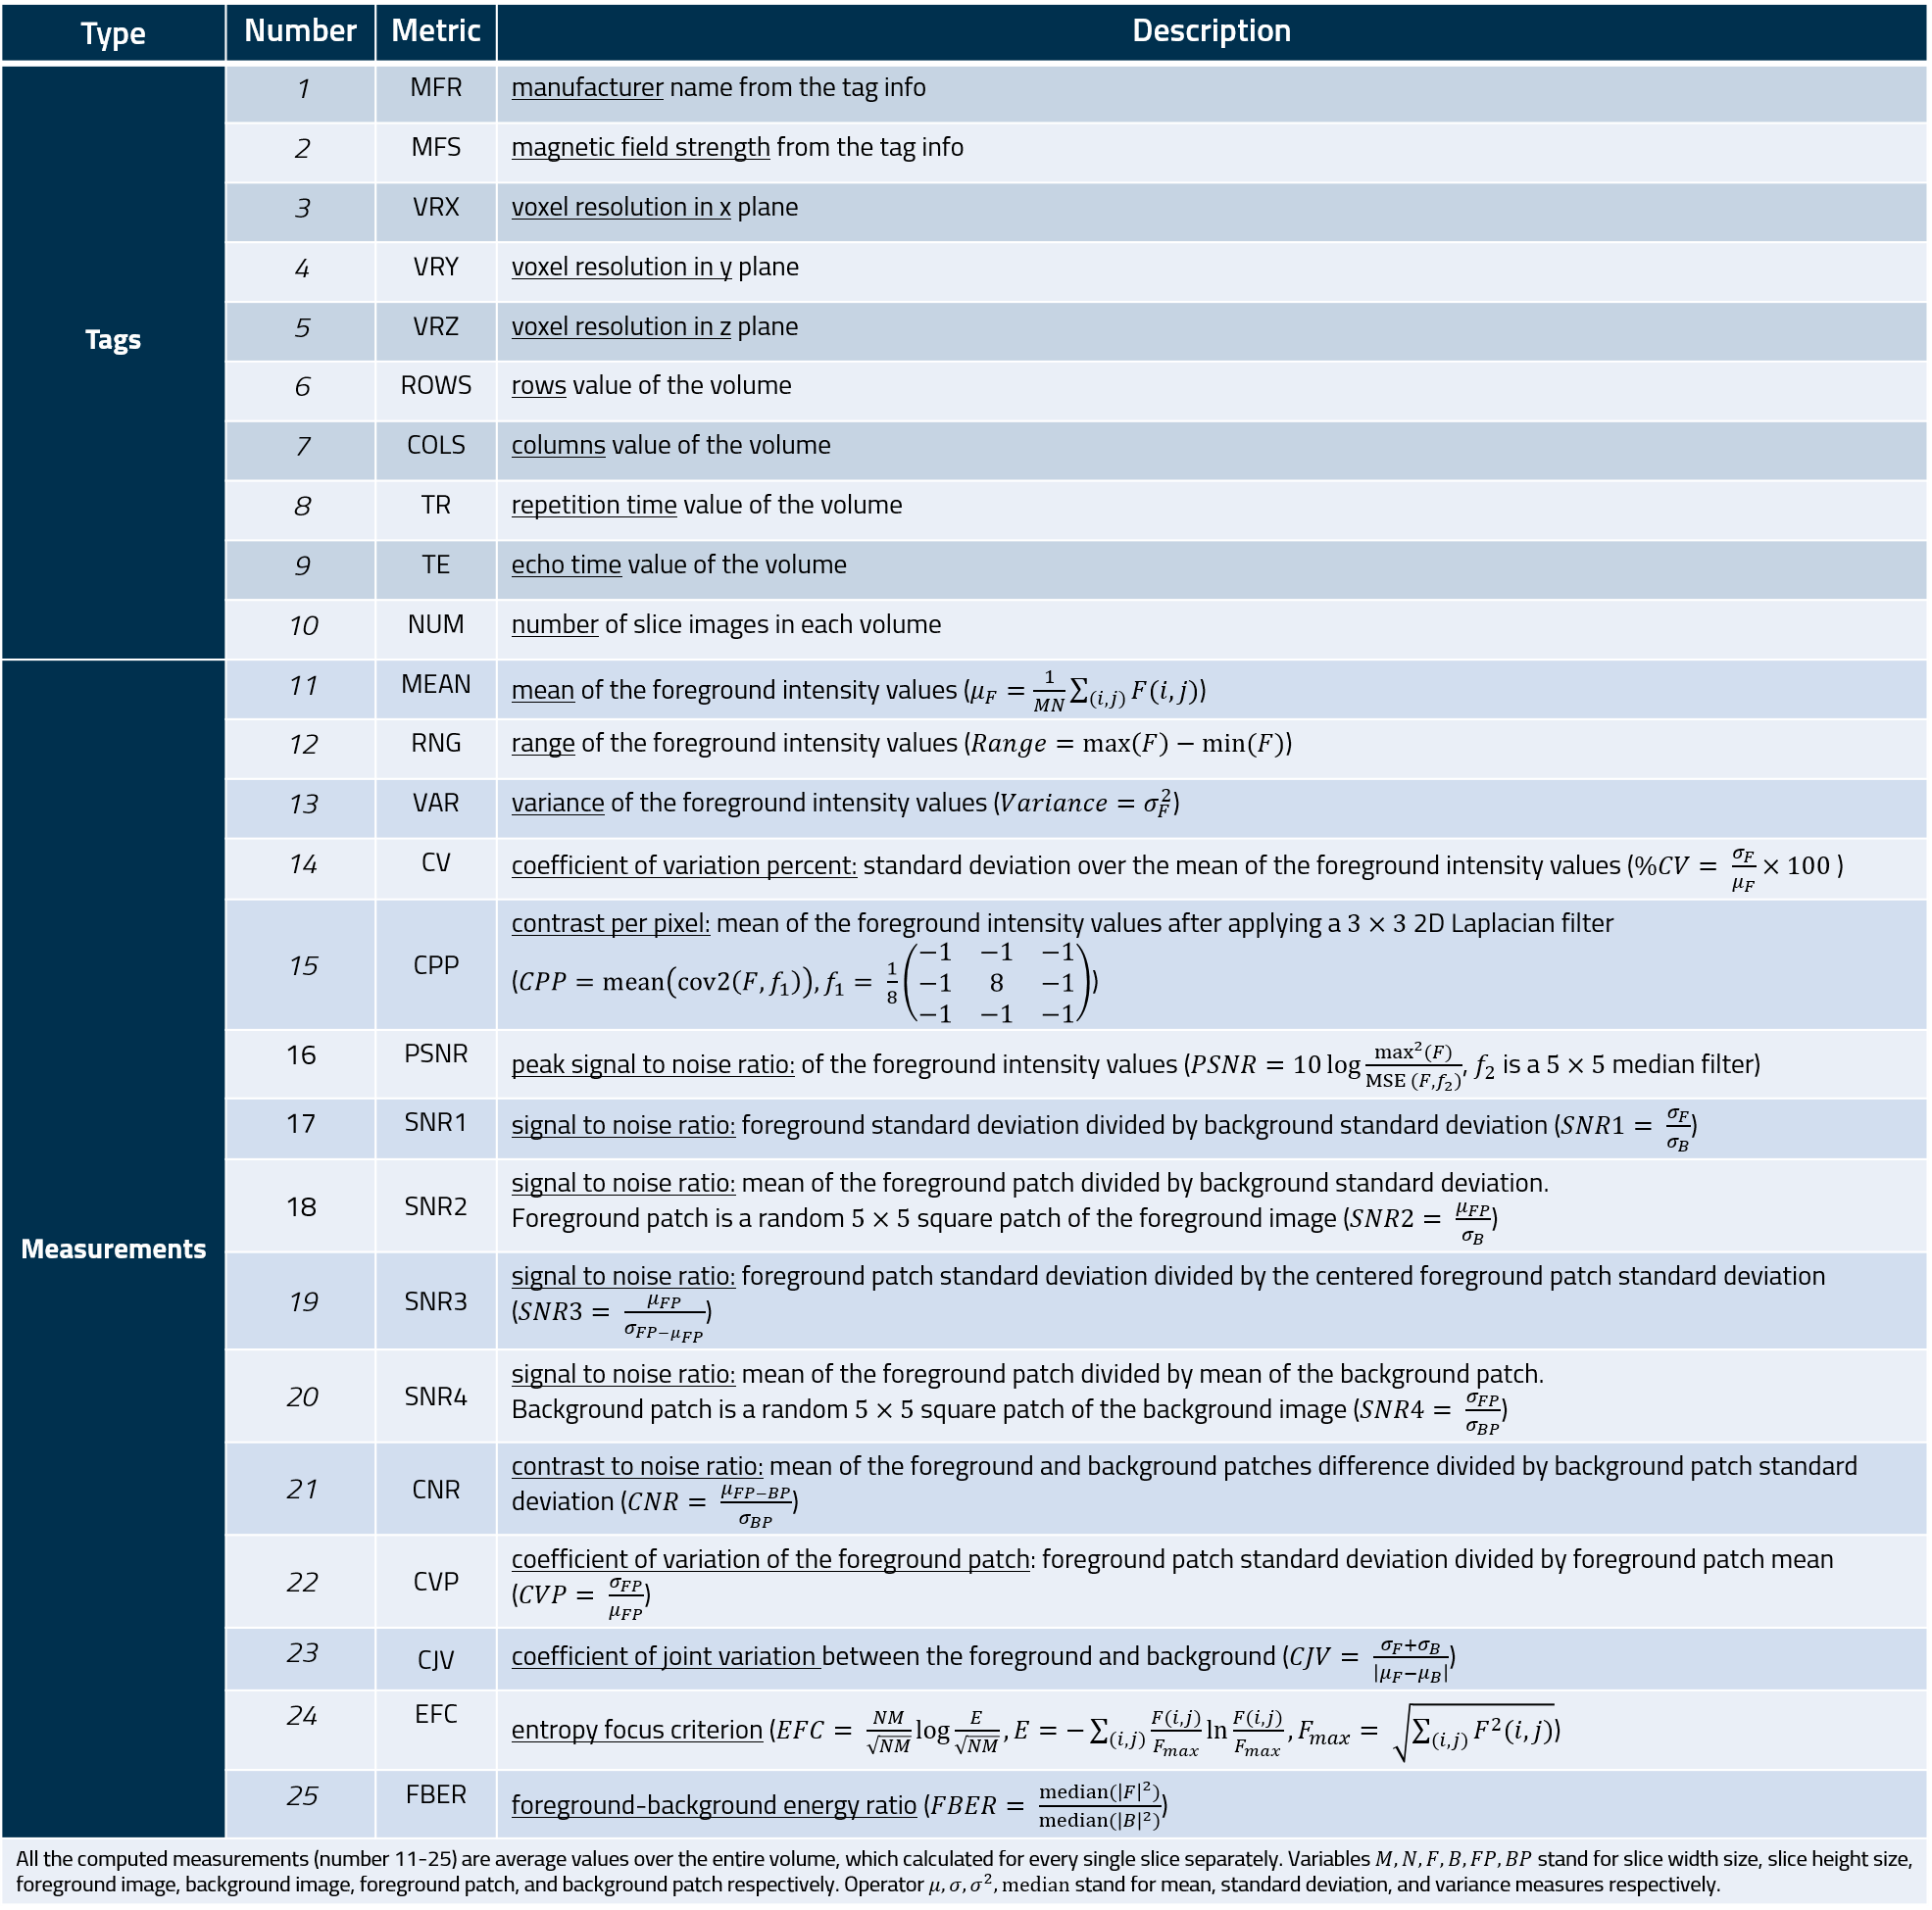
The measures of the MRQy tool are listed in the following table.
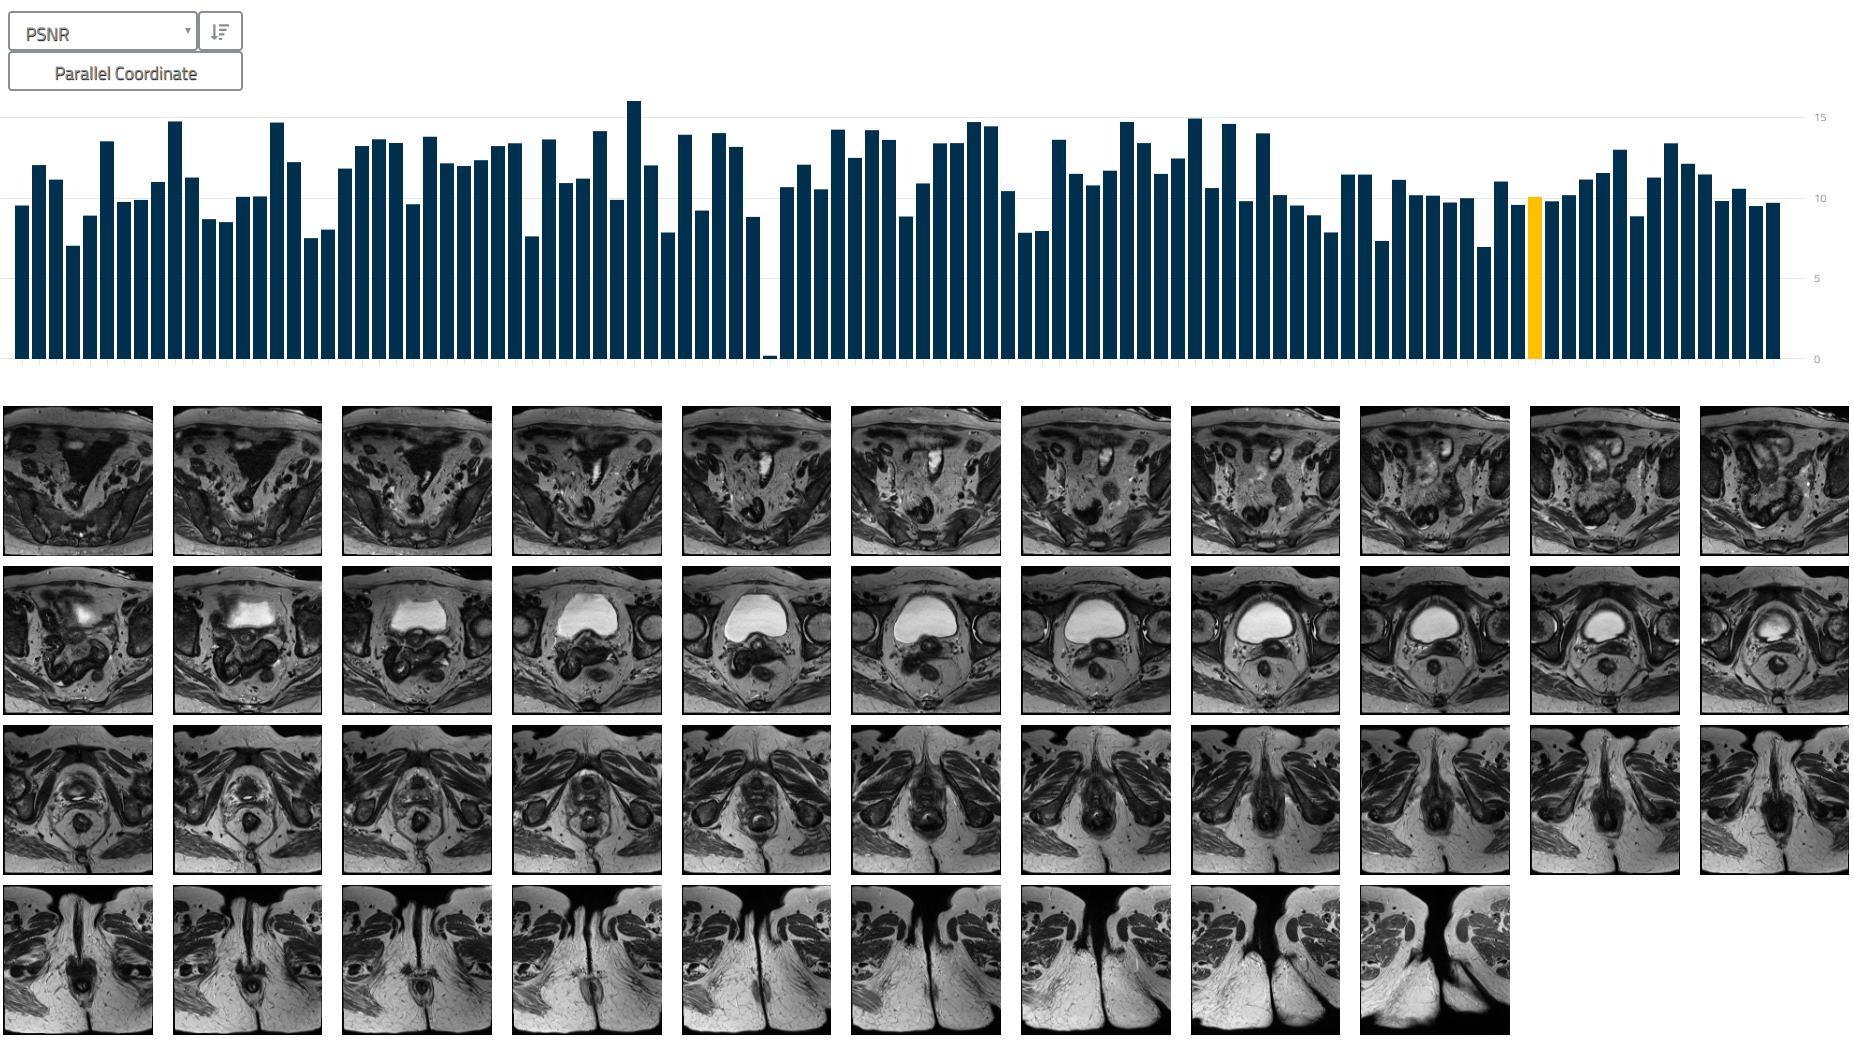
The following figures show the user interface of the tool (index.html).


Please report and issues, bugfixes, ideas for enhancements via the "Issues" tab.
Detailed usage instructions and an example of using MRQy to analyze TCIA datasets are in the Wiki.
You can cite this in any associated publication as:
Sadri, AR, Janowczyk, A, Zou, R, Verma, R, Beig, N, Antunes, J, Madabhushi, A, Tiwari, P, Viswanath, SE, "Technical Note: MRQy — An open-source tool for quality control of MR imaging data", Med. Phys., 2020, 47: 6029-6038. https://doi.org/10.1002/mp.14593
ArXiv: https://arxiv.org/abs/2004.04871
If you do use the tool in your own work, please drop us a line to let us know.